
How To Take Photos For Medium Stories Like a Boss
Tips and tricks for mastering your visual content
Never underestimate the power of a good picture. Words to live by if you’re a medium writer. Pictures help to mark important visual milestones for the reader as you tell your story. They add dimension and have the power to keep the reader’s eyes engaged and moving through the content. However, a bad photo can do just the opposite.
Don’t make the mistake of neglecting the image portion of your story… you’ll regret it.
Even the best-written stories can fail if littered with poor subpar imagery. I’m fortunate enough to have earned a graduate degree in visual communications and it’s been a priceless aid in my career as a freelance writer. I’d like to share my most coveted story image tips…right here… just for you.
When choosing images there are basically two options
can borrow stock images from a source like Unsplash, or you can upload your own photos.
Let’s take a look at the pros and cons of using a stock photo source. First off… it’s easy. Anyone can visit Unsplash, search a topic, download an image, and add it to their story. There’s usually a wide variety of images to choose from. For the most part, these images are going to be relatively high quality. On the other hand, hundreds of other folks have had the exact same idea as you and have more than likely used the exact same image you’ve just downloaded. There goes your originality right out the window… ugghh.
I can say with certainty that I’ve come across far too many stories on Medium where the author used an image I’ve already seen in another story. It’s off-putting. As a consumer of stories myself, I feel as though each story I read is a type of intimate one on one virtual experience I’m having with the writer… a short glimpse into their world. For those five minutes or so… It’s just me and their thoughts. I like to have the illusion that the images are equally as personal and that they too are as unique as the words I’m reading.
I’ve seen the same image of a girl sitting in a field maybe six times now… in different Medium stories. It feels generic, and suddenly the stories content itself feels as though it’s worth less. Which sounds silly. But the truth of the matter is that the second someone opens your story… you’re being judged… you and your content. The reader, within a cursory scan, accesses if you’re credible and if your content appeals to them. A photo I’ve seen over and over tells me that the author didn’t take the time to add a meaningful image… they simply took some a picture from someone else. Subconsciously I ask myself… if they put that little effort into their images… how much effort did they put into the writing itself.
Be different
The images that usually catch my eye and pull me in are most always original photos by the author. Not to say all original images are stellar, but the good ones speak volumes. Here’s why.
No one else is ever going to have that image… unless they steal it. It will be fresh visual content amidst a sea of musty stock pictures.
One of the greatest perks to taking your own candid pictures is that you have complete control over the image. You’re the designer! No more searching endlessly for an image that syncs up with your story. If you need a picture of a cat eating cookies off a plate on a couch… grab little fluffy snickers and let her have at a plate of chocolate chip cookies! You’re the composer… you’re the boss. Have fun with it. Maybe you walk away with not just one…but more than a few keepers.
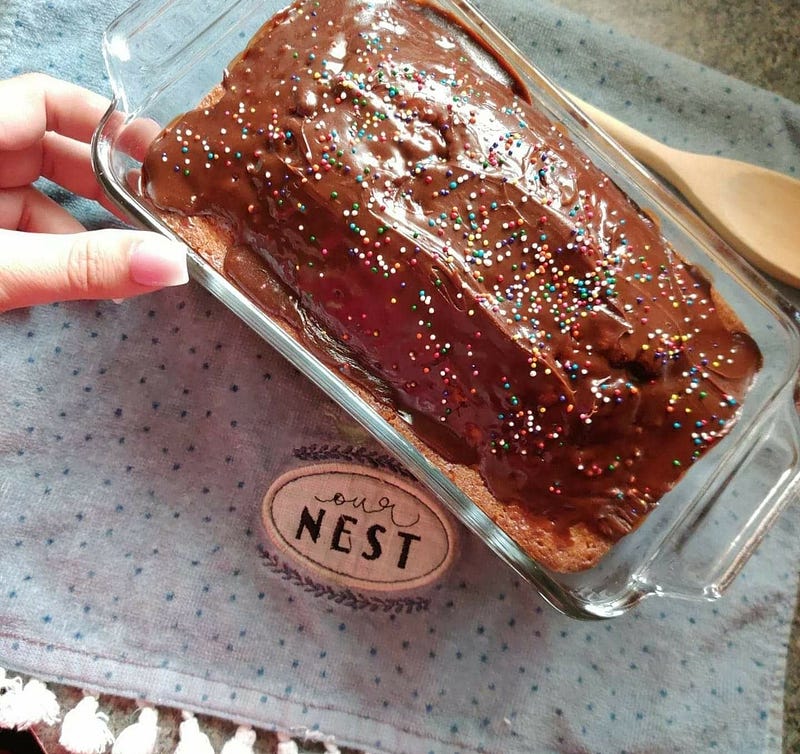
I’ve got an excellent example. If you need a cake picture… bake a cake! Here’s a photo I took for a holiday baking article I wrote. I literally baked the cake. Great original picture… and I got a delicious treat out of the deal.
Here’s another plus. Using your own pictures is super easy… from a technology standpoint. All you need is a smartphone with a decent quality camera. Point and shoot. Now here is where it gets a little trickier. Not every picture is going to a winner. But that’s all part of the fun. Experiment. To get started, here are a few pro tips to get you creating images like a boss!
Never make pictures too busy
You want to be sure to choose a focal point. It’s okay to have multiple objects in a picture. But designate the main subject. Try and stay away from cluttered images as they distract the viewer from the point of the image.
Never center your focal point. If the star of your picture is sitting in a chair… off-center the chair to the left or right just a bit. This helps to create negative and positive space.
Lighting matters.
Don’t destroy a potentially good image by using flash! I almost never use it. We want our picture to be bright and full of life. But think of the kind of light we want to achieve as being soft. I’ve found that the best lighting… and most cost-efficient, is natural lighting. Find a nice bright window or doorway. My perfect photo location is right in my entryway. With the door open and the front bay window flooding natural light in…, it has gifted me with many photos that would rival any professional photoshoot.
Pay attention to colors.
If you’ve got a dark teal wall… have your model wear a light-colored shirt for contrast. This will add depth and bring focus to where it should be… on your model!
Have some fun! One of my favorite photo editing apps is PicMonkey. It’s like most editing apps in that it has a free version with the option of upgrading. I find that the free version is more than sufficient. I call my original photos “raw”. I take almost all of my raw images and run them through an editor such as PicMonkey to brighten, add contrast, soften edges and intensify warmth. Sometimes I’ll use filters to add a vintage appeal or dreamy feel. It’s also great for converting pictures to black and white. Take the red-eye out of portraits and lessen glare… the possibilities are endless.
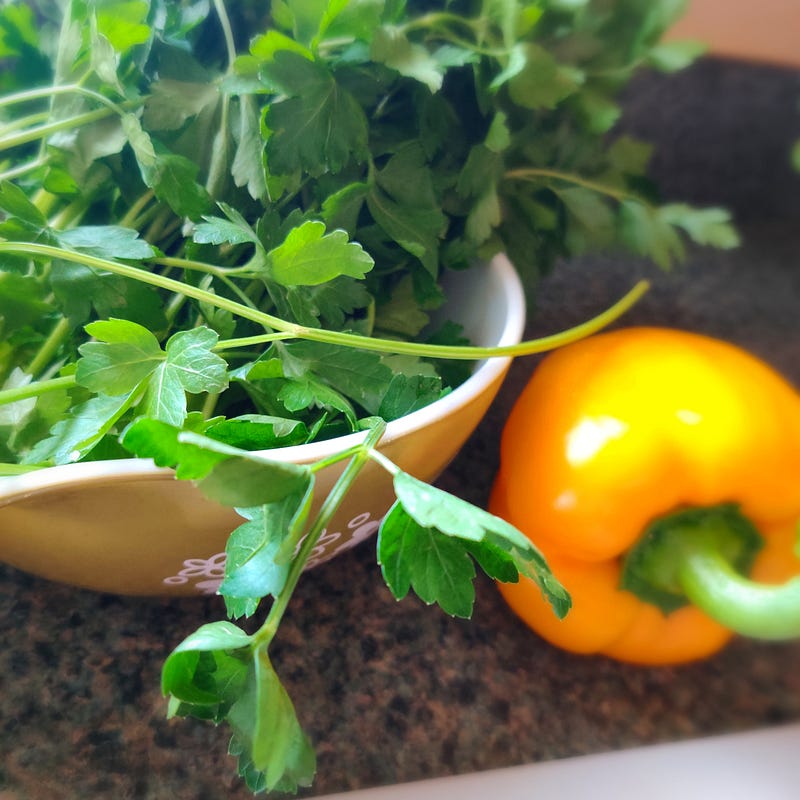
HOT TIP: Zoom in on a particular portion of an image and fade out the background. This is another effect I like to use my apps for. It’s usually called the blur function. Highlight the area of interest and the rest with blur out of focus.
Use this technique to pull the viewer into the image by guiding their focus to a detail element. You’ll notice this being used a lot for food pictures as it’s great when illustrating recipe ingredients.
I’ve noticed a lot of successful Medium writers adding text to photos. You can too! No need for mad Photoshop skills… just use an app!
Now for a touchy topic.
I’m just going to be brutally frank here…
Nothing is worse than seeing images in a story that almost, but not quite relate. In those cases, it’s painfully clear that the author just threw a picture in because they needed to break up the white space and this was the closest image that matched their topic.
Don’t be that person!
Thoughtfully place images. Make sure they are as relevant as possible to what you’re writing. And stay away from inside jokes. Be clever, but not too clever. Remember, a very wide audience will be reading your story and looking at your images. Think universal. Be unique but not so obscure in your image choices that not everyone will be able to follow.
Now let’s talk a bit about consistency and rhythm.
Of course, you want to use a stellar image for your main title picture. Hopefully, one that runs horizontally. Most images sit best in the Medium format when they are horizontal or run lengthwise.
It’s a good idea to add an image whenever you’ve made an important point, need to illustrate a step or technique, it’s an opportune time to add an example image of something or during a particularly emotional segment of a story. Remember, images are visual aids… they are meant to back up the content and keep the flow flowing. Move the reader down the page.
After you’ve added images in all the need to have locations, go back and scroll through your story. Is there any area of text that drags on? If you find any segments getting too wordy use an image to break up space. As interesting as the content may be… it’s still easy for a reader to zone out and lose interest if their eyes don’t have multiple places to rest.
In closing, I hope you’ll find these tips helpful and incorporate what you’ve learned into your next Story! Feel free to comment or write if you’d like any additional advice. Remember… a good picture… is worth a thousand words.
If you liked this article you may also like:
My name is Jamie Golob. I’m a writer, artist, and lover of life, motivated by the collective experiences and stories of the creative community. My mission is to illuminate and preserve the beautiful complexities of what it means to be human. Follow me at livingwanderfully.com


