
Hack Social Media Accounts using a Captive Portal
In this article, I will show you how to steal login information from social media accounts using a malicious Wi-Fi captive portal.
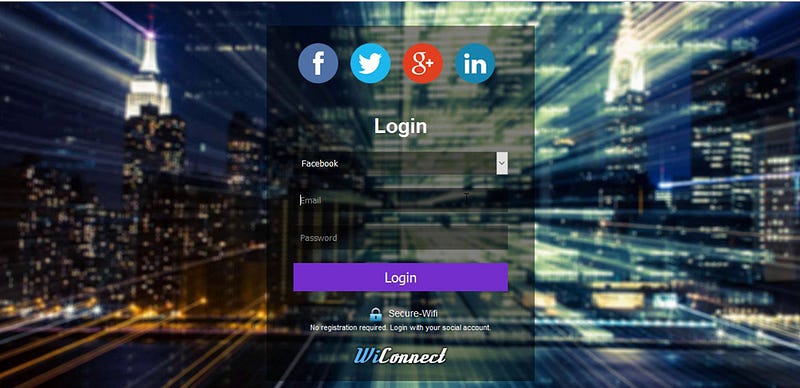
A Wi-Fi captive portal is a webpage that is displayed to newly connected users of a Wi-Fi network before they are granted access to the internet.
These web pages that appear as soon as you connect to the Wi-Fi are known as captive portals. In them, many companies not only ask you to accept the terms and conditions but you are also requested to enter your login credentials from social networks, such as Facebook, Twitter, or Google.
Captive portals are typically used by business centers, airports, coffee shops, and other places that offer free Wi-Fi hotspots for Internet users.
Usually, you will be redirected to a captive portal when you try to connect to a public hotspot. After authenticating on the web page, you can access the Internet using the hotspot.
To demonstrate the attack I will use a script from GitHub called RougeWifi.
Clone the Script
In order to use the script, you need to download/clone the package from Github using the following command.
git clone https://github.com/s0meguy1/RougeWifi.gitOnce done with that, change the directory to the script folder.
cd Rouge-WifiNow you need to copy all the files from this directory to the Apache web server location (/var/www/html) using the following command.
cp –r * /var/www/htmlLet’s change the directory to /var/www/html and use ‘ls’ command to see all the files.
cd /var/www/html
Here you can see the files.
At this point, you can run the script using the following command.
./wifi.sh wlan0 eth0 Free-WiFiThis command will use wlan0 which is the wireless interface for creating the access point, and the second interface eth0 will be used to give internet access to the users when they have submitted the login credentials. Free-WiFi is the network name.
In my case, I have internet connection through eth0. If you are using two wifi cards, just switch out eth0 (in my above example) for the internet interface (wlan1,wlan2…).
The internet interface can be wired or wireless, but obviously, the AP interface needs to be a wireless interface. You can use ifconfig command to find the interfaces on your system.
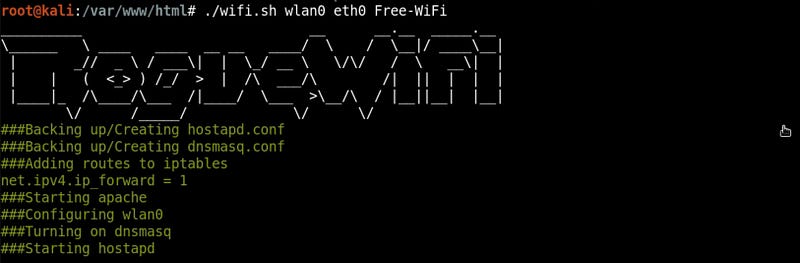
Now the access point is running…
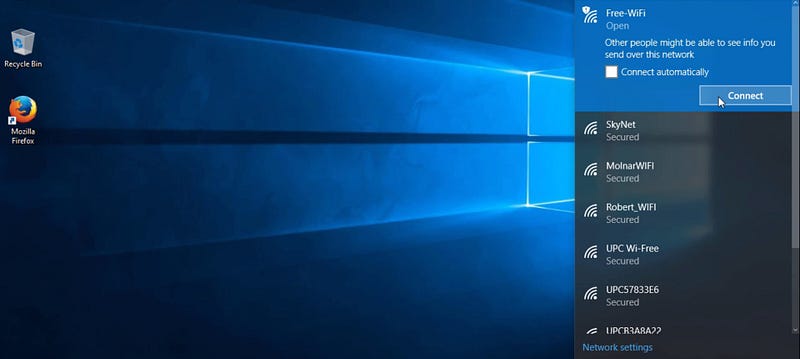
So, let’s switch to a different computer and connect to the ‘Free-WiFi’ network.
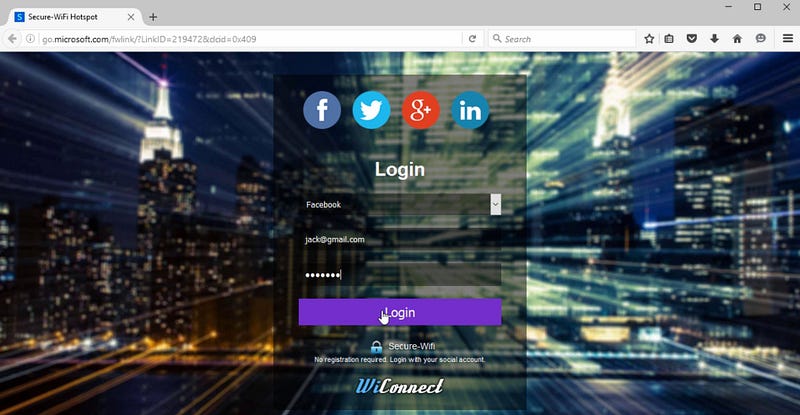
I have been redirected to the captive portal where I need to login using my social media account to get Internet access. I will type ‘[email protected]’ for the email and ‘letmein’ for the password, and click “Login”.
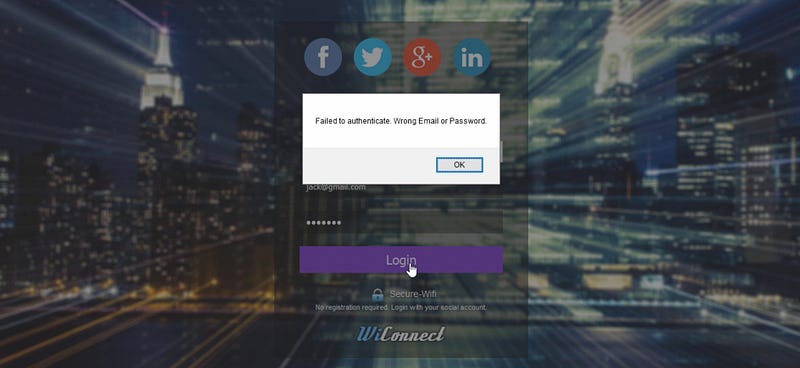
The script is written to fail on the first attempt because most of the time users will try to enter fake information.
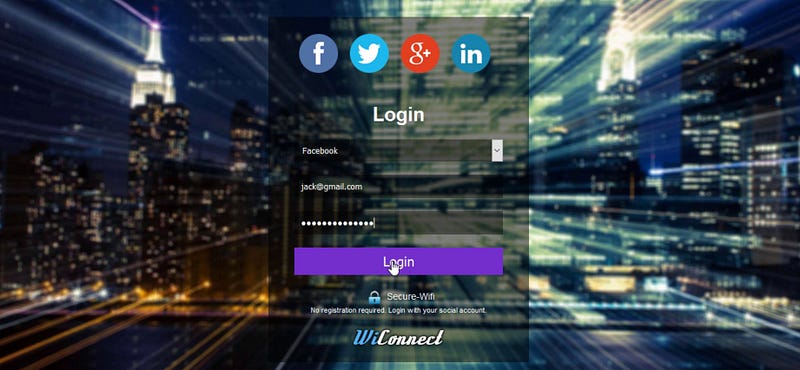
So, this time I will try to login again (second attempt) using ‘[email protected]’ and ‘justletmein456’ for the password, and click “Login”.
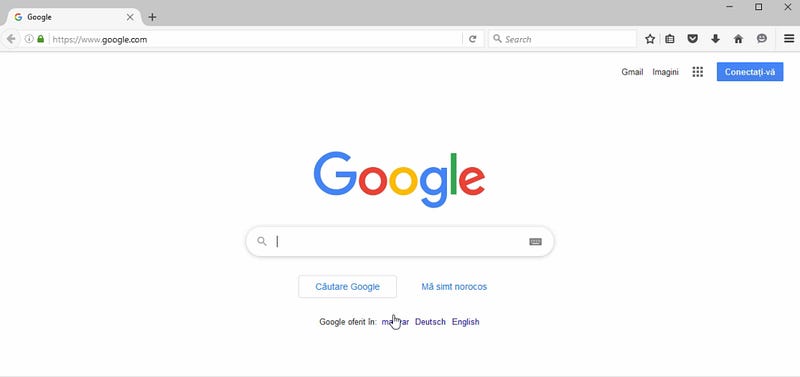
I have been redirected to Google website. This means I have access to the internet.
Let’s switch back to the Kali Linux machine and go to /var/www/html location. Use ‘ls’ command to list all the content.

You can see a text file called ‘password.txt’ where the login credentials should be stored. To open the file I will use nano text editor.
nano passwords.txt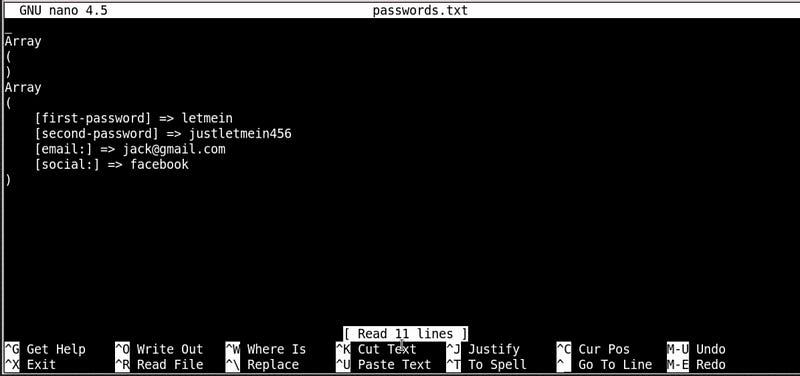
Here, you can see both passwords first-attempt and second-attempt along with the email/username and type of authentication (facebook).
I hope you enjoyed this article. If you want to support my writing, I would really appreciate if you took a second to leave some claps and a follow! You can also buy me a coffee to fuel my next article.

Thank you for reading this article!


