
How to Snowboard Part 2
Part 4 — Introduction to carving *Optional
In this part we’ll cover:
- How to get off the ski lift
- Learning to stop
- J-Turns
- C-Turns
- Transitions
- S-Turns
00. How to get off the ski lift
Learning how to “skate/glide” off the ski lift is the first key to a nice day on the mountain.
Try this a couple of times on flat land before you go on a ski lift.
- Have only the front foot strapped in, and use the back foot to skate laterally.
It’ll take a few tries but don’t be discouraged — like everything else, the more you do it the better you’ll get at it!
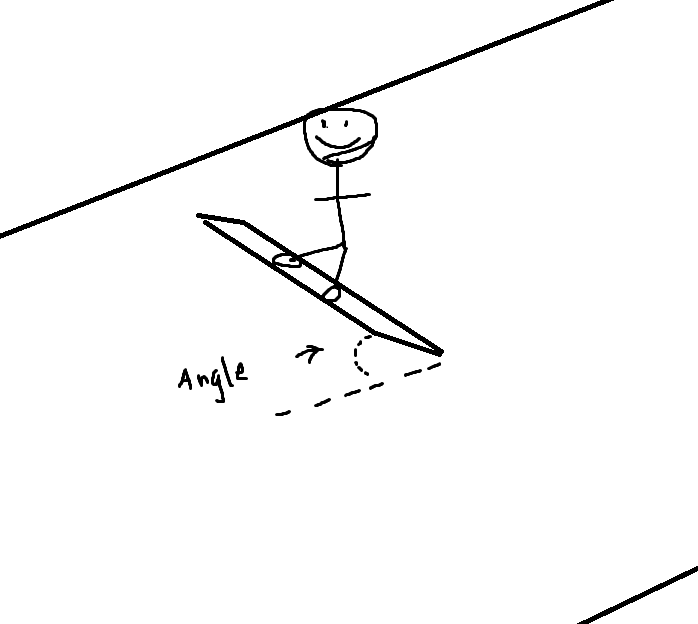
0. Learning to stop
Keep your board horizontal/perpendicular to the trail.
Play with:
1. flexing ankles for board angle
- the larger the angle, the more braking force you generate.
- the smaller the angle, the less braking force you generate.
2. bending knees — the more you bend your knees, the more braking force you have(imagine leg press with bent knees vs. straight knees).
Notice the angle of the edge relative to the ground and the effect it has on the braking force.
The lower the angle, the less braking force you have.
The higher the angle, the more braking force you have (up to 90 degrees).
Challenge #1: while perpendicular to the fall line, work on going down the mountain by increasing and decreasing that angle above using your ankles. Try heel side first, then toe side.
1. Traverse
To traverse is to move across the trail horizontally, left and right
This is where you learn the falling leaf which is traversing left and right on one edge to get down the mountain
- Traverse the trail on the heel edge
- Traverse the trail on the toe edge
Challenge #2: Traverse left and right across the trail
2. J-Turn
Head towards the fall line for half a second and then transition to a stop. You’ll do this on both heel and toe edge
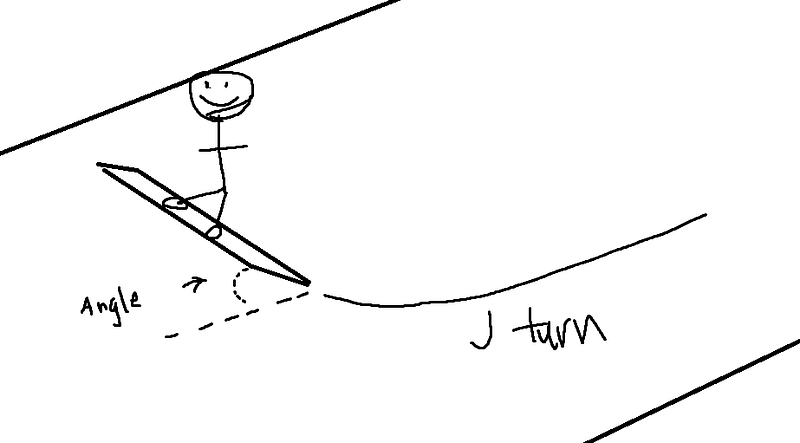
What side your J turns is using will depend on which stance you are (left foot forward vs. right foot forward)
- J turn on the heel side
- J turn on the toe side
Challenge #3: Complete 2 J-Turns, notice the improvement in generated braking force when you bend your knees
3. C-Turn
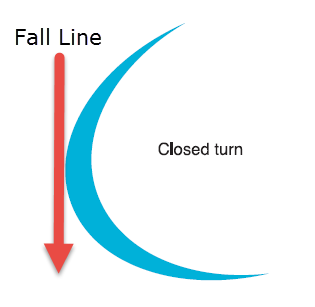
A C-Turn is a closed turn and this should be the fundamental shape of your turns when we are learning how to snowboard.
C-Turns are used to taper off some speed before entering the next turn. Remember to be patient with your snowboard.
Make sure the end of the turn stays round enough so that you get to decelerate before entering a new turn.
Challenge #4: Complete 2 C-turns, notice the deceleration at the end of the turn.
- make sure the end of the turn stays round enough so you lose some speed before the next turn.
4. Transitions/Initiations
Transitions probably feel unnatural and that is okay. You’re not alone.
At the end of your C turns, you will have slowed down enough that it’s easier to lean onto the other edge.
Imagine a knife cutting through an ice cream cake. If we chopped , we’d receive considerably more friction vs. slicing through from a point.
Chopping in this analogy is the equivalent of abruptly digging your entire edge into the snow — this generates a lot of counterforce from the trail which is how beginners typically fall (like chopping the cake).
Try leading the first point of your edge in and let the rest follow (like a slice) instead. In essence, you’re continuously slicing your path down the trail, except for when you’re braking which is more like an abrupt chop.
When transitioning into and initiating the next turn, try a weight balance of 60/40. What should be observed is that your entry point gains more weight, letting you slice through that line just a bit easier.
5. S-Turn
It’s finally time to complete your first S-Turn.
an S turn is two linked C turns, which you’ve been doing in step 3!
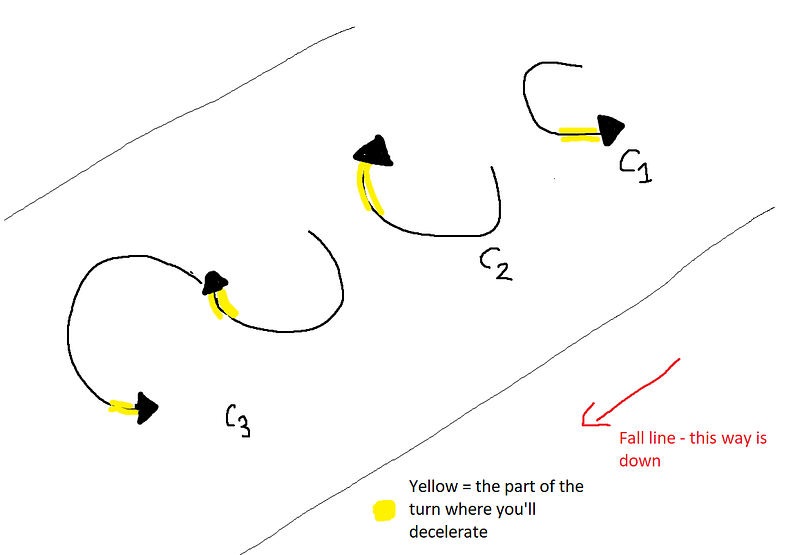
Example: Assuming I am left foot forward* —
C1 — Start with toe edge going right, then initiate the turn on the heel edge to go left.
C2 — Start with heel edge going left, then initiate the turn on the toe edge to go right.
C3 — Combine [C1] and [C2], linking two C-Turns to make an S-turn.
*if you are right foot forward, mirror all the paths when switching the feet
Challenge #5: Complete 2 S turns.
All the challenges:
Make sure you complete these challenges on heel side and toe side.
Challenge #1: while perpendicular to the fall line, work on going down the mountain by increasing and decreasing that angle above using your ankles.
Challenge #2: Traverse left and right across the trail.
Challenge #3: Complete 2 J-turns.
Challenge #4: Complete 2 C-turns.
Challenge #5: Complete 2 S-turns.
Once you can complete these 5 challenges (on both edges) you’ve graduated from novice to advanced beginner! Now let’s give you pointers on how to improve.
In Part 3, I’ll go into detail about how you can improve, and highlight areas that you can refine. Part 3 will be a resource I hope you keep referencing as you improve on every facet of snowboarding!
Was something confusing? I’d love some feedback!
YouTube tutorials by stevantures


