
How to Setup Your Local Solidity Development Environment
Get started with smart contract development

Welcome to the first article in my series on smart contract development with Solidity. All articles will be published in this publication so make sure to follow us if you are interested. The publication will start from elementary concepts and progress all the way to more advanced topics, covering the ins and outs of Solidity and Ethereum.
Ethereum
Let’s begin with the very basics and briefly mention what Ethereum is. Ethereum is a decentralized open-source blockchain with smart contract functionality developed in the Go programming language. Ethereum was first conceived in 2013 by Vitalik Buterin. Since then, it grew to be one of the largest cryptocurrencies in existence used by millions of people.
Smart contract
Smart contracts are computer programs or protocols that are stored on a blockchain and run when predefined conditions are met. They are useful for automatically executing parts of an agreement, and storing legally relevant information about this agreement.
In the world of Ethereum, a smart contract is an Ethereum account. They have balances, can send and receive money and do the actions a regular account can. They are controlled by the code written inside the smart contract. Users can interact with the contract by submitting transactions that call functions in the contract.
Solidity
Solidity is the programming language used to develop these smart contracts on Ethereum. It is an open-source, object-oriented, statically-typed programming language that many say is somewhat similar to JavaScript.
In this series, we will deal with the intricacies of this language. The first step in this process is to set up our local development environment, so let’s get started!
Getting started
There is a great browser-based IDE for Solidity called Remix, which is great if you just want to get your feet wet, but if you’re serious about Solidity sooner or later you should set up your local development environment. This is why I won’t talk about Remix here, and cut straight to the chase.
Since we will write Solidity code, you might want to install some great extensions to help you with that in your text editor. Personally, I use VSCode, so here is one extension that I recommend, but feel free to shop around for others:

Step 0 is having node and npm installed on your workstation.
Step 1 is installing a development environment. The two most often used are Truffle combined with Ganache and Hardhat. Both are pretty good, and I’m going to go over getting started with both.
Truffle
Truffle is a great development environment, testing framework, and asset pipeline. Its trusted companion is Ganache, a tool for firing up a personal, local Ethereum blockchain on your machine that you can use to test your smart contracts or do any other work like executing some commands.
Start by installing Truffle via npm:
npm install -g truffleVerify that everything went well by running truffle version on the command line.
Then install Ganache, or just ganache-cli, which only contains the CLI.
Run:
npm install -g ganacheor:
npm install -g ganache-cliVerify that it’s working by running ganache or ganache-cli. It should output something like this:
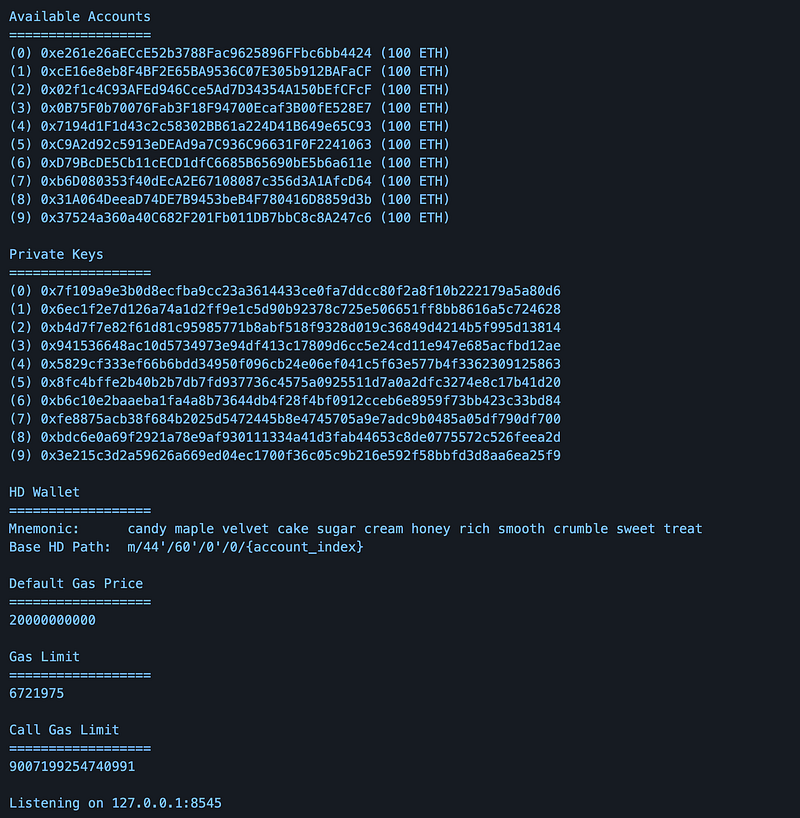
Your very own Ethereum blockchain with a couple of accounts, private keys, and all that sweet stuff.
Now it’s time to create our first project. Let’s create a folder and cd into it, then run truffle init. This creates an empty Truffle project with no example contracts included. This is how the default project structure looks like:
contracts/folder will contain all our smart contract logic.migrations/is where you will create files that will handle the deployment of your smart contracts.test/contains our tests.truffle-config.jsfile contains our Truffle configuration. It’s similar to apackage.jsonfile.
When you’re done with writing the code, the next step before deployment is to compile it. Run truffle compile in your project root.
Before deployment, we also need to do a migration, which alters the state of our contracts (deeper explanation coming in future lessons). cd into the migrations folder and create a file named 2_deploy_contracts.js. This file should contain the following (let’s assume we have a contract named Lottery.sol, swap this name to your actual contract):
var Lottery = artifacts.require("Lottery");

module.exports = function(deployer) {
  deployer.deploy(Lottery);
};
Now start ganache and run truffle migrate. Your smart contract is now deployed to your local Ethereum blockchain so you can start playing around with it.
If you want to run your tests just run truffle test.
Hardhat
Hardhat is the other quite famous development environment for Solidity. It is used to compile, deploy, test, and debug Ethereum software. Instead of Ganache, we have the Hardhat Network, which comes built-in, and Hardhat Runner, the CLI.
You have to install Hardhat locally in each project. Create a new folder, do npm init inside it, then install Hardhat by running:
npm install --save-dev hardhatTo create your project run npx hardhat. You should see the following:
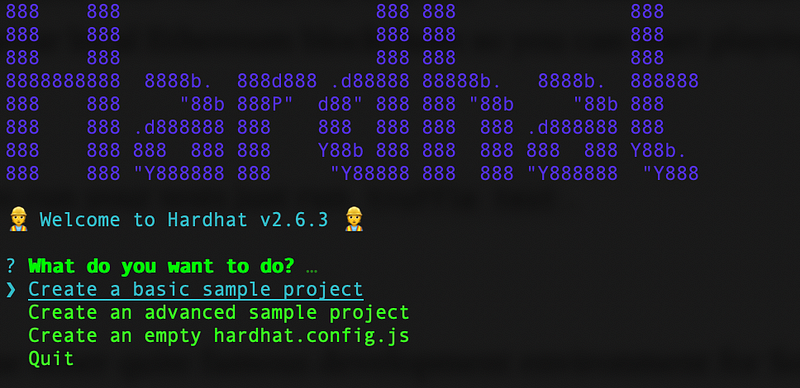
You have the option to create a basic or advanced sample project or just an empty project with a config file. When you create a sample project, the CLI will ask you to install a couple of plugins. Plugins are integral parts of the whole Hardhat ecosystem and their task is to extend the functionality of Hardhat with new capabilities. They make smart contract development a lot easier and definitely a lot more fun. A nice plugin that I use every time for example is hardhat-gas-reporter, that estimates your contracts’ gas usage per unit test.
The directory structure looks similar to the Truffle version:
contracts/folder is the place for our smart contracts.scripts/contains ourdeploy.jsfile, which looks a bit different than the Truffle version but serves the same purposetest/for our tests- The
hardhat.config.jsfile
Once you’ve written your contracts, the flow to deployment is once again similar to Truffle. Just run npx hardhat compile to compile the contracts. To execute your tests run npx hardhat test. To deploy you have to run your script with npx hardhat run scripts/sample-script.js.
Conclusion
This was a light introduction to Ethereum, smart contracts, and Solidity. We’ve seen how to set up a local environment for smart contract development using the two most popular tools, Truffle and Hardhat.
Thank you for staying with us till the end. If you enjoyed reading this piece please keep in touch and follow Solidify to keep up with our lessons on Solidity. The upcoming articles will start to dwell on the intricacies of the language, progressing from beginner to advanced level.