
How to Set up Row-Level Security in Tableau

It is possible to restrict users’ views when you share workbooks to Tableau Server or Online. Those who have access to the workbook are the only ones who can see the data shown in the view. We can demonstrate this by using the row-level security in Tableau. Here, we apply a type of filter that allows users to specify which data any given person signed in to the server can view.
How to Set up User-based Filtering
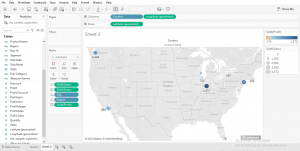
We’ll be using one of our sales reports to demonstrate this. In this report, let’s say we’ll like to show the number of sales for different geographical regions. Also, we just want to assign each of our users to view their own designated region whenever they view the report.
The users won’t have access to other regions except for the ones they were given access to, we will follow the steps below on how to make this happen;
1)We first publish our report to the Tableau Server.
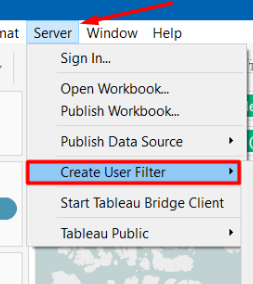
2)The next thing we need is to create a user filter for our report, we then locate the Server on the menu tab and click on Create User Filter
3)Under the create user filter, we will create users to assume the exact region data they will have access to view. Therefore one user maps to any given row of data.
4)After we’re done we then add our Manager with Region filter we created to the Filters Pane.
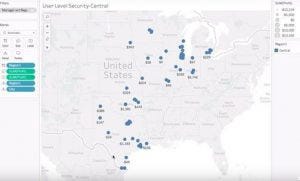
5)After this, we put this in a dashboard and publish it again to the server. We must ensure to apply our filter to be active on all worksheets using the related data source, so all users can view data designated to them.
Note, Tableau offers the following approaches to row-level security:
- Create a user filter and map users to values manually; This applies to an example we demonstrated above. This method is convenient but high maintenance. It must be done per workbook, and we must ensure to update the filter and republish the data source as our user base changes.
- Create a dynamic filter using a security field in the data; In creating a dynamic filter, we create a calculated field that automates the process of mapping users to data values. This method usually requires that the underlying data include the security information we want to use for filtering.
The most common way to do this is to use a reference (“look-up,” “entitlements,” or “security”) table that contains this information.
We must also know that Row-level security with extracts is faster to create and have better performance than Row-level security with data sources that use live connections.
How do you secure your data in Tableau? Let us know in the comments section.
If you enjoy reading stories like these, and want to support our writers, consider signing up to become a Medium member. It’s $5 per month, giving you unlimited access to stories on Medium. If you sign up using our link, we’ll earn a small commission.