How to Set Up an E-Commerce Store on Google Sites

Creating an e-commerce store on Google Sites can be a cost-effective and straightforward solution for individuals and small businesses looking to start selling products online. Google Sites, a free website builder from Google, offers an intuitive interface and easy integration with payment service tools, making it an attractive option for those already using Google’s ecosystem. In this guide, we’ll walk you through the process of setting up your ecommerce store on Google Sites.
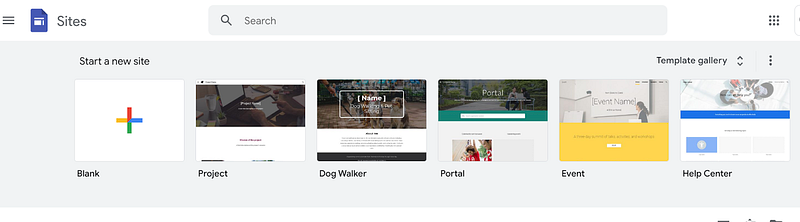
Step 1. Sign in to Google Sites and Create a New Site
Go to sites.google.com and log in with your Google account. If you don’t have one, create a new gmail account for free. Select a template that suits your ecommerce store’s style or start as blank. You can always customize the template later. Or, you can buy the premium google sites template from here.
Step 2: Design Your ECommerce Store
Plan your site’s structure by creating essential pages like “Home,” “Shop,” “About Us,” “Contact,” and “FAQ.” You can add more pages as needed. Organize your site’s navigation menu by clicking on “Pages” in the sidebar. Drag and drop pages to arrange them in the desired order. Ensure that the design aligns with your brand identity and provides a user-friendly experience for visitors.
Step 3: Set Up Payment and Checkout Options
Research and choose a suitable payment gateway for your e-commerce store. Popular options include Stripe and PayPal, as both are free services, so I’ll include them in this article.
Option 1. Paypal
PayPal stands out as one of the most well-known payment gateways, offering easy creation of a “Buy Now” button.
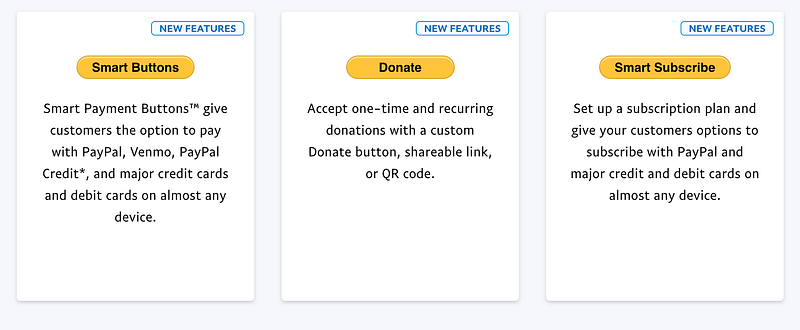
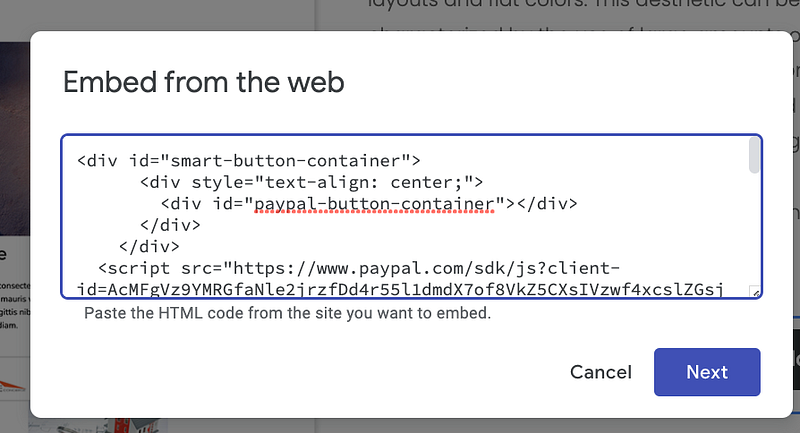
Pros: With just a few clicks, you can generate a “Buy Now” button and use Smart buttons or Smart Subscribe buttons to set up one-time or recurring payments. Embedding the code into Google Sites is a breeze. Check out this start page for more details: https://www.paypal.com/buttons/
Cons: However, it lacks advanced features like bulk item management, coupons, and an advanced checkout system to handle multiple items.
Option 2. Stripe
Stripe is a highly popular payment gateway service, offering a wide range of features. Let’s explore its pros and cons.
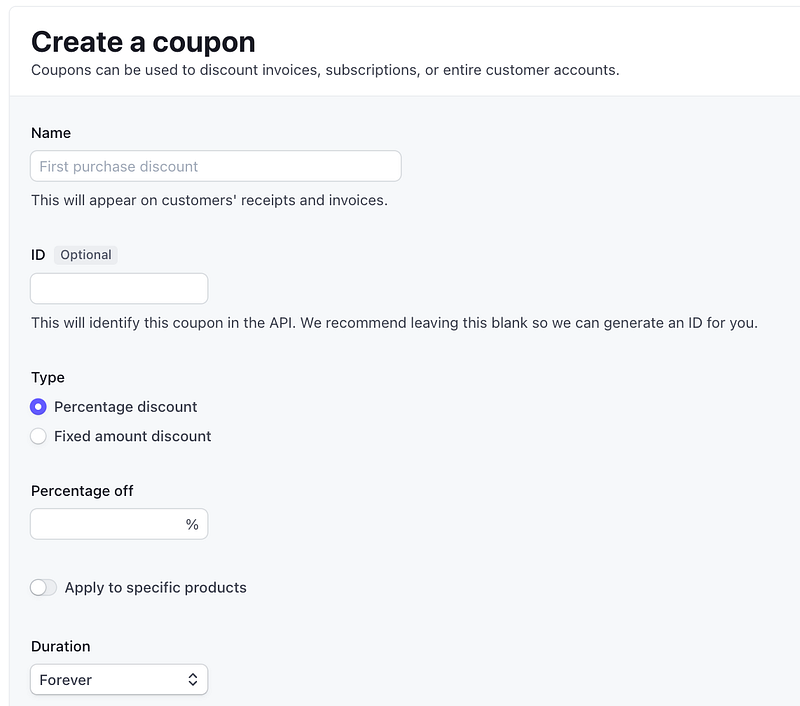
Pros: One of its main advantages is the extensive array of features, including efficient management of multiple products and the ability to create promotional campaign coupons.
Cons: Nevertheless, its biggest drawback is the variety of fees it charges. Even in cases where you have to issue refunds due to customer purchase mistakes, you still end up paying fees. Additionally, their current pricing table widget does not function well on Google Sites.
Step 4: Add Your Products
Create a new page for your online store or modify the existing “Shop” page. Add your products with relevant details such as product names, descriptions, prices, and images. Organize them into categories for easy navigation. Add the necessary payment buttons or widgets to your product pages to enable secure and convenient transactions.
Conclusion
Creating an e-commerce store on Google Sites offers a user-friendly and cost-effective solution for individuals and small businesses looking to enter the online market. By carefully planning your site’s structure, integrating payment tools, and customizing your design, you can create an attractive and functional e-commerce store to showcase and sell your products. Remember to regularly update your site with fresh content and provide excellent customer support to ensure the success of your online venture. Happy selling!