
How to set up a Node.js project with a clean folder structure (TypeScript)
A step-by-step guide to creating a Node API server
In this step-by-step tutorial, we will learn how to initialize a node project. Node is not a programming language but a run-time environment that enables JavaScript to run on server-side. However, JavaScript is a weakly typed language, and often in large code-base it is difficult to read, understand codes/logics and find bugs.
TypeScript is a super-set of JavaScript which is a strongly typed language. A TypeScript project is written and later transpiles into JavaScript which then can be run by node run-time environment.
Prerequisites
- A basic knowledge of JavaScript/TypeScript
- Postman or similar tool to test API
- A basic understanding of MongoDB or any other database
- VS Code or any code editor of your choice
- Node.js installed on your operating system (Install Node.js)
Step 1: Create a folder and initialize with npm
Open up your terminal, create a folder and move into that:
mkdir node-tutorial
cd node-tutorial
After moving into that directory, initialize a project with npm:
npm init -y
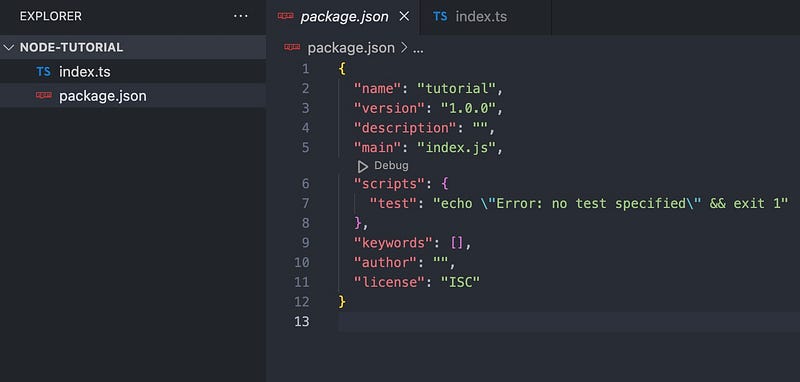
You can include or exclude the -y flag which means “yes” to all the defaults. Open the folder in VS Code, where you will see a package.json file.
Create an index.ts file on that directory, which will serve as an entry point for your API server. After this, your folder structure will look like this:
Step 2: Install dependencies and create a Typescript-Express server
Setup TypeScript compiler:
npm install --save-dev typescript ts-node ts-node-dev
Here, the — save-dev flag is used because these packages are only required at the time of development mode. In actual deployment, typescript transpiles into JavaScript, and packages installed with the — save-dev can be omitted for performance.
Initialize tsconfig.json file using npx:
npx tsc --init
npx : An npm package runner — helps to execute packages without installing explicitly.
Now, install express library to create an API server and dotenv to use environment variables:
npm install express dotenv
Install types for express as a dev dependency:
npm install --save-dev @types/express
Sometimes with many npm packages @types/<package-name> should be installed for type support.
Write your server code in index.ts and expose it in port 8000:
import express, { Application } from 'express';
import 'dotenv/config';

const app: Application = express();

const PORT = process.env.PORT || 8000;
app.listen(PORT, () => {
 console.log(`Server is up and running on port ${PORT}`);
});
Add a script with dev in your package.json to run your server using ts-node-dev:
{
  "name": "tutorial",
  "version": "1.0.0",
  "description": "",
  "main": "index.js",
  "scripts": {
    "dev": "ts-node-dev --respawn index.ts",
    "test": "echo \"Error: no test specified\" && exit 1"
  },
  "keywords": [],
  "author": "",
  "license": "ISC",
  "devDependencies": {
    "@types/express": "^4.17.16",
    "ts-node": "^10.9.1",
    "ts-node-dev": "^2.0.0",
    "typescript": "^4.9.4"
  },
  "dependencies": {
    "dotenv": "^16.0.3",
    "express": "^4.18.2"
  }
}
Start your server:
npm run dev
Step 3: Configure ESlint and prettier
Eslint is a plugin which will help us to identify and report bugs along with making code more consistent. Prettier is another tool that makes code formatting easier across all files.
npm install --save-dev eslint prettier
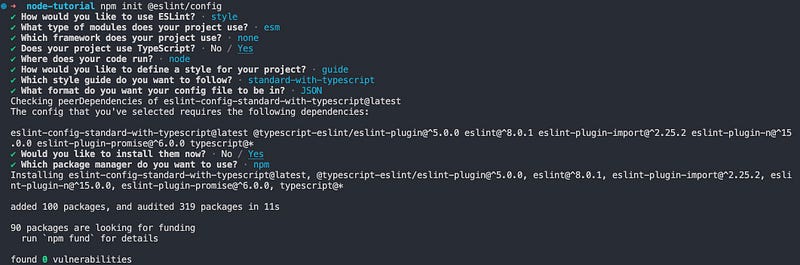
Initialize ESlint:
npm init @eslint/config
Create .prettierrc.js file on your project.
module.exports = {
    singleQuote: true,
    semi: true,
    trailingComma: 'none',
    printWidth: 120,
    tabWidth: 4
};
Create .eslintignore and .prettierignore files and put below codes respectively:
node_modules
coverage
cdk.out
.eslintrc.js
distpackage.json
CHANGELOG.md
*.yml
.versionrcStep 4: Create directories
Create a folder src where we will keep all the source codes including moving index.ts to src with different subfolders:
mkdir src
cd src
mkdir config controllers middlewares models routers utils
We will keep files in these sub-folders:
- config: Any configuration files like database connection, external API integration.
- controllers: End functions which deal with database requests and response.
- middlewares: Any middleware functions between router and controllers.
- models: All the schema for database.
- routers: Express router to route based on different end-points.
- utils: Any utility function used in the project.
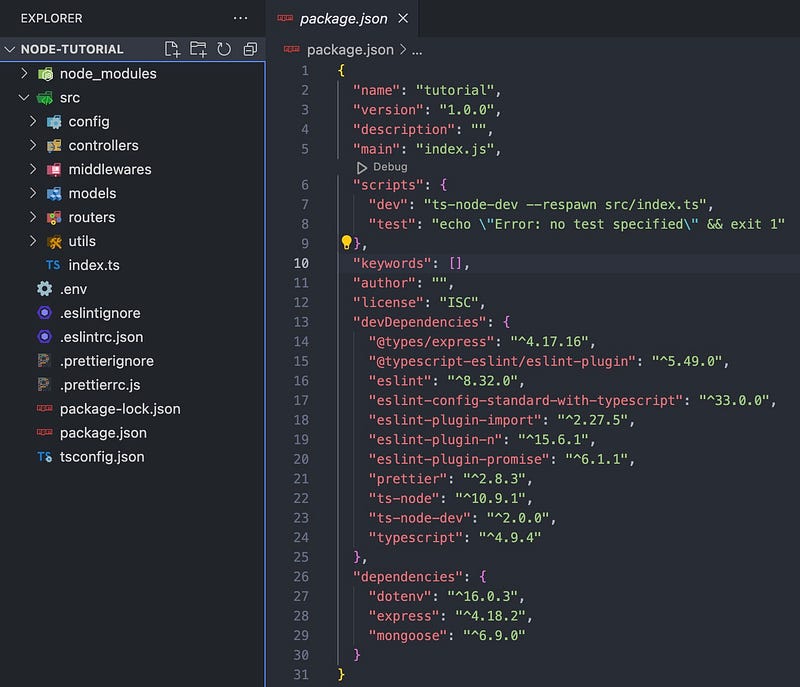
Remember to change dev script in package.json from index.ts to src/index.ts
After all the changes, your project structure should look like this:
Step 5: Configure connection with a database
Now we will connect to a database. In this case, I will use MongoDB Atlas. You can also use MongoDB Atlas. To setup MongoDB Atlas, you can follow this tutorial (https://hevodata.com/learn/mongodb-atlas-nodejs/).
Install mongoose and create mongodbConnect.ts inside config:
npm install mongoose
touch src/config/mongodbConnect.ts
Paste this code in you mongodbConnect.ts:
import mongoose from 'mongoose';
import 'dotenv/config';

mongoose.set('strictQuery', false);

const mongodbConnect = async () => {
    try {
        await mongoose.connect(process.env.MONGODB_URI as string);
        console.log('MongoDB Connected');
    } catch (error: any) {
        console.log(error.message);
    }
};

export default mongodbConnect;
Your MONGODB_URI is the connection string that you can get from you MongoDB Atlas account in the web. Put the value in your .env file.
MONGODB_URI=mongodb+srv://<username>:<password>@rbac.m03getg.mongodb.net/?retryWrites=true&w=majorityAfter database connection, you can now create models in MongoDB and use them in your APIs. You should restart your server manually after these with ctrl+c and npm run dev in your terminal window. You should see information like this in your terminal.

Step 6: Create and expose your first API
Create files in respective directories src/routers/userRouter.ts, src/models/userSchema.ts and src/controllers/userController.ts
touch src/models/userSchema.ts src/routers/userRouter.ts src/controllers/userController.tsIn userSchema.ts:
import { Schema, model } from 'mongoose';

export interface IUser {
    firstName: string;
    lastName: string;
    email: string;
    password: string;
}

export const userSchema: Schema<IUser> = new Schema({
    firstName: String,
    lastName: String,
    email: String,
    password: String
});

const User = model<IUser>('User', userSchema);

export default User;
In userController.ts:
import { Request, Response } from 'express';
import User from '../models/userSchema';

const createUser = async (req: Request, res: Response) => {
    try {
        const { firstName, lastName, email, password } = req.body;

        const newUser = new User({
            firstName,
            lastName,
            email,
            password
        });

        const savedUser = await newUser.save();

        res.status(201).json(savedUser);
    } catch (error: any) {
        console.log(error.message);
        res.status(500).json({ error: error.message });
    }
};

const getUser = async (req: Request, res: Response) => {
    try {
        const { userId } = req.params;
        const user = await User.findOne({ _id: userId });

        if (!user) {
            res.status(404).json({ error: 'User not found' });
            return;
        }

        res.status(200).json(user);
    } catch (error: any) {
        console.log(error.message);
        res.status(500).json({ error: error.message });
    }
};

export default { createUser, getUser };
In userRouter.ts:
import express, { Router } from 'express';
import userController from '../controllers/userController';

const userRouter: Router = express.Router();

// API route: /users/
userRouter.post('/', userController.createUser);

// API route: /users/:userId
userRouter.get('/:userId', userController.getUser);

export default userRouter;
Modify your index.ts:
import express, { Application } from 'express';
import 'dotenv/config';
import mongodbConnect from './config/mongodbConnect';
import userRouter from './routers/userRouter';
const app: Application = express();
// Database Connection
mongodbConnect();
// Middleware Functions
app.use(express.json());
// Routers
app.use('/users', userRouter);
const PORT = process.env.PORT || 8000;
app.listen(PORT, () => {
console.log(`Server is up and running on port ${PORT}`);
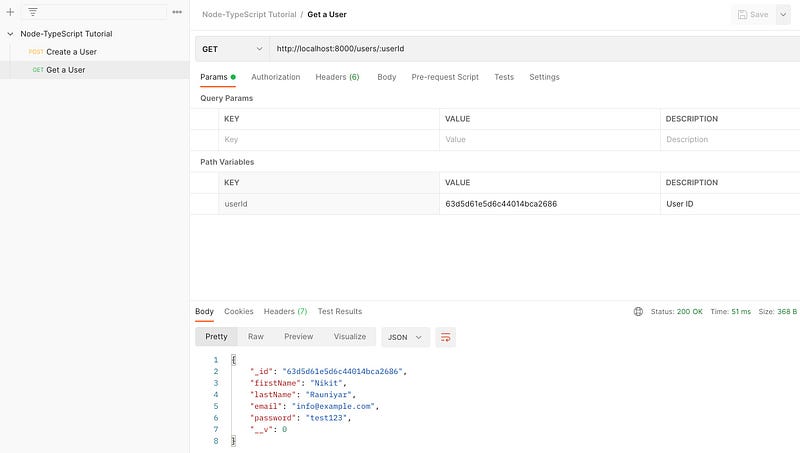
});Test Your APIs using Postman:

Conclusion
You have successfully built an API server with Node-TypeScript. Obviously, there are a lot of things to do such as, global error handling, data validation middleware, storing passwords in hash, authentication & authorization and a lot more. However, this tutorial was mainly focused on setting up minimal Node-TypeScript API server with database connection, clean folder structure, eslint, prettier, and separating controllers, middlewares, and routers.


