
How to Set Up a Development Environment for Machine Learning
How to install, activate, and use a virtual environment for machine learning and data science-related tasks

Before we start coding, it is essential to set up our machine with a new development environment. In these examples I will use the OSX terminal and Python 3.8 to just that and I will show you the basics to get started.
If you are a Windows user the basic logic does not change, but for some commands you may need to use Google. Starting with Windows 10, you can use WSL (Windows Subsystem for Linux) — this is a subsystem made available by Microsoft that can host several Linux distributions. Read here for an in-depth guide. Another option available would also be to install a virtual machine with Ubuntu 18.04 or use a VPS.
What a virtual environment is in layman’s terms
A brief introduction for those who are just starting their path in data science and programming in Python. A virtual environment is a development environment that acts as a container for our current project. While having the ability to install any system-wide library is there, having a virtual environment allows you to install such libraries and packages for specific projects. This allows you to have an orderly and easily navigable system, without risks of incompatibility or malfunctions on a global level.
Dedicating a virtual environment to a project is common practice, and should always be done for the reasons mentioned above.
In Python, there are several options for managing virtual environments. One of the most famous is certainly Anaconda, a software that helps (especially data scientists) to configure and manage development environments efficiently.
We will be using Miniconda to configure Python on our system. It is a lightweight installer of conda, an open-source data science-oriented development environment management system available for Linux, OSX and Windows.
The choice to opt for Miniconda and not for Anaconda is because the latter brings with it numerous packages that in my opinion we will never use except in sporadic cases and therefore having a small installation makes more sense.
How to install Miniconda on OSX
At the time of writing this article, the file that we will download from the official website will have a name like this: Miniconda3-py38_4.11.0-MacOSX-x86_64.sh
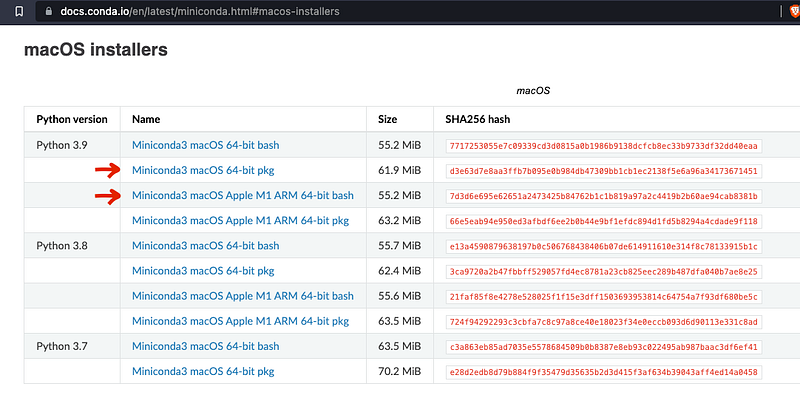
Depending on the architecture of our system we can choose between the basic version and the version for M1 ARM chipset.
Once the file is downloaded, we open the terminal and write
$ cd Downloads
$ sh Miniconda3-py38_4.11.0-MacOSX-x86_64.sh
and follow the onscreen instructions. We can check we have installed the software correctly if we write conda in our terminal
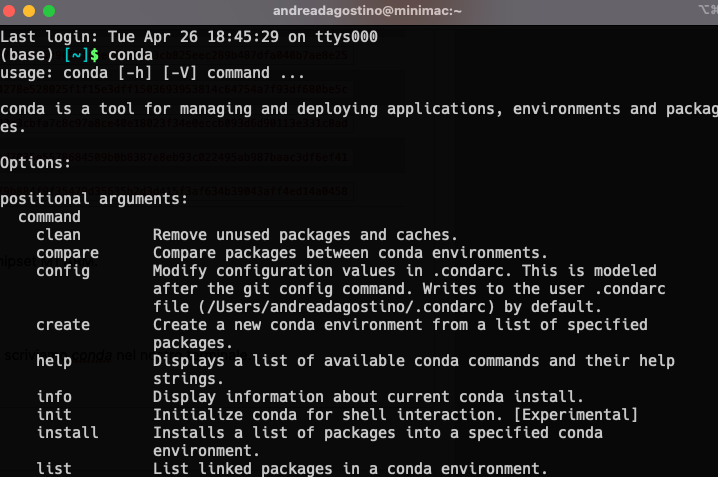
At this point we have installed Miniconda on our Mac OSX system and we are ready to create a virtual environment.
How to create a virtual environment with Miniconda
Once Anaconda or Miniconda has been installed and their correct functioning has been validated using the conda command, we can create a new development environment as follows:
$ conda create -n name_of_my_environment
This command will create a virtual development environment called name_of_my_environment in the installation directory. To activate the virtual environment just run the command
$ conda activate name_of_my_environment
And we are done! Our virtual environment is ready for the development of our application. Now let’s see how to install or uninstall libraries and packages in our newly activated virtual environment.
How to install packages and libraries in the virtual environment
Now is the time to add tools to our toolbox. To add a Python package or library, just use the command
$ conda/pip install name_of_package
As we can see it is possible to use the pip command to install packages within conda as well. In fact, if we use the command
$ conda/pip list
conda or pip, respectively, will show us the packages installed via their command.
I recommend using the pip install command over conda install because some packages are not available in the conda repository. There may be several reasons, but using pip has no drawbacks and allows you to download and install packages efficiently.
Conda Cheat Sheet — every command at your fingertips
I will conclude this article by sharing with you a helpful asset that has helped me countless times during my career and personal work. I am talking about the official cheat sheet made available by Anaconda. Here’ a preview of what it looks like 👇
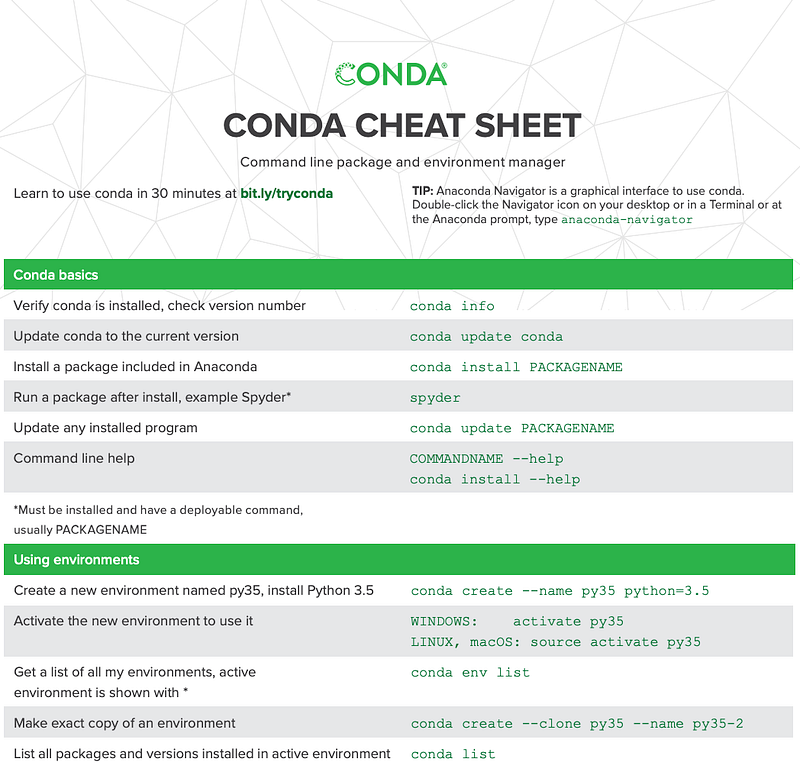
I suggest you save it in a folder you open often, or save the single commands in your favorite note-keeping app.
I hope this short guide helps you getting started in your data science & analytics journey with Python. Leave a comment below if you have any questions or want to share your feedback!
Until next time 👋


