
How to Set Up a Captive Portal Login Page
A captive portal is a web page that is displayed to newly connected users of a Wi-Fi network before they are granted access to the network.
Captive portals are typically used by business centers, airports, hotel lobbies, coffee shops, and other places that offer free Wi-Fi hotspots for Internet users.
Users can freely connect to these networks without a password and will often be directed to a login page where a password is required before being allowed to browse the web.
The danger in using these types of networks is that an attacker can create a clone of the access point with the same login page and trick users to connect to the fake network.
Set up the Access Point
Start up the Linux system and in the terminal type:
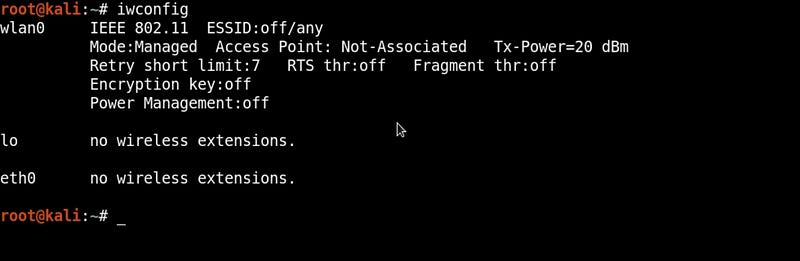
apt install dnsmasq hostapdThen, figure out which wireless network device you will be using for the Access Point. Run the “iwconfig” command to see the available wireless network devices (wlan0, wlan1).
Once you have identified your wireless interface, set up the configuration files using the nano text editor in the terminal.
nano dnsmasq.confAnd add the following lines.
#Set the wireless interface
interface=wlan0
#Set the IP range for the clients
dhcp-range=192.168.1.2,192.168.1.250,12h
#Set the gateway IP address
dhcp-option=3,192.168.1.1
#Set DNS server address
dhcp-option=6,192.168.1.1
#Redirect all requests to 192.168.1.1
address=/#/192.168.1.1
This configuration file will tell dnsmasq to use the wlan0 interface and start handing out IP addresses to the clients.
The last line will redirect all requests to the IP address 192.168.1.1. This is the address of your server hosting the captive portal page.
When clients connected to the network try to access any website, their DNS requests are intercepted and redirected to the captive portal page, which is hosted on the server (192.168.1.1). Don’t forget to save the file.
Next, I am going to create another configuration file, this time called hostapd.conf.
nano hostapd.confAdd the following lines:
#Set wireless interface
interface=wlan0
#Set network name
ssid=Free-WiFi
#Set channel
channel=11
#Set driver
driver=nl80211
In the configuration above, an Access Point is defined with the network name “Free-WiFi”, and it will run on channel 11, using wireless network interface wlan0.
Save the file as hostapd.conf.
At this point, you can start the access point using the following commands:
dnsmasq –C /root/dnsmasq.conf
hostapd /root/hostapd.conf
You will also need to assign the IP address for the wlan0 interface using:
ifconfig wlan0 192.168.1.1/24Copy the Captive Portal to the Web Server
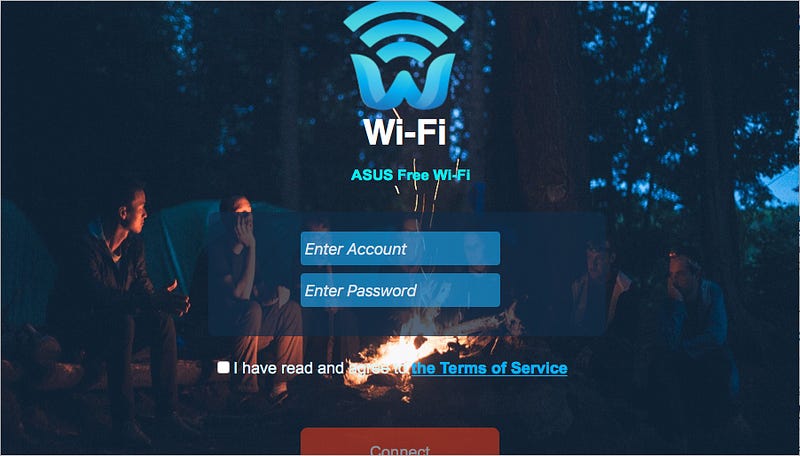
To set up a captive portal login page, you need to create or download a captive login page and copy the files to a location accessible by the web server.

Here, you can see a basic HTML login page which will be used to appear when clients try to connect to the access point.
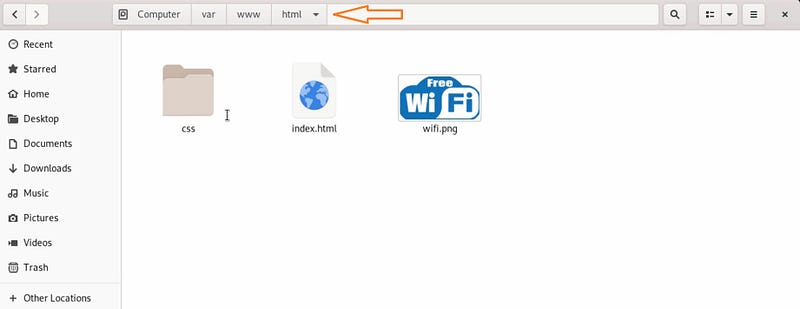
I am using Apache web server, so I need to copy the files to /var/www/html.
The last step is to add rewrite rules to the Apache web server using nano text editor.
nano /etc/apache2/sites-enabled/000-deafult.confAnd under ‘VirtualHost’ add the following code:
<Directory "/var/www/html">
RewriteEngine On
RewriteBase /
RewriteCond %{HTTP_HOST} ^www\.(.*)$ [NC]
RewriteRule ^(.*)$ http://%1/$1 [R=301,L]
RewriteCond %{REQUEST_FILENAME} !-f
RewriteCond %{REQUEST_FILENAME} !-d
RewriteRule ^(.*)$ / [L,QSA]
</Directory>
The rewrite rules above will make the redirection for the captive portal to work properly. Don’t forget to save the file and start the server using ‘service apache2 start’ in the terminal.
Now, I will switch to a different computer and connect to the ‘Free-WiFi’ network.
And I have been automatically redirected to the captive login page.
Thank you!
The Gray Area is a collection of great cybersecurity and computer science posts. The best articles are highlighted in a weekly newsletter, sent out every Wednesday. To get updates whenever The Gray Area publishes an article, check out our Twitter page, @TGAonMedium.


