
How to Serve AI Models with FastAPI and Docker
Learn to create a containerised FastAPI app serving a HuggingFace model

FastAPI is a modern web framework for building APIs with Python 3.7 and above. It’s high-performant and yet easy to learn and use. Companies like Microsoft and Uber love it so much that they use it in their machine-learning services.
In this tutorial, we’ll learn how to serve machine learning models with FastAPI for live inferencing. More specifically, we’ll use a GPT-2 transformers model from Hugging Face to generate text given a short sentence.
While the app we’ll be creating is really simple, we’ll also get to practice a very important skill in MLOps — packaging ML models that can be shared and deployed anywhere[1].
Creating the app
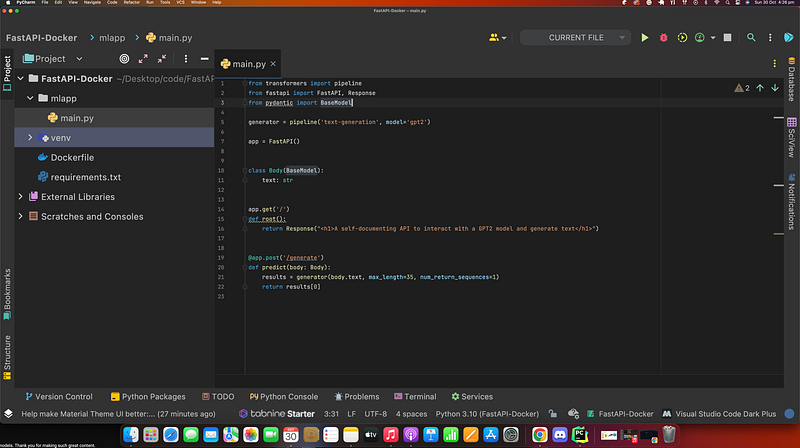
To get started, create a project in your IDE of choice. I prefer PyCharm for Python projects, but feel free to use something like VSCode. Inside your IDE, set up your project like this:
The requirements.txt file contains all the packages that our app depends on to be functional. Let’s list these packages inside your requirements.txt file.
We need TensorFlow and transformers to interact with the HuggingFace Models. And we, of course, need FastAPI itself and the standard Uvicorn to serve the FastAPI web application.
Note: Your IDE will complain when you try to import packages you haven’t installed. So quickly install all the packages in the requirements.txt file before moving on.
python3 -m pip install -r requirements.txtLet’s put the code for our FastAPI web app will be in a main.py module inside a /mlapp directory.
If you’re new to FastAPI, let’s see what the code above 👆🏾 is doing. We start by importing the required packages for our application to run successfully.
Then we declare a generator using the pipeline() function from HuggingFace’s transformers. This function allows us to use many pre-trained models from HuggingFace.
In line 7, we instantiate an instance of the FastAPI class called app. With this app instance, we can decorate some functions to create endpoints for our application.
The first endpoint is simply the root of our application with some HTML to greet the user of our app.
The next endpoint allows us to post some text to the Uvicorn server. Then FastAPI will process the request and return the prediction result given a body of text.
Containerising our app with Docker: AKA Dockerising our app
Okay, hold on, hold on….
🤔🤷🏾♂ ️At this point, you might be wondering why we even have to bundle our app into a container. Here’s why.
A container is a portable unit of software that combines the application and all its dependencies into a single package that’s agnostic to the underlying host OS. It removes the need to build complex environments and simplifies the application development-to-deployment process.[2]
We’ll use Docker to containerise our application into a portable Docker image that can be run in any environment, such as AWS ECS or Azure ACI, consistently.
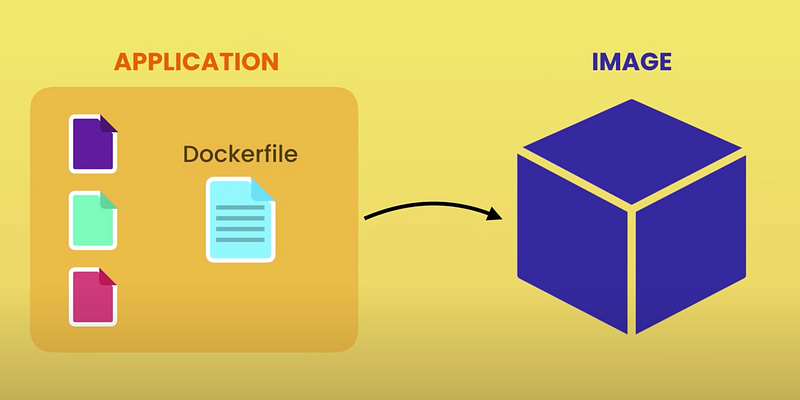
To give you a mental model of what’s happening when we containerise our app,
- we begin with a Dockerfile which contains all the instructions to create our Docker image ( which is what we can share or deploy to other services).
- Then we can run the application that’s packaged inside this docker image by simply running the image.
- When we say a container, we are referring to this running instance of the Docker image👍🏾👌🏾.
Let’s now create the Dockerfile for our application. As mentioned above, this file contains the instructions required to containerise our app.
FROM python:3.10 : In the Dockerfile, we’re going to start with the Python 3.10 image.
COPY ./requirements.txt /code/requirements.txt : Then we’ll copy the requirements into the container where we’re building it. We copy it into the directory called /code which will be at the very root.
WORKDIR /code : We change our working directory into /code.
RUN pip install --no-cache-dir --upgrade -r /code/requirements.txt : Then we will install the requirements.
COPY ./mlapp /code/app : And finally, we copy the local contents of anything that’s in the /mlapp directory into the container’s /code/app directory.
CMD [“uvicorn”,”app.main:app”, “ — host”, “0.0.0.0”, “ — port”, “8000”] : Finally, we’ll run it with uvicorn on host 0.0.0.0 and we’re going to run the function called app that’s inside the main.py module.
Interact with the API
FastAPI makes it easy to test our API by providing us with a /docs endpoint out of the box for us to interact with our API.
We’ve done all the hard work, and now what’s left is for us to build and run our docker image and interact with the FastAPI web app that’s bundled inside it.
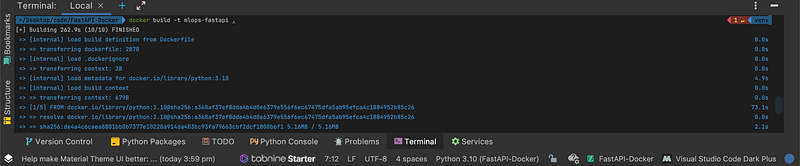
***Make sure you have docker installed and is running on your machine before getting started***First, we build the docker image to bundle our app that’s in mlapp/main.py. You can give the image name by tagging it ( -t mlops-fastapi in the example below).
# Terminal / Run from project's root directorydocker build -t mlops-fastapi .
Let’s now use that image to run a Docker container on port 8000 of our local machine.
# Terminaldocker run -p 8000:8000 mlops-fastapiClosing remarks
And there you have it. Congrats on making it to the end 🥳. We’ve successfully built a FastAPI application that can serve a Machine Learning model. While what we did here was very simple, you have taken your first steps towards MLOps.
You can find the complete code here.
Resources
[1]https://www.oreilly.com/videos/packaging-machine-learning/50116VIDEOPAIML/


