
How to send leads from LinkedIn lead gen forms to Hubspot
Quick LinkedIn — Hubspot integration guide

If you’re running paid campaigns on LinkedIn and using Hubspot as your CRM, you’ll find this useful.
As usually, I’m focusing on B2B SaaS companies, but the principles will apply to B2C and service companies too.
Let’s start with the basics.
When running paid ads, you want LinkedIn users to convert to customers. This conversion happens when a demo request form if filled in on LinkedIn, or when the user goes to your website and fills in a demo form there.
I will only cover the native LinkedIn lead gen forms here, and write a separated guide for tracking the leads that convert on the website.
We’ll cover four main points:
- The integration of the two platforms, and the user flow
- The form building in LinkedIn
- Mapping the fields to ensure correct tracking
- Creating a workflow for automatic lead list building
Let’s get started.
Hubspot — LinkedIn integration & user flow
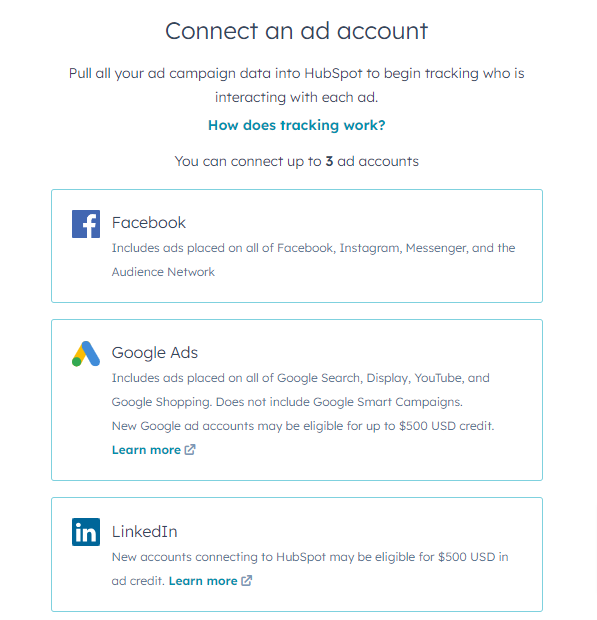
Hubspot offers an out-of-the-box integration with LinkedIn, so if you go to your account, under Marketing > Ads, you’ll see that you can choose to connect your social platforms to the CRM.
Select LinkedIn, and follow the steps to set up the integration.
You will be redirected to the Ad overview, and should be able to see your account connected. Set the lead tracking on ‘Auto tracking’.

Next, under ‘Lead syncing’, enable the LinkedIn form tracking. If you’re not running any lead gen ad, you’ll see ‘0 forms’, but once you ad a form to your LinkedIn account, they’ll be automatically synced, and you’ll see them in your HS account.
However, note that these forms won’t be available under Marketing > Lead Capture > Forms, like the general HS forms.
So in order to keep all the leads from LinkedIn organized, we’ll build some automatic lists a bit later.
For now, let’s move on to step 2: creating the LinkedIn forms.
Creating and syncing the LinkedIn forms
This step is quite straight-forward. In your LinkedIn Campaign Manager, go to Assets > Lead gen forms, and build your first form. Then, add it to a campaign, and leave it on Draft for now.
When a user fills in this form, the contacts will be automatically sent to Hubspot, through the already enabled integration. However, the form fields need to be mapped with Hubspot data fields, to make sure everything is sent to your CRM.
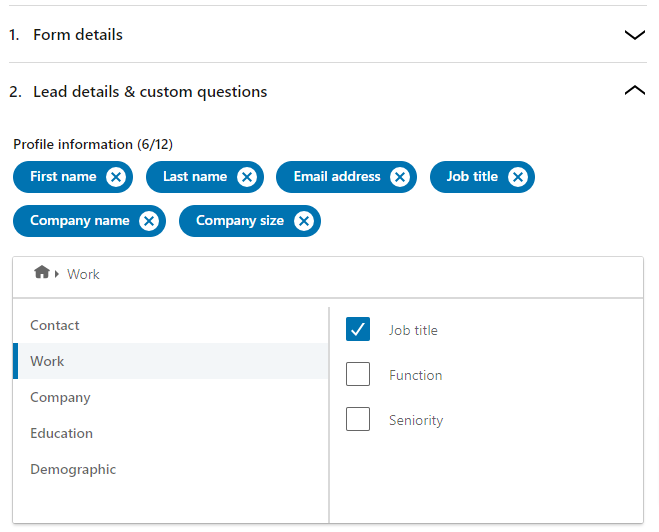
In the Form details fields, add the Headline (CTA of the form), and the Privacy policy URL. Don’t add the Privacy text here, we use a checkbox for consent in the next step.
Then, under Lead details, enable the following fields, and add the text for consent:
Next, add the UTM code for tracking your campaign in the Landing page URL field.
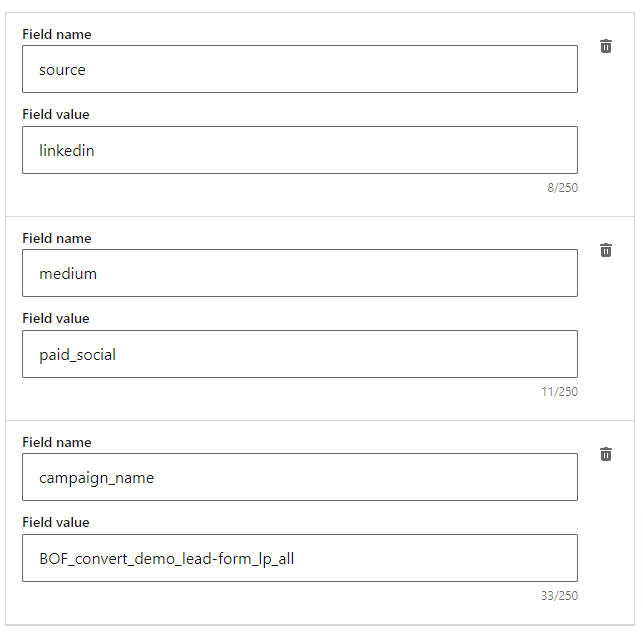
Finally, under Hidden fields, add the following (don’t change the letter case, use lowercase and keep it all as bellow):
- source = linkedin
- medium = paid_social
- campaign_name = your campaign name, for internal use and tracking purposes only
Once your form is created, go ahead and add it to a campaign. Create a lead campaign with the goal of Lead generation, and follow the steps. At the end, you should see your ad with the form in your Ads list.
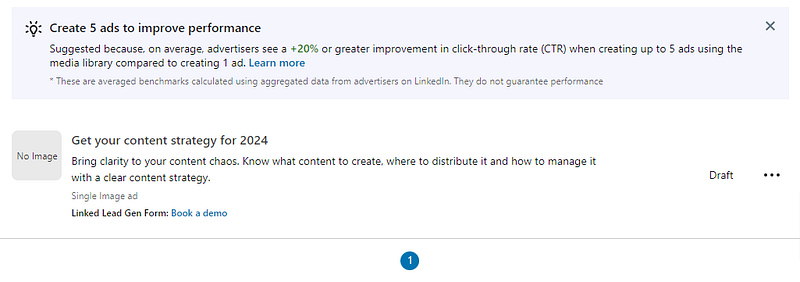
Click on the three dots, then ‘View’, and you’ll be able to preview and test the form.
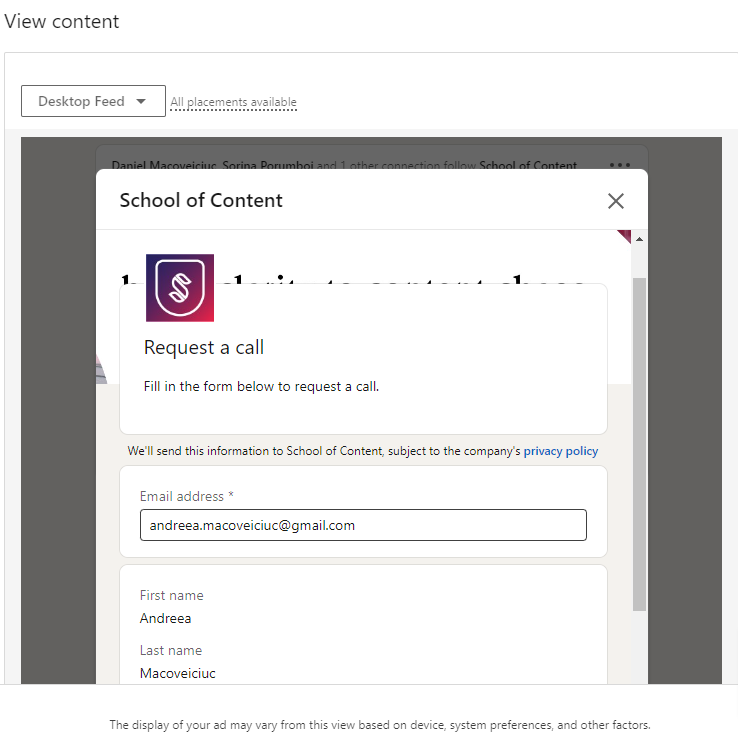
Fill in the form and click ‘Submit’, to have your first lead data sent to Hubspot.
Step 3: Map the fields to ensure correct submissions
If you now go to your Hubspot account, under Marketing > Ads, you should see your new campaign.
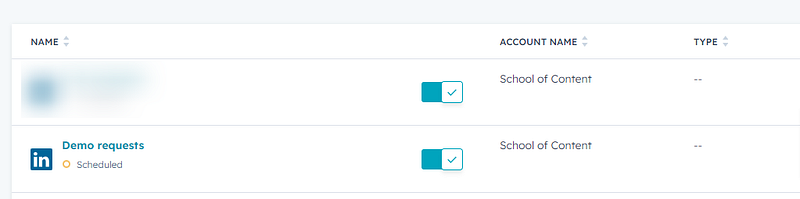
If you hover over the campaign name, you’ll see the option to ‘See details’. Click it and this sidebar will open.

We’ll go and create a workflow to collect all the leads from this campaign in one list. But before doing so, one more thing: let’s check the field mapping.
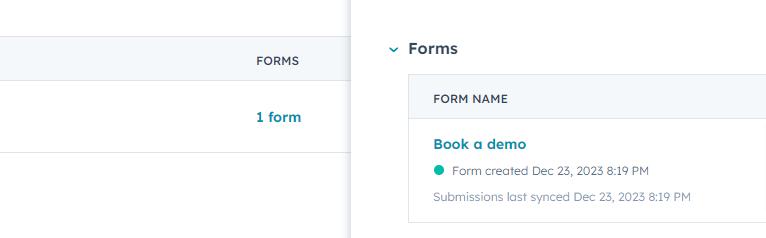
Go back to HS Settings > Ads > Lead syncing. You will now see the form tracked in Hubspot.

Click on the form, and you’ll see this sidebar.
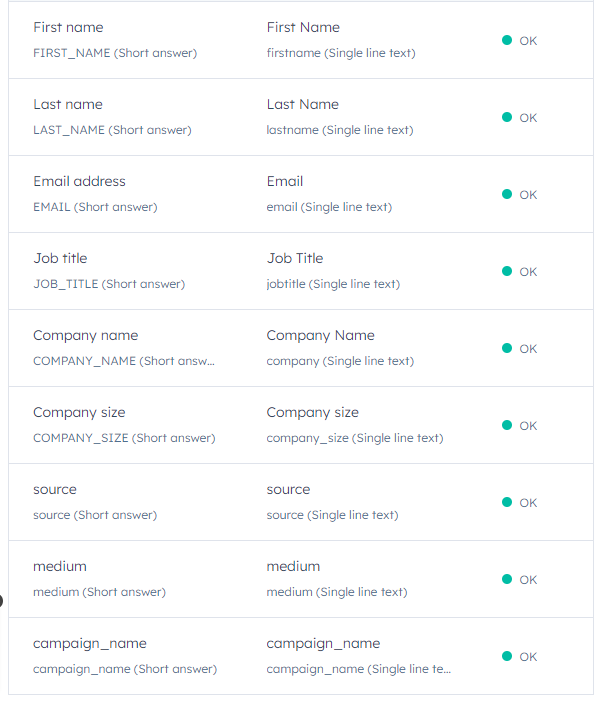
Then, click on the form name (‘Book a demo’ in this case), and you’ll see the field mapping. If there are no errors, you’re good to go.
However, like mentioned in the beginning, this form doesn’t appear in your regular Lead gen forms list. So although you’ll be able to see the leads in your Contact list, it’s not handy to always have to check the submissions by going to Settings > Ads.
So let’s build the automatic list to collect all LinkedIn ads in one place.
Create a HS workflow to send all leads to one list
Just a note: This will not work if you’re using the HS free account. However, if you’re on a paid plan, just go to Automation > Workflows, and create a new workflow.
The trigger for you will be a Form submission -> Anyone who filled in the form listed above.
When this trigger happens, send the Contact to a new list. Make sure you follow some naming conventions — for example, you can reuse the campaign name, or just name your list ‘LinkedIn leads’, if you want to collect all your paid leads in one list only.
This is it. Your LinkedIn forms are now sending leads to HS in an automated list :).
Hope you find this useful! Let me know if you have questions and follow me here or on LinkedIn for more non-fluffy marketing stuff!
— —
For an example of LinkedIn campaign structure, take a look at this template, or watch the video below. It explains how LinkedIn paid works, and how to structure a campaign, including what types of ads to use for each funnel stage.
For Campaign Naming Conventions, take a look at this document: https://docs.google.com/spreadsheets/d/1Rgu4AOsFkA49arDxXtwtM_Jfvt4FbA7JZ0Wo3GXEZ7M/edit?usp=sharing
Hope this was useful!