How To run SQL queries from a Jupyter Notebook
SQL IDEs aren’t capable of visualizing the data. Did you know you can run and visualize the results of a query with Jupyter Notebooks?

If you are working in the field of Data Science chances are you are using SQL to extract and preprocess the data. I’ve been using JetBrains DataGrip as my main SQL editor for a while now. While DataGrip does a decent job, it doesn't offer a way to visualize the data. Is there a better way?
Here are few links that might interest you:
- Complete your Python analyses 10x faster with Mito [Product]- Free skill tests for Data Scientists & ML Engineers [Test]- All New Self-Driving Car Engineer Nanodegree [Course]Would you like to read more such articles? If so, you can support me by clicking on any links above. Some of them are affiliate links, but you don’t need to buy anything.
IDEs for SQL

Integrated Development Environments for SQL usually don’t have the capability to visualize the results of a query. IMO that’s a good thing because each IDE would have its own proprietary way to visualize the data, which we would need to learn.
My workflow to visualize the data was: develop and execute the query in the SQL IDE, export the data to CSV and visualize it in a Jupyter Notebook.
Running queries in a Jupyter Notebook

What to do when the query results are too big to be processed in a single query? One solution is to run the query on smaller time intervals — instead of a whole year, you can run the query by months.
Running a query by months requires 12 query runs for one year, which is not feasible to do by hand — for loops come in handy here.
It is always good to have multiple tools at your disposal
When faced with such problems, I’ve been using SQLAlchemy to connect to the database and extract the data to a pandas DataFrame, like in the example below:
import sqlalchemy
import pandas
engine = sqlalchemy.create_engine(
sqlalchemy.engine.url.URL(
drivername="postgresql",
username="username",
password="password",
host="host",
port="port",
database="database",
),
echo_pool=True,
)
print("connecting with engine " + str(engine))
connection = engine.connect()query = "select * from table"df = pd.read_sql_query(query, connection)As you can see above, the SQL query is written in a string. Even if you put the query string in a separate cell in a Jupyter Notebook and you have SQL code formatted installed, it won’t format the query, because it is still a Python string.
Is there a better way?
Meet ipython-sql
ipython-sql enables us to run SQL queries directly from a Jupyter Notebook. No need to write multiple lines of code to connect to the database or wrap the query in a string. ipython-sql makes querying a database from Jupyter Notebook “cleaner”.

To install ipython-sql simply run the following command in a Jupyter Notebook:
!pip install ipython-sqlThen load the SQL module:
%load_ext sqlWe need a connection string to connect to the database. For SQLite, it is as simple as:
%sql sqlite://If you’ve used SQLAlchemy before to connect to a database, you can use the code below to obtain the connection string:
print("connecting with engine " + str(engine))Note, each cell needs to be annotated with %%sql. This tells the Jupyter Notebook that the code in the cell is SQL.
Let’s add sample data to the SQLite database:
%%sql
CREATE TABLE sales
(
    key       varchar(6),
    ts        timestamp,
    product   integer,
    completed boolean,
    price     float
);
INSERT INTO sales
VALUES ('sale_1', '2019-11-08 00:00', 0, TRUE, 1.1),
       ('sale_2', '2019-11-08 01:00', 0, FALSE, 1.2),
       ('sale_3', '2019-11-08 01:00', 0, TRUE, 1.3),
       ('sale_4', '2019-11-08 01:00', 1, FALSE, 1.4),
       ('sale_5', '2019-11-08 02:00', 1, TRUE, 1.5),
       ('sale_6', '2019-11-08 02:00', 1, TRUE, 1.5);
Now, let’s query the database’
%%sqlselect * from sales;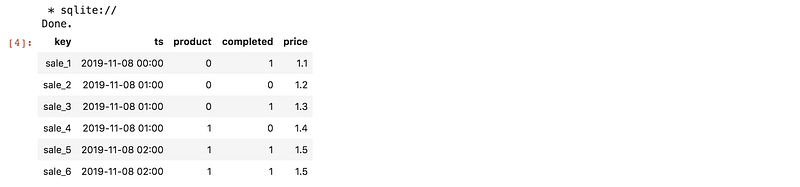
Works like a charm!
We only ran the query, but results aren’t assigned to any variable, which is not much of a use. Luckily, Jupyter Notebook enables us to set the previous output of a cell to a variable:
result = _Let’s check the type of result variable:
type(result)# sql.run.ResultSetNow, let’s convert the ResultSet directly to a pandas DataFrame with:
df = result.DataFrame()
This enables us to interactively explore the data.

Before you go
Follow me on Twitter, where I regularly tweet about Data Science and Machine Learning.