
How to Run Nginx Web Server in a Docker Container on Linux: Step-by-Step Guide
Hey Folks, we come to another blog post, In this blog we will discuss how to install Nginx on a container.
Who’s Nginx?
Nginx, a prominent open-source web server, is no exception. Docker has transformed the way developers bundle and deploy programs. Dockerizing Nginx creates a lightweight, portable, and isolated environment for your web server, making it easier to manage and deploy across platforms. In this blog post, we will walk you through the process of containerizing Nginx using Docker, allowing you to simplify web server deployment and scale your applications.
Requirements:
- Docker and Docker Engine
I hope Docker is set up on your machine. for docker installation checkout!
Step 1: Create a Simple Nginx Configuration:
a) Open your editor and save your nginx config. I am using the sample configuration below
server {
    listen 80;
    server_name your_domain_or_IP;
location / {
root /usr/share/nginx/html;
index index.html;
}
}server {
listen 80;
server_name localhost; location / {
root /usr/share/nginx/html;
index index.html;
}
}to save the file as Nginx.conf
Step 2: Create a Dockerfile:
Create the Dockerfile, expose the port 80, and copy the created nginx config file to the docker.
# Use the official Nginx base image
  FROM nginx:latest

  # Copy the custom Nginx configuration
  COPY nginx.conf /etc/nginx/conf.d/default.conf

  # Expose port 80 to allow incoming traffic
  EXPOSE 80
save the file as a Dockerfile.
Let me break this down in a simple way, like I’m explaining it to you in the hallway:
So, we’re using Docker to run Nginx, and here’s what’s happening step by step:
1. FROM nginx:latest
This basically says, “Hey Docker, use the official Nginx image.” The nginx:latest part means we’re pulling the latest version of Nginx from Docker Hub. It’s like using a pre-built Nginx server that’s ready to go, so we don’t need to manually install it ourselves.
2. COPY nginx.conf /etc/nginx/conf.d/default.conf
Now, we want to customize how Nginx behaves, right? So, we’ve got a custom configuration file (nginx.conf) sitting on our local machine. This line copies that custom config into the container, replacing Nginx’s default setup. Think of it as us telling Nginx inside the container, “Hey, use this new set of rules for how you handle requests!”
The config gets copied to /etc/nginx/conf.d/default.conf, which is where Nginx looks for its default server settings.
3. EXPOSE 80
Finally, this line tells Docker that our container will be listening for web traffic on port 80 (the standard HTTP port). But exposing the port doesn’t actually make it available on our computer by default — it just opens it up inside the container.
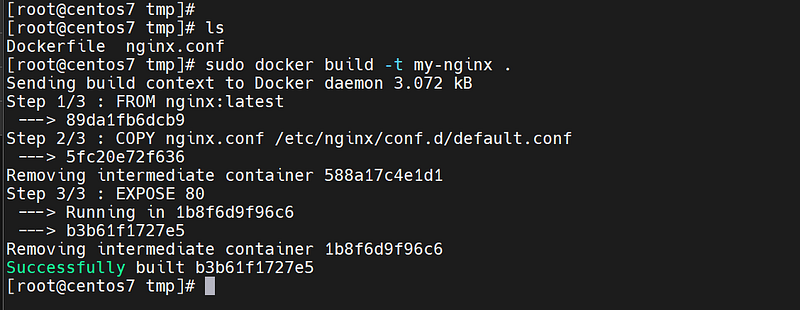
Step 3: Build the Docker Image:
sudo docker build -t my-nginx .
The command sudo docker build -t my-nginx . creates a Docker image named my-nginx from the Dockerfile in the current directory.
Step 4: Run the Nginx Docker Container:
once we build the new nginx docker image, we can run the container
sudo docker run -d -p 8080:80 my-nginxstarts a container from the my-nginx image, running it in the background and mapping port 8080 on your machine to port 80 in the container.
Note: Make sure port 8080 is not used by local machine, otherwise you will get error.

The successful output is shown in the above snap.
Check container status:
docker ps

Check container logs:
sudo docker logs <container_name_or_id># For real-time logs (tailing):
sudo docker logs -f <container_name_or_id>Step 5: Allow on Firewall:
we need to allow the 8080 port on the machine firewall to execute the below commands.
For Firewalld
sudo firewall-cmd --get-active-zones
sudo firewall-cmd --zone=public --add-port=8080/tcp --permanent
(or)
For ufw
#Aallow traffic on port 80 using UFW (Uncomplicated Firewall)
sudo ufw allow 80/tcp
# verify that the rule has been added, you can check the UFW status with:
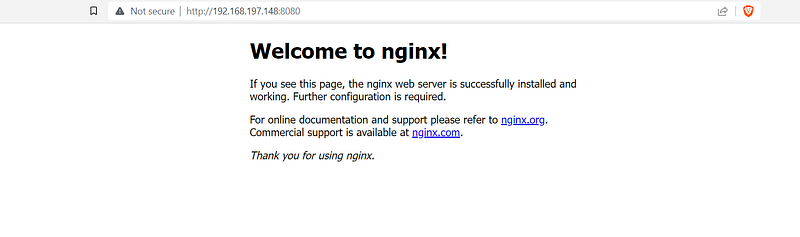
sudo ufw statusStep 6: Now visit the URL
http://localhost:8080 or http://<IP_address>:8080
✅✅feel free to connect with us.
LinkedIn: https://www.linkedin.com/in/karthick-dkk/
Follow my Medium Account (To get valuable information)
For more updates: subscribe to this medium account.
Follow for more: ✌️


