
How to run AWS Glue jobs on your computer using Docker, VSCode and Jupyter Notebook

One who makes no mistakes makes nothing. Giacomo Casanova.
Mistakes are perhaps one of the best teachers. Of course, it would be better to learn without them or with other’s failures, but in real life and many situations, you will learn with your own falls.
Welcome to this tutorial! It was only written because, one day, I forgot an AWS Glue development endpoint running for an entire weekend and spent almost every budget I had to carry out a proof of concept for ETL and data processing.
After this tragic event, I went hunting for a cheaper and less risky way to test my Glue jobs. After all, I did not doubt that I would be able to forget that endpoint running again.
My wife, mother, and friends would confirm that. If necessary, with concrete evidence and examples.
Hands On
The idea here is to create a AWS Glue dev environment from the Docker image amazon/aws-glue-libsaws-glue-libs. This image supports Glue 1.0 and Pyspark 2.4.3.
Then we will configure two options for developing and test our programs, one using VSCode and the other using Jupyter Notebook.
The best of everything!?
Run as many times as you like without worrying about the cost. You don’t even need an AWS account if you’re not going to consume any resources there.
An excellent way to start your learning!
Prerequisites
All the steps described in this tutorial were performed on Ubuntu 20.04, but this is not a prerequisite. Adapting a few steps and installing the software packages in the required version, you can use another S.O. of your preference.
Before performing step 1, you will need Docker and VSCode installed. If you don’t have these applications yet, I suggest following the official links below. The idea is simple.
With Docker, we will pull the image and start the container.
With VSCode, we will connect to the container to develop our jobs.
Optional Step
With AWS-CLI you can set up an AWS account and prepare your local environment to interact with resources in the cloud. So it is possible, for example, to run a Glue job on your desktop that reads or writes data to an S3 bucket in your AWS account. Although it is not essential for this tutorial, I recommend following this step to leave your environment ready.
AWS Glue e Pyspark with VSCode
With Docker installed, open the terminal and execute the command below to download the image:
sudo docker pull amazon/aws-glue-libs:glue_libs_1.0.0_image_01Now start the container:
sudo docker run -itd -p 8888:8888 -p 4040:4040 -v ~/.aws:/root/.aws:ro -v ~/projetos:/home/projetos --name glue amazon/aws-glue-libs:glue_libs_1.0.0_image_01where:
-v ~/.aws:/root/.aws:ro: maps the AWS credentials from the local machine to the container. For this step, you must configure your credentials after installing the AWS-CLI. Although it is not essential for this tutorial, I recommend following it to leave your environment ready.
-v ~/projetos:/home/projetos: maps the local project directory to a project directory internal to the container. Here you can change the name of the local folder as needed. Pay attention to the path names to locate the project on your local machine and in the container.
Connecting VSCode to our Glue environment
Open VSCode and install the python extensions and remote-containers:
ms-vscode-remote.remote-containers
ms-python.python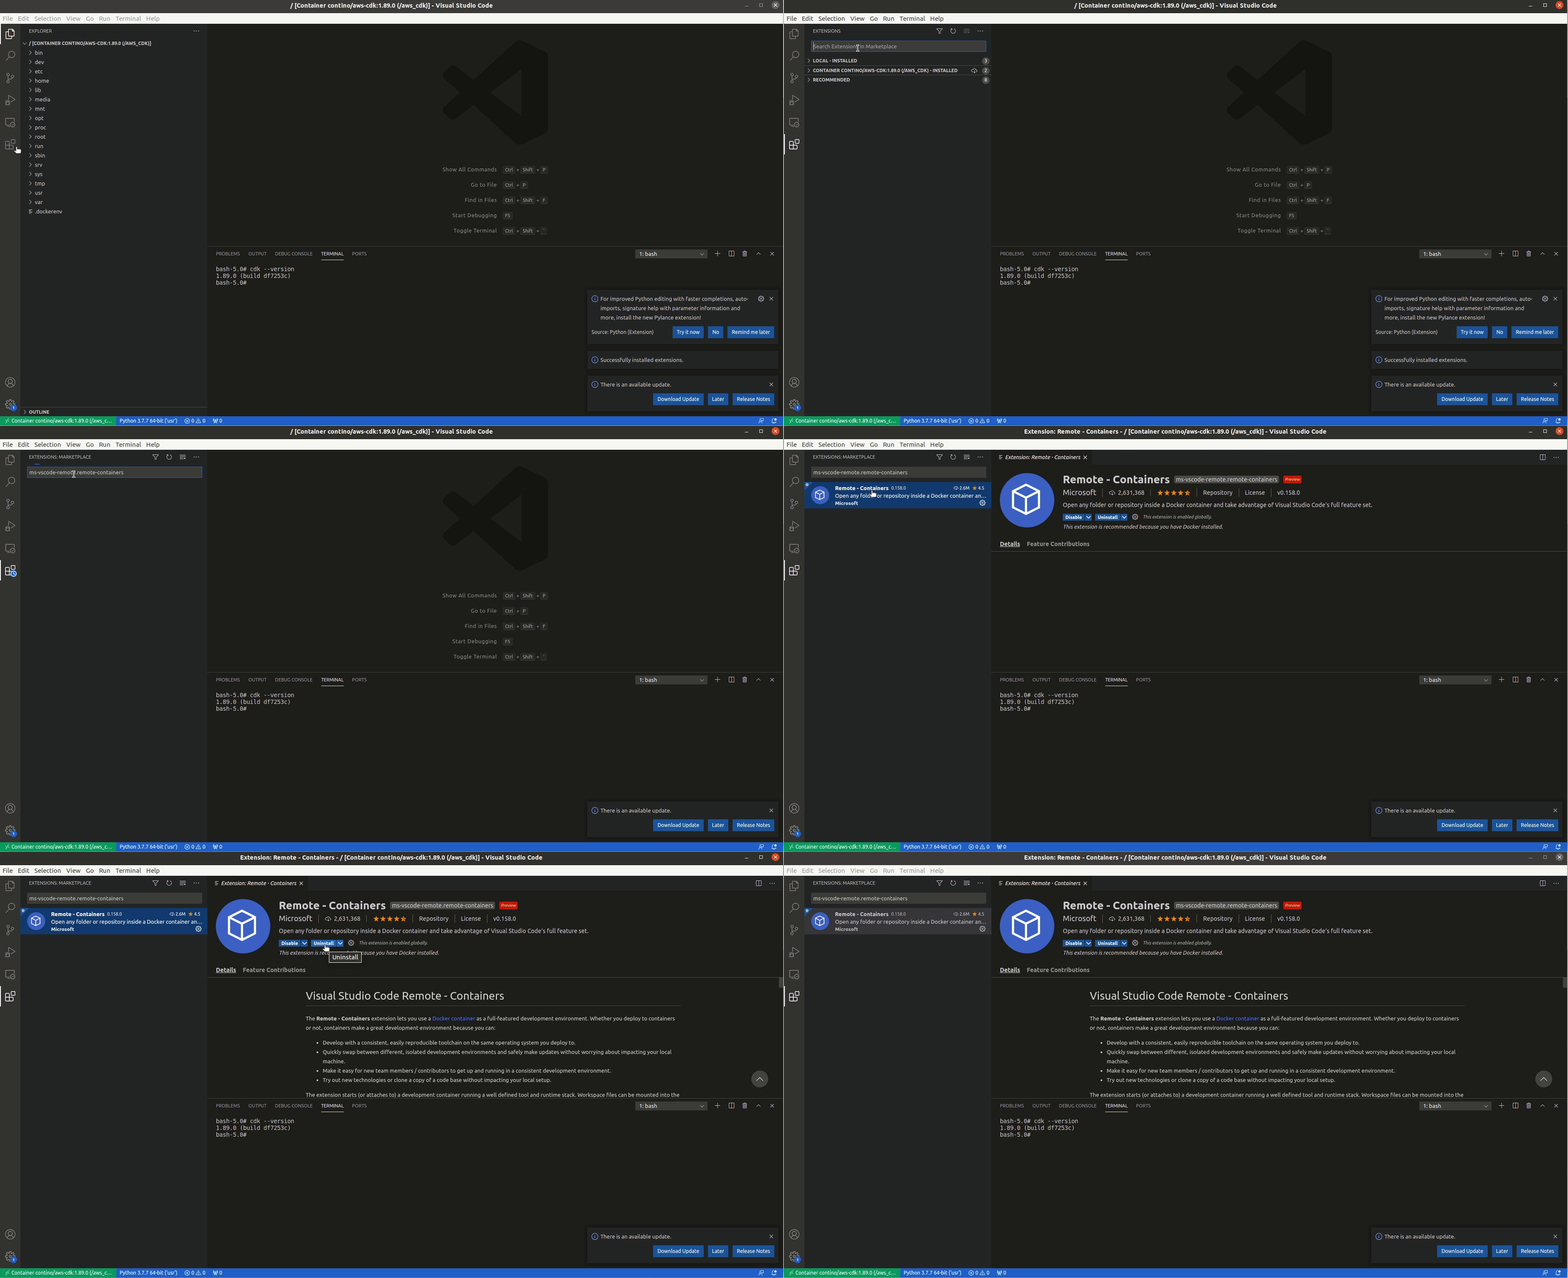
With the extensions installed, we will connect the VSCode to our container.
Click the green icon in the bottom left corner of the screen.
A menu will appear in the center of the screen, next to the title bar.
Select the Attach to Running Container option and click on the container name.

To test our environment, create in the project folder the file glue_example.py including the code below:
Let’s execute this job.
Now open the terminal on VSCode. In the top menu click on Terminal and New Terminal.
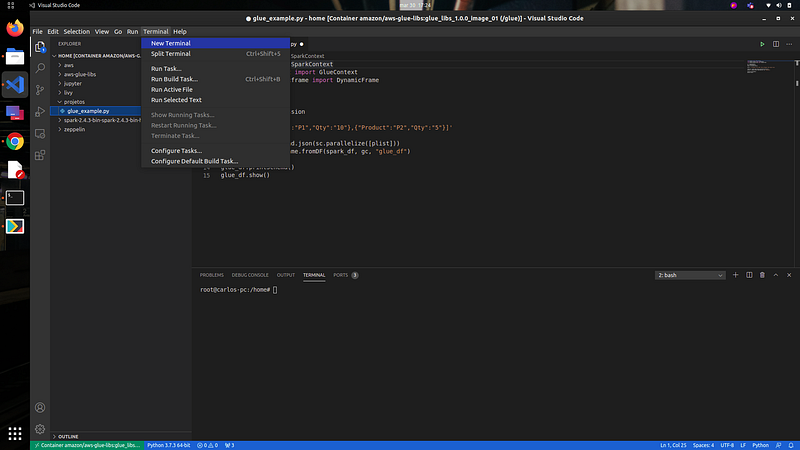
Run the command below:
spark-2.4.3-bin-spark-2.4.3-bin-hadoop2.8/bin/spark-submit projetos/glue_example.py
After execution, you can check the output of the program.
The schema,

and the data.

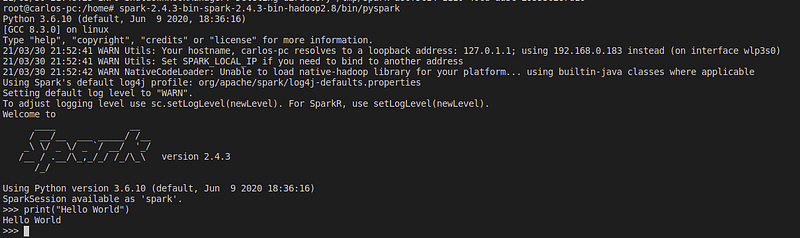
You can optionally use the Pyspark iterative terminal by running the following command:
spark-2.4.3-bin-spark-2.4.3-bin-hadoop2.8/bin/pyspark
Wrapping up
Disconnect the VSCode from the container by clicking on the green icon in the lower-left corner and on the Close Remote Connection option.
End the execution of the container by executing the following command in the operating system terminal:
sudo docker stop glue
You can check the file created in your local directory. To do this, run the following command in the operating system terminal:
ls -la ~/projetos
To use the environment again, just restart the container.
sudo docker start glueAnd reconnect it to VSCode.
AWS Glue e Pyspark with Jupyter Notebook
A super benefit of the amazon/aws-glue-libsaws-glue-lib image is the option to use Jupyter.
For that we will start a second container with the necessary parameters to run this service.
At the operating system terminal, run the following command:
sudo docker run -itd -p 8888:8888 -p 4040:4040 -v ~/.aws:/root/.aws:ro -v ~/projetos/jupyter:/home/jupyter/jupyter_default_dir --name glue_jupyter amazon/aws-glue-libs:glue_libs_1.0.0_image_01 /home/jupyter/jupyter_start.shwhere:
-v ~/.aws:/root/.aws:ro: maps the AWS credentials from the local machine to the container.
-v ~/projetos/jupyter:/home/jupyter/jupyter_default_dir: maps the local project directory to a project directory internal to the container.
/home/jupyter/jupyter_start.sh: start Jupyter service.
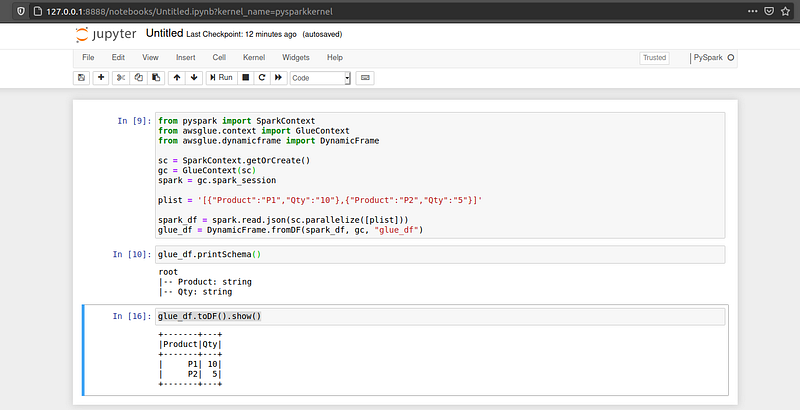
Now just open the browser and access the following address:
To test, you can use the same code suggested for VSCode.
Wrapping up
End the execution of the container by executing the following command in the operating system terminal:
sudo docker stop glue_jupyter
You can check the files created in your local directory:
ls -la ~/projetos/jupyter/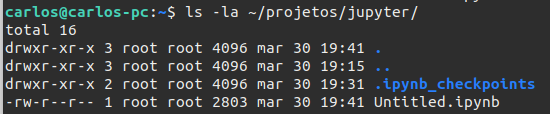
To start the Jupyter service again:
sudo docker start glue_jupyterConclusion
And that’s it. I hope this tutorial will help you get started with Glue and save money in your development process.
See ya!
Reference
https://aws.amazon.com/blogs/big-data/developing-aws-glue-etl-jobs-locally-using-a-container/


