
How to render a photo image and save rendering time
Here are potential solutions for your rendering problems after seeing my article reach 1.3K views
Many beginners face the same problem, and here are some more potential solutions before rendering images.
I accidentally found one of my old articles has reached over 1.3K views.
It was when I was curious about which article received the most attention from my readers last month.
Here is the list based on member reads: #1, #2, #3, #4, and #5.
As I listened to the article, it reminded me how I came to write the content, sharing what I learned and did apply to my fiction story.
First, I was so eager to find the solutions how to make a photo image appear even with the 3D images I created.
It was to satisfy my needs.
Here is the article.
How to Make a Photo Appear Using Blender 3D Modeling | Bootcamp (uxdesign.cc)
I noticed there were frequent views after I was able to publish it through Bootcamp. There were views daily. There were always some viewers every day.
The constant number that I was getting from the external viewers through ten different search engines.
There had been a constant need.
Many were trying to solve this problem I faced and wanted to solve it.
And there were still a similar amount of people trying to find out how to meet their needs as I checked last week.
And the total number of views has reached 1.4K views as of today.
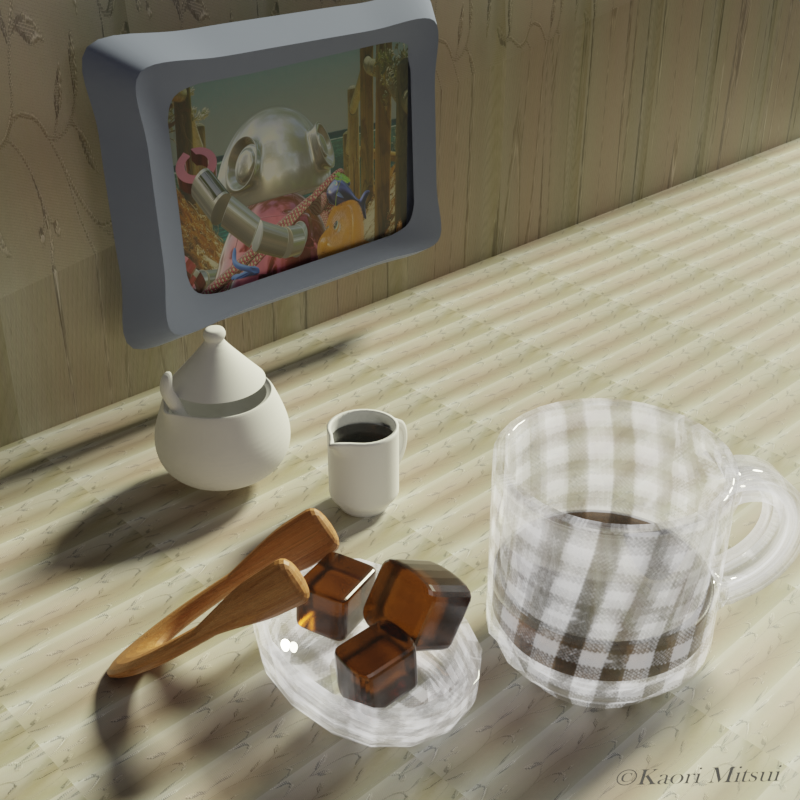
I wrote about several ways to make a photo image appear, but I realized there is one very useful way, and I used it in one of my recent articles.
In the rendered image, I stick the image into the picture frame.
Here is how.
Adding an image to render
Assuming you know how to make any type of frame, then
(1) you click Shading on the upper taskbar,
(2) you click the Add to select Texture Image to be able to choose your photo/image.
In case your image is not available in the Texture Image:
1) Make sure the image is somewhere above there on the left side.
2) Find the image and drag it down.
3) Select the Plane (you just need to add this mesh as you were creating the photo frame). Go to your Texture Image node, and now you can select from the pulldown list.
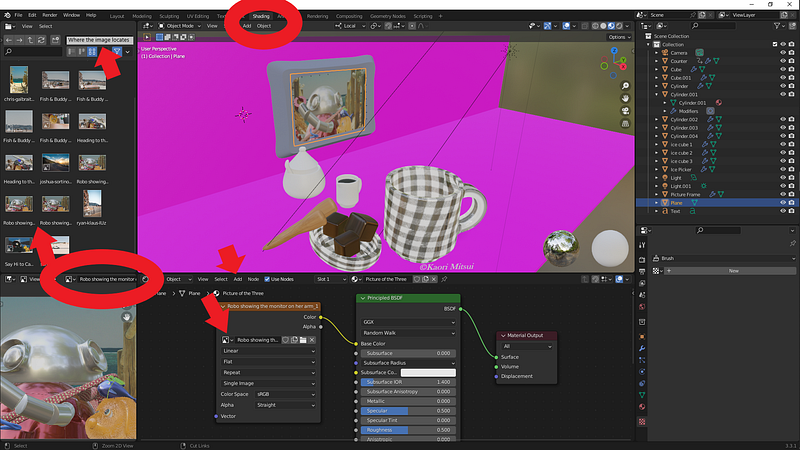
Once the nodes are connected, the image of my selection appears after rendering. It isn’t the extra one anymore. I know this trouble because I’ve been there.
When I was trying to make something using a photo image as a sample image, putting it right next to a simple object like a square to create something, I experienced this difficulty. The image would perish from your camera view as you hit the shortcut keys (Fn+F12, for example) to render. I guess many Blender starters have gone through this problem, and that’s why the article has gotten over 1.3K views since then.
As I wrote before, depending on your needs, selecting Viewport may meet your needs. It’s a quick way to get your creativity out somewhere, whether your design is for your webpage, blog, or story.
Especially if you don’t have GPU or don’t want to spend hours waiting for the rendering to complete, this may save you.
Oh, by the way, there is a way you can shorten the amount of time rendering images. I use it most of the time these days.
Saving time and avoiding exhausting work
If you aren’t particularly keen to have over 4000 samples, you can cut the time short.
Whenever you hit the shortcut keys to render, you probably see 0/4096 as the default number using Render Engine, Cycles (Blender version 3.3.1) on the top of the rendering window. If you got many things for the software to do; for example, many particles/hair density and a quick smoke effect, you’ll have to WAIT EVEN LONGER.
So, cutting down the sample size is a way to shorten your rendering time.
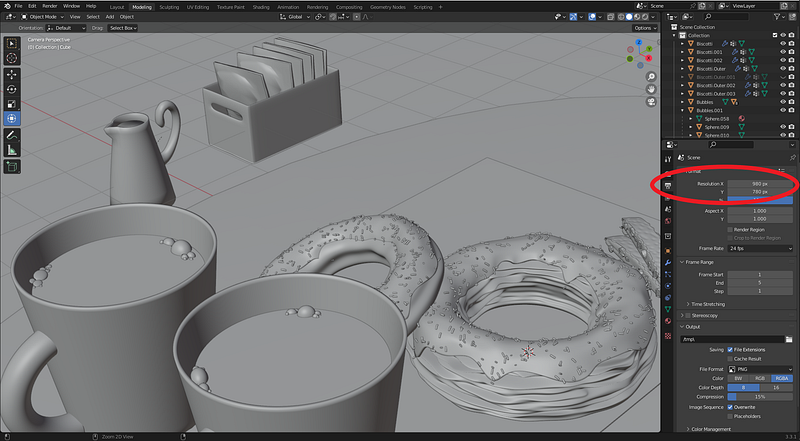
You can click the Output Properties (the printing photo icon) and Render Properties (the microwave-like icon) on the side menu to change the number. While you make the number up or down of Resolution X and Y, you see the focused area becomes either rectangular or square.
What I do is I decrease the number of Resolution X and Y, but I keep the rectangular shape. Then I change the total sample number to around 2500 instead of 4096.
Changing the Resolution values of the Output Properties
Changing the value of Max Samples from Render Properties
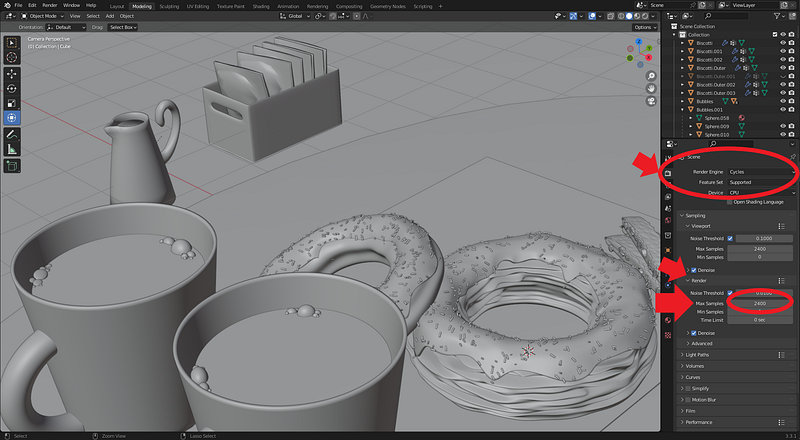
It is how I’ve saved some time for myself but still kept the equally good rendered results to accommodate my posts.
I intentionally kept the images a little darker so readers could brighten their screens and enjoy each shape, shadow, and those small details of objects coming alive.
I hope you find these techniques helpful. If you are interested in what other things I created, please check these articles:
Have you checked your article stats lately? If not, it might give you a joyful surprise. Happy writing and rendering.
© Kaori Mitsui. All rights reserved.