
How to Publish Your Book on KDP When It’s Ready
Steps I took to overcome issues in the submission process

After one and a half months on Medium as The Rude Poet, I finally decided to bite the bullet. I started up an account on Kindle Direct Publishing (KDP) and this is my experience from that moment.
I’d never published before and only started writing on Medium because of lockdown. In my short time here, I quickly learned how to promote, what to write, and where to look for more ideas.
Even though I had worked in the print industry for over 20 years, working out how to self publish on Amazon was a headache. I read articles on it, made Facebook posts enquiring about it, and even had conversations with other writers who had done it. A couple of writers did offer to help but the only way I was going to learn was to do it.
The main things I learned from the experience? Keyboards are uncomfortable to sleep on, coffee goes cold quicker when you type, and self-publishing eliminates the need to get your hair cut.
Opening an Account With KDP
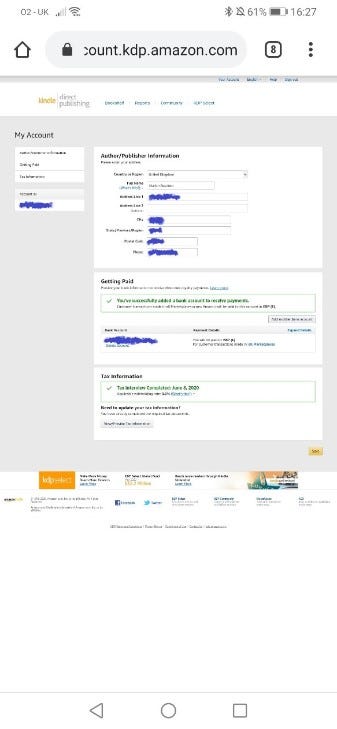
Opening a KDP account is quite easy. I was so surprised I almost fell off my chair. Once I put in the basic details, linked my bank account, filled out tax forms, it was job done.
It’s a little more long-winded than that and I needed to use a few brain cells. Firstly, I use a pen name or pseudonym (if you want the posh word). So to hide my true identity, just like Batman, I used my pen name “Martin Rushton” on my details. That way the account shows up like that.
Then my real name (Bruce Wayne if you must know) goes in with bank details and that brilliant tax form I keep having to fill out. Once submitted they are pretty fast at accepting.
The Five P’s
Now, after opening the account I just wanted to get my chapbook up and selling. I dived right in and made some horrible mistakes that cost me three days trying to put it all right. As we go through, I will kiss and tell where I went wrong.
Simply put “The five P’s are: Prior Planning Prevents Poor Performance.” If you are going down the road of KDP for self-publishing then please plan ahead. This is what I didn’t do.
You will need to have prepped and ready an account as covered above, the document you want to be turned in to a book, an idea for your cover, some advertising text, seven keywords for tags, an idea on price, Microsoft Word (other word processors available) and the categories you want your book placed in.
Welcome to Your Bookshelf
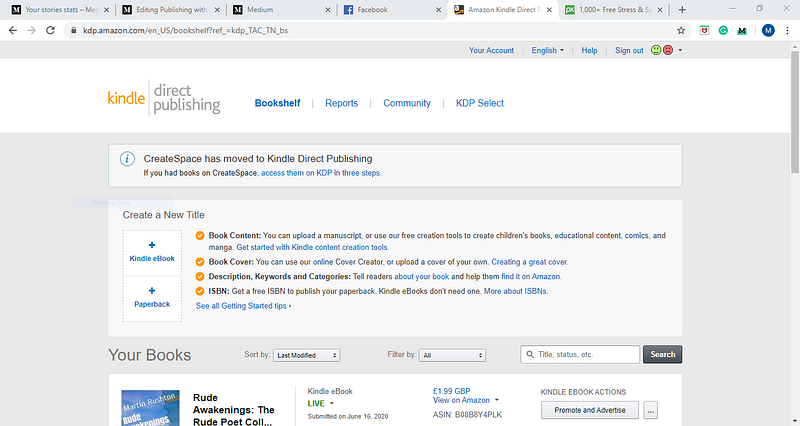
We have all the prep work done and are now logged in. Our first port of call is the bookshelf. We have two areas here that are important to us at the moment. The first being “Create a New Title” and it does exactly what it says on the tin. The other being your booklist, for all of those magnificent works of art you will be shortly producing.
We have just one button to focus on and that's the “Kindle ebook.” At this point, my caffeine-fueled brain was in overload and I wasn’t ready for the next part.
Kindle eBook Details
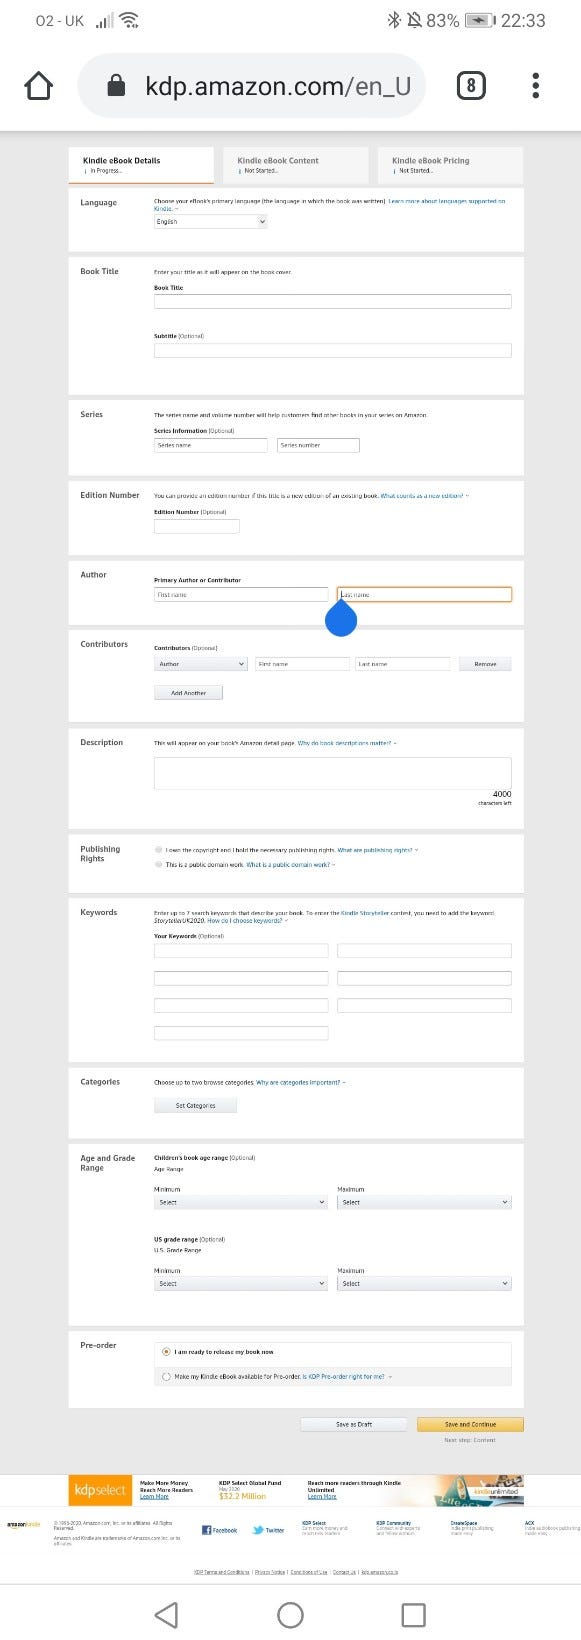
The page opened and so did my eyes. It was like that really scary part of a movie. Then I realized I was still on KDP. There should be a warning on this page, “More coffee needed to complete.”
I won’t go through all of them here, as most are self-explanatory, like Language. You should know what language you wrote in.
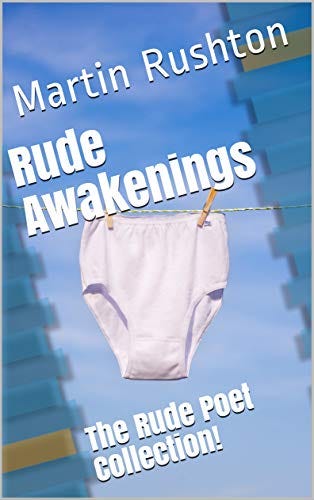
Enter your rather catchy and awe-inspiring title next, my title was easy “Rude Awakenings” which came from some comments by readers. I added a subtitle “The Rude Poet Collection” to mine as I can use it to link with future ebooks. It does go on the cover in some designs.
The edition number can go in if you wish. More importantly, is the author’s name. Yes, that’s you, well your pen name if you use one. Unless of course, you want to put my name in. But only if the book is going to make me lots of money though.
Get a good description in. Your book in one paragraph. Hard? Yes. Important? Very much so. The first thing your possible customers will see. “Martin Rushton is a new poet who got into the writing game during the Covid-19 lockdown. This chapbook is a selection of slightly naughty and rude poetry that earned him the name “The Rude Poet” Enjoy.” My first and rushed description.
I changed it to “Caught you looking! If you got this far then have a look at the preview. Warning though, my poetry is on the slightly naughty/rude side ;) You are sure to laugh at least once, maybe blush a couple of times too.”
The Keywords next, think tags on your Medium stories. My first was pretty lame, “Poetry, Poems, Rude, Naughty, Cheeky” after some thought I changed them too “Poetry, Satire, Humour, Adult, Naughty, Comedy, Poem.” What do you tag your work as? It’s the same principle. You know your work better than anybody. So take a good long time to go through the categories and pick which ones suit your ebook best. I had to add an age restriction to mine because of the content. Click save and continue.
That’s the front end of your ebook done. All of that information is going to be the links needed to bring those book sales in. So review it two or three times. Make sure it’s all good. I didn’t. I rushed through and published. I had to email Amazon and get them to cancel the review so I could go back and redo it all.
Kindle eBook Content
This is where the magic happens. Again, I learned the hard way and I’m still learning. There are only four areas to work in this section, Manuscript, Kindle eBook Cover, Kindle eBook Preview, and Kindle eBook ISBN.
You have your book, probably all typed up in Word. The manuscript area allows you to upload it in various formats. On top of that, you can also download Kindle Create to help you sort out the layout of your book.
First, I copied and pasted my poems on to pages, added page breaks and saved. Because I’m in England my default page size is A4 or 21cm x 29.7cm. I uploaded it and… it went all over the place in the preview. I downloaded Kindle Create and used that to modify the word document. Guess what. Nope didn’t work, it went all over the place again, even though it looked fine in Kindle Create’s preview.
One day of research and testing later, I found that creating a word document, resizing the pages to 15.24cm x 22.8cm, and adding a one-inch border worked. I used Word to create the index and did the author page etc. all in one document. When I uploaded it and looked at the preview it worked, a huge scream rang out, birds flew off the rooftops and the emergency services turned up after reports of someone being murdered.
The page size may not work for you, but I do recommend trying it and formatting in Word to how you want it first.
Kindle eBook Cover
Even though I spent years in print designing stuff, I quite like the cover creator. If you’re like me, just starting in publishing, and don’t even have two pennies to rub together, hiring a graphic designer or buying the software is expensive, so this won hands down.

You can upload an image to start and there are lots to choose from. Once you choose a design you then have the option to edit it. I’m tempted to use it for my other ones. If you have got this far then play. Try different designs, play with the typefaces, and get the feeling that you want for your book. This was what I went for in the end.
There is no point in writing too much about the preview section because it does exactly that. Previews your book. You have options to view it on a kindle, tablet, and phone as well as change typeface size. I used the preview at both the manuscript stage and the cover stage to make sure everything worked.
Kindle eBook ISBN
This is another important part of your journey. An ebook doesn’t need an ISBN (International Standard Book Number), but printed books should have them. Your choices are simple. Publish just an ebook and don’t go the ISBN route or go for printed too and buy an ISBN. You can get one for free through Amazon but it isn’t transferrable as far as I can see. The best option is to buy one then input the number.
Save and continue.
Kindle eBook Pricing
Nearly there, everything is in place except for the price. There are options for different pay bands and a conversion chart so you can see what it will cost in other countries. I’m not going to sit there on all my gold bars from the sales of my book (I have a good imagination!) and tell you what you should choose. That is solely down to you.
Save and return to your bookshelf, don’t publish just yet.
As with everything else go over your choices a few times, make sure everything is how you want it. Even if it takes a couple of days. When you are ready, hit that publish button.
Your book will then go off for review. Amazon can take up to 72 hours to review it. Just as your excitement levels are almost overflowing, it happens. Your book changes to published. Good news? No, not yet. Now you have to wait up to 12 hours for it to go live.
Now fellow writers, keep notes as you go through. I created a folder on my computer with the working files and final files. I will be using those as templates for my next ones.
I hope this has been helpful for you and makes your first publishing experience a lot better than my first one was. Don’t just leave it there though. If you do use this then please respond and tell me how it benefitted or if I missed something. Add a link to your book too. You never know, I might even buy it. My chapbook can be found on my profile if you wish to look at it for reference.