
How to Publish Azure Static Web Apps with Azure DevOps

Azure Static Web Apps publishes a website by building an app from a code repository.
In this quick-start, you deploy an application to Azure Static Web apps using Azure DevOps.
Prerequisites
- Active Azure account: If you don’t have one, you can create an account for free.
- Azure DevOps project: If you don’t have one, you can create a project for free.
- Azure DevOps includes Azure Pipelines. If you need help getting started with Azure Pipelines, see Create your first pipeline.
- The Static Web App Pipeline Task currently only works on Linux machines. When running the pipeline mentioned below, please ensure it is running on a Linux VM.
Create a static web app in an Azure DevOps
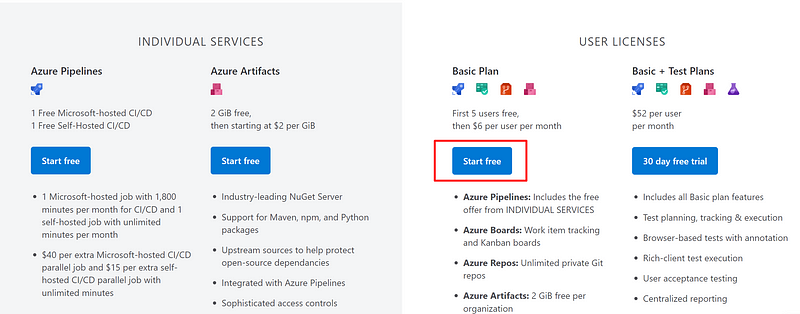
Access Azure DevOps - https://azure.microsoft.com/en-us/pricing/details/devops/azure-devops-services/
On the right-hand side, under Basic Plan, click the Start Free button.
Create your Azure DevOps organization. Click the Continue button.

A progress indicator will appear and show that your DevOps organization is being created.

Now, provide a name to your DevOps project, then click the Create project button.

Your project will be created, and you will see the home landing page on Azure DevOps and your respective project.

Navigate to your repository in Azure Repos. Select Import to begin importing a sample application. A Git repository type is selected by default.
In Clone URL, enter https://github.com/staticwebdev/vanilla-api.git.
Select Import.

You will see another progress indicator.
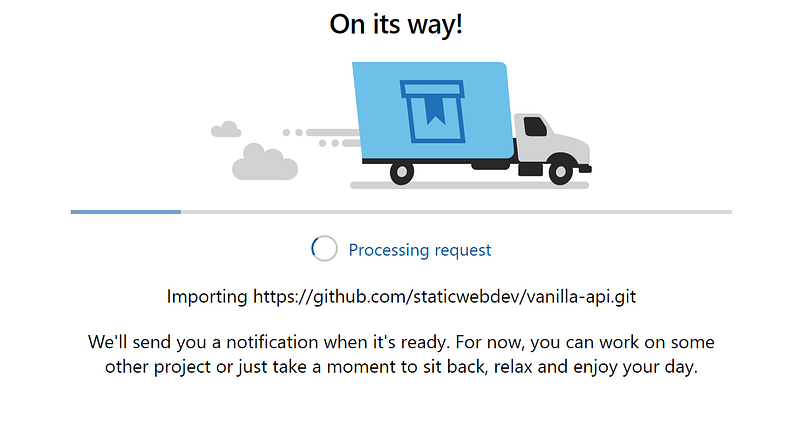
As soon as it finishes, you will see that your repository got imported successfully.

Create a static web app
Navigate to the Azure portal.
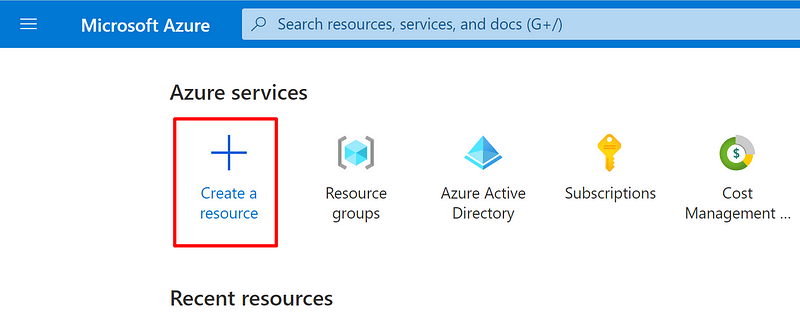
Select Create a Resource. Search for Static Web App.

Select Static Web Apps. Select Create.

Create a new static web app with the values specific to your Azure subscription and your preferred parameter arguments.
Note that you can use an existing Resource Group or create a new one.
Subscription: Your Azure subscription name.
Resource Group: Select an existing group name, or create a new one.
Name: Enter myDevOpsApp.
Hosting plan, Plan type: Select Free.
Region: Select a region closest to you.
Source: Select Other.
Click the Review + create button.

Select Create.

The SWA deployment will start.

As soon as it completes, you will see a confirmation message as well. Then, click the Go to resource button.

Select Manage deployment token.

Copy the deployment token and paste the deployment token value into a text editor for use on another screen. Click the Close button.

Create the Pipeline Task in Azure DevOps
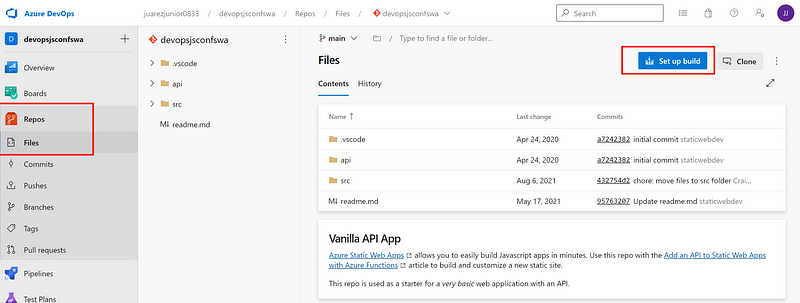
Navigate to the repository in Azure Repos that was created earlier.
Select Set up build.
In the Configure your pipeline screen, select Starter pipeline.

Copy the following YAML and replace the generated configuration in your pipeline with the code below.
trigger:
  - main
pool:
vmImage: ubuntu-lateststeps:
- checkout: self
submodules: true
- task: AzureStaticWebApp@0
inputs:
app_location: '/src'
api_location: 'api'
output_location: '/src'
azure_static_web_apps_api_token: $(deployment_token)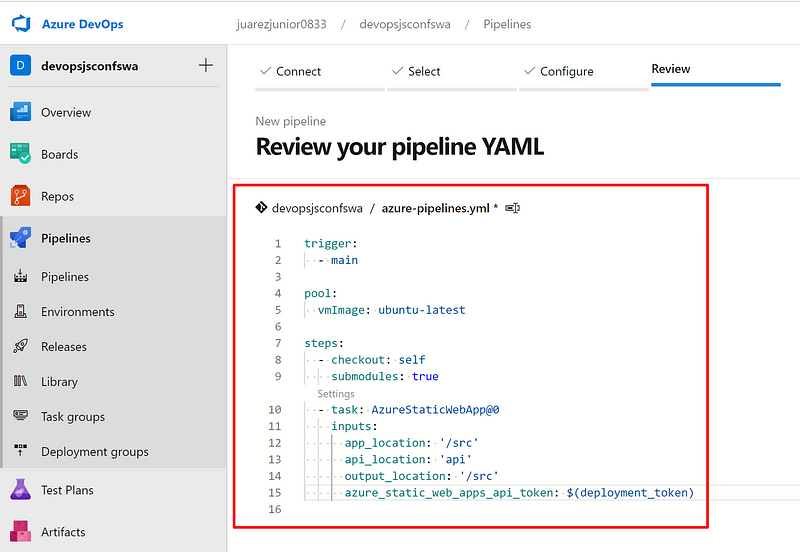
Select Variables.

Select New variable.
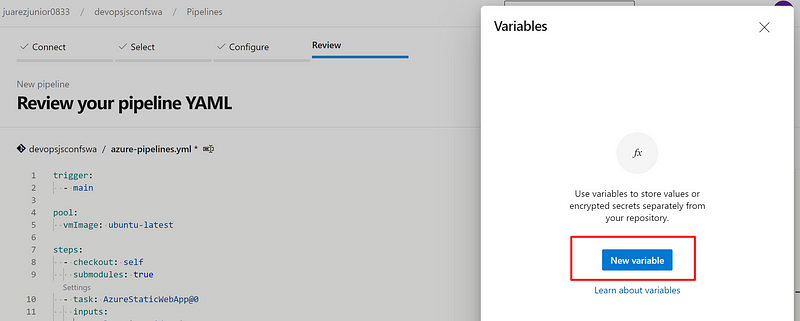
Name the variable deployment_token (matching the name in the workflow).
Copy the deployment token that you previously pasted into a text editor. Paste in the deployment token in the Value box.
Select OK.

Select Save to return to your pipeline YAML.

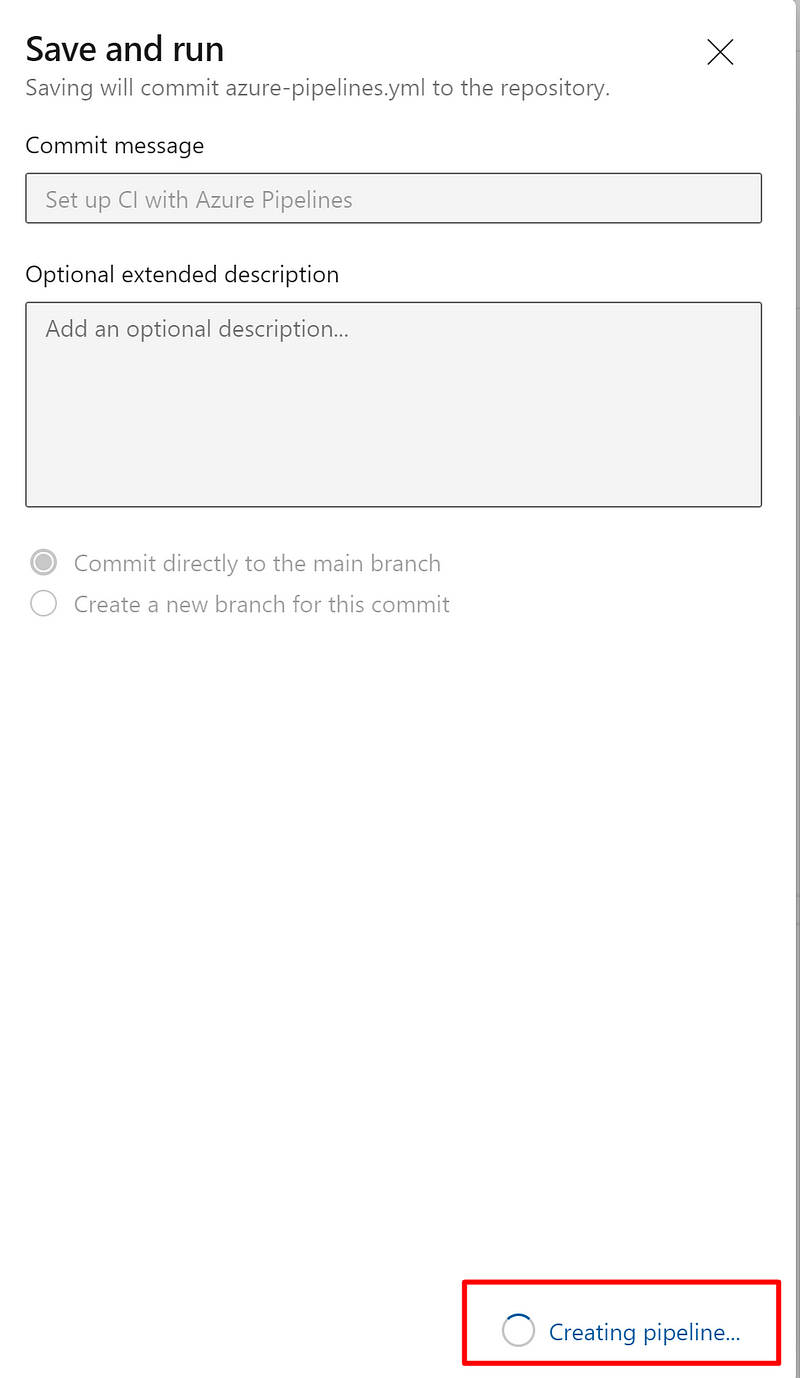
Select Save and run to open the Save and run dialog.
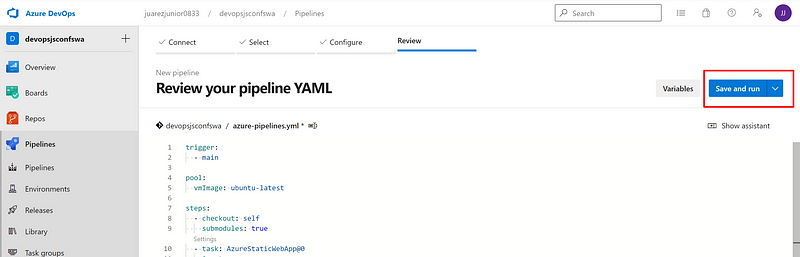
Select Save and run to run the pipeline.

You will see an indicator message concerning the pipeline creation.
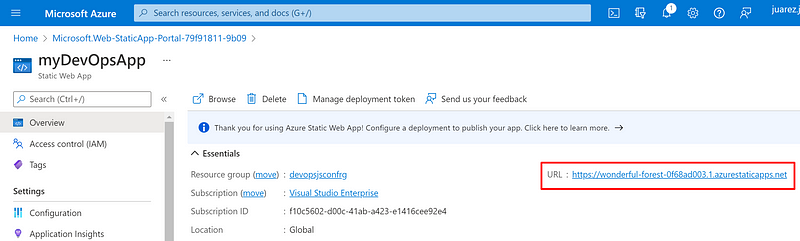
Once the deployment is successful, navigate to the Azure Static Web Apps Overview which includes links to the deployment configuration. Note how the Source link now points to the branch and location of the Azure DevOps repository.
Select the URL to see your newly deployed website.
Clean up resources
Clean up the resources you deployed by deleting the resource group.
From the Azure portal, select Resource group.

Select the respective resource group name you used in this tutorial.

Select Delete resource group from the top menu.
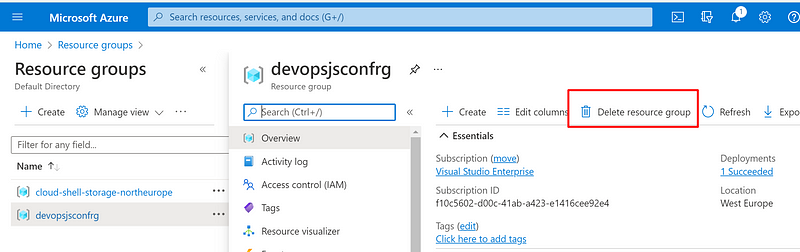
Confirm the resource group deletion operation by providing the target resource group name. Click the Delete button.

That’s it. You created your first Azure Static Web Apps, and built and deployed it with Azure DevOps! Congratulations!
If you want to learn more about Azure Static Web Apps, please check the resources below.


