
How to publish 🏁a KMP library🏆 to the GitHub Packages repository🏎️?
🏎️ A Guide to Publishing Your Library on GitHub Packages
In the vast landscape of open-source development, GitHub has become a central hub for sharing and collaborating on code. GitHub Packages, a feature within GitHub, provides a convenient and integrated solution for hosting and managing your software packages. If you’ve crafted a remarkable library and want to share it with the world, this guide will walk you through the exhilarating process of publishing your library on GitHub Packages.🏎️
Here we are going to use GitHub Packages — because it’s simple to configure and is free.
🏎️Step 1: Set Up Your GitHub Repository:
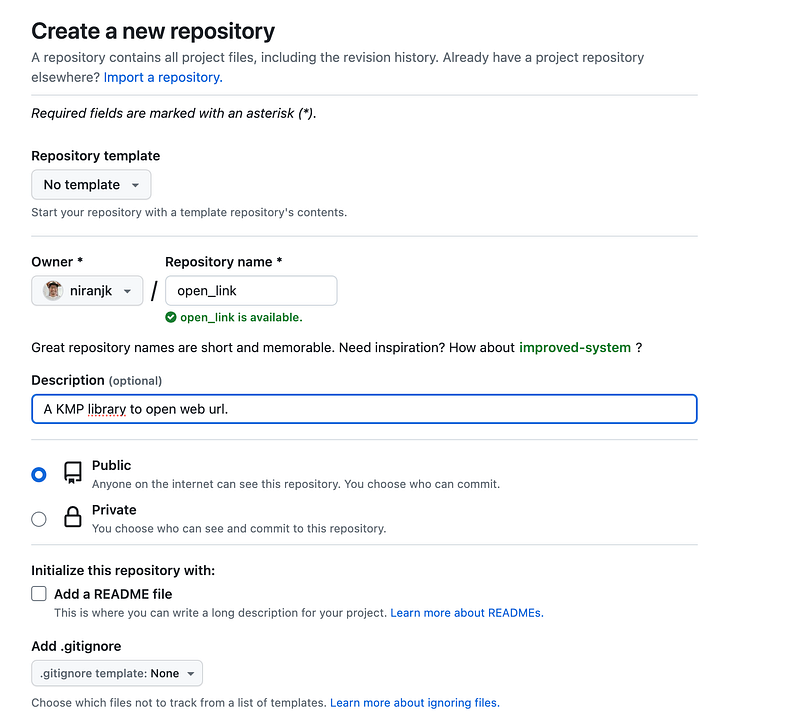
Before you can publish your KMP library, ensure that you have a dedicated repository for it on GitHub. If you haven’t created one yet, initiate a new repository by clicking the “+” button on the GitHub homepage and selecting “New repository.” Give your repository a meaningful name, add a description, and initialize it with a README if needed.
🏎️Step 2: Prepare Your Library for Packaging:
Make sure your library is well-structured and contains all the necessary files for distribution. This includes your source code, documentation, and any other essential resources. It’s crucial to have a clear README file, as this will be the first thing potential users see.
🏎️Step 3: Generate an Access Token:
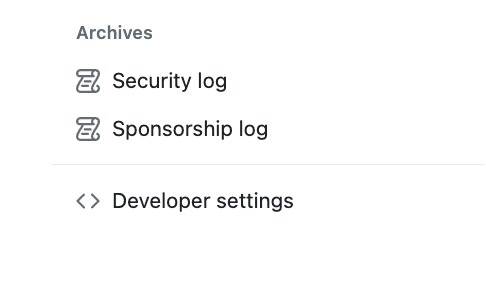
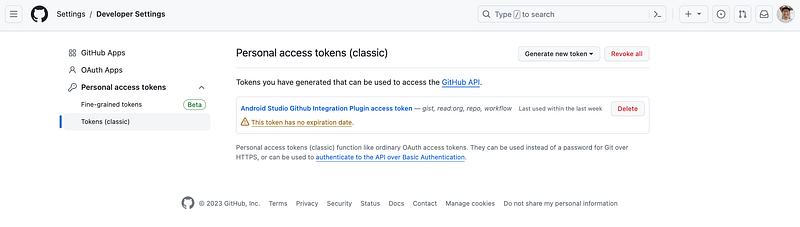
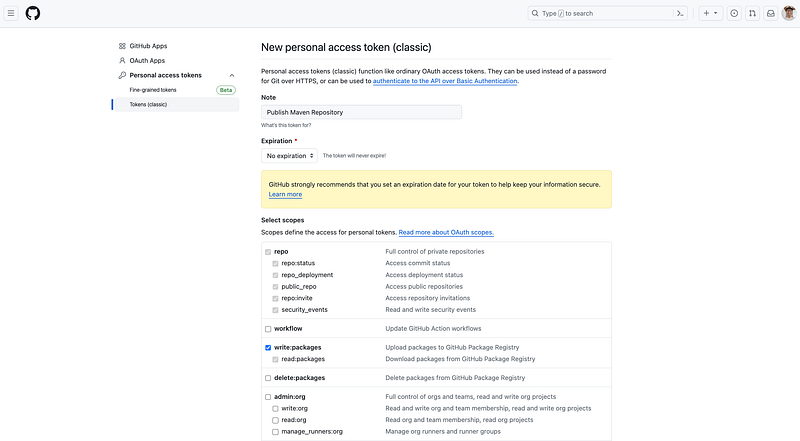
GitHub Packages requires authentication to ensure secure package publishing. Generate a personal access token by navigating to your GitHub account settings, selecting “Developer settings,” and then “Personal access tokens.” Create a new token with the necessary permissions, such as read and write access to packages. Copy the generated token — you’ll need it in the next steps.
Account Settings > Developer Settings > Personal Access Token > Tokens > Generate New Token
🏎️Step 4: Publish Your Library:
With your repository, metadata, and authentication in place, it’s time to publish your library to GitHub Packages.
In gradle.properties add your maven username and password:

In build.gradle.kts[:open-link] add:
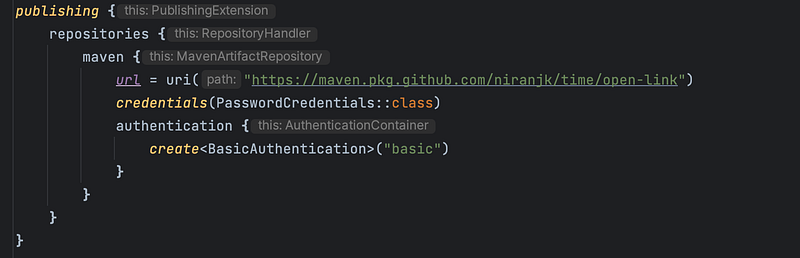
Note*:
We use the BasicAuthentication as the authentication mechanism
The PasswordCredentials::class looks at the mavenUsername and mavenPassword to authenticate the request.
It’s a good practice to have these credentials in a seperate file that should be added to the .gitignore file to avoid unconsciously pushing it in your repository.
Also add to your build.gradle.kts[:root] level
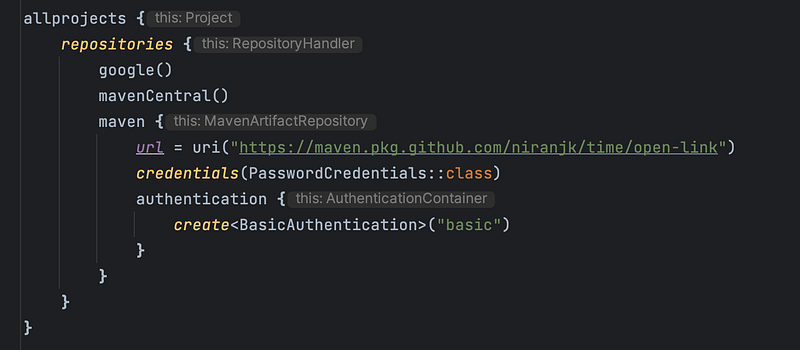
Add this again to publish your library:
build.gradle.kts[:androidApp]

build.gradle.kts[:shared]

Go to terminal and run the command:

You will get :

🏎️Step 5: Verify:
After successfully publishing your library, visit the GitHub Packages page for your repository to verify that your package is listed. Users can now easily discover, install, and use your library in their own projects.

niranjk - Packages
I am a natural programmer. Flutter | Android App Development - niranjk
github.com
🏎️Code:
🏎️Now finally you can use your packages:
settings.gradle.kts

build.gradle.kts[:androidApp]

build.gradle.kts[:shared]

> Configure project :shared
        w: Please use `androidTarget` function instead of `android` to configure android target inside `kotlin { }` block.
See the details here: https://kotl.in/android-target-dsl
Download https://maven.pkg.github.com/niranjk/time/open-link/com/niranjan/khatri/shared/open-link-iosarm64/1.0/open-link-iosarm64-1.0.module, took 608 ms (3.43 kB)
Download https://maven.pkg.github.com/niranjk/time/open-link/com/niranjan/khatri/shared/open-link-iossimulatorarm64/1.0/open-link-iossimulatorarm64-1.0.module, took 515 ms (3.54 kB)
Download https://maven.pkg.github.com/niranjk/time/open-link/com/niranjan/khatri/shared/open-link-iosx64/1.0/open-link-iosx64-1.0.module, took 479 ms (3.41 kB)
Download https://maven.pkg.github.com/niranjk/time/open-link/com/niranjan/khatri/shared/open-link-iosarm64/1.0/open-link-iosarm64-1.0-metadata.jar, took 506 ms (4.49 kB)

> Task :commonizeNativeDistribution UP-TO-DATE
> Task :commonize UP-TO-DATE
> Task :prepareKotlinIdeaImport UP-TO-DATE
> Task :shared:commonizeCInterop UP-TO-DATE
> Task :shared:copyCommonizeCInteropForIde UP-TO-DATE
> Task :shared:commonize UP-TO-DATE
> Task :shared:generateDummyFramework UP-TO-DATE
> Task :shared:podspec UP-TO-DATE
> Task :shared:podInstall UP-TO-DATE
> Task :shared:podImport UP-TO-DATE
> Task :shared:transformNativeMainCInteropDependenciesMetadataForIde
> Task :shared:transformAppleMainCInteropDependenciesMetadataForIde
> Task :shared:transformIosMainCInteropDependenciesMetadataForIde
> Task :shared:transformNativeTestCInteropDependenciesMetadataForIde
> Task :shared:transformAppleTestCInteropDependenciesMetadataForIde
> Task :shared:transformIosTestCInteropDependenciesMetadataForIde
> Task :shared:prepareKotlinIdeaImport
> Task :prepareKotlinBuildScriptModel UP-TO-DATE

Deprecated Gradle features were used in this build, making it incompatible with Gradle 9.0.

You can use '--warning-mode all' to show the individual deprecation warnings and determine if they come from your own scripts or plugins.

See https://docs.gradle.org/8.1/userguide/command_line_interface.html#sec:command_line_warnings

BUILD SUCCESSFUL in 21s
        16 actionable tasks: 6 executed, 10 up-to-date
> Task :prepareKotlinBuildScriptModel UP-TO-DATE

Deprecated Gradle features were used in this build, making it incompatible with Gradle 9.0.

You can use '--warning-mode all' to show the individual deprecation warnings and determine if they come from your own scripts or plugins.

See https://docs.gradle.org/8.1/userguide/command_line_interface.html#sec:command_line_warnings

BUILD SUCCESSFUL in 500ms


