
How To: Proxmox on Hetzner with a subnet
Hetzner have built a reputation for being a high-value position for servers with their ‘server auction’ servers going for bargain-basement prices. With this, there are some upsides, in that it's very affordable to host your own server with games or applications or website, but there are downsides too, in that abuse is more prevalent and sending emails via Hetzner will be a lot more of a challenge, plus support is a lot more automated so if the ‘robot’ doesn't work it may be more of a challenge.
With all that said, Hetzner is great to run your own Proxmox server. Lots of resources and low prices. You can have the option to spin up virtual machines, test things and blow them away at the end with little cost. When I was setting up my Proxmox instance I found lots of guides on how to do it, but no working guides that show you how to use a routed subnet rather than buying individual IPs and getting an additional MAC address. So that's what this guide will do!
Getting started
The first job is to get the server built with Debian.
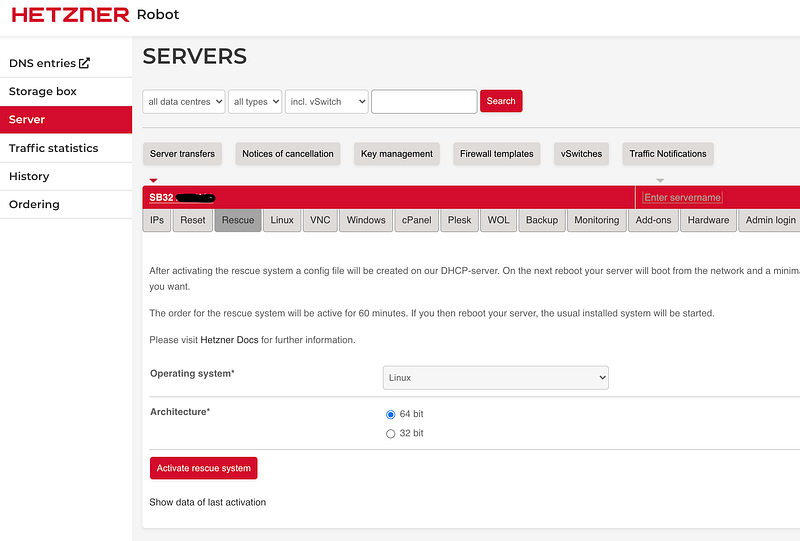
Log into Robot and select your server. Click the Rescue tab. Activate using 64bit Linux. Reboot the server using the reset tab, or a normal reboot if the server is working currently.
Once that has booted you can SSH into the rescue mode using the password provided. This same password will later become the root password of the server. Create the install file:
vi install-config.txt
This is the file I used but you need to think about your partition layout, RAID configuration and ensure sizing works for your needs, plus edit the hostname!
DRIVE1 /dev/sda
DRIVE2 /dev/sdb
SWRAID 1
SWRAIDLEVEL 1
BOOTLOADER grub
HOSTNAME pve.yourdomain.co.uk # Set correct hostname
PART /boot ext4 512M
PART lvm vg0 all
LV vg0 root / ext4 2800G
LV vg0 swap swap swap 8G
IMAGE /root/.oldroot/nfs/install/../images/Debian-1101-bullseye-amd64-base.tar.gzInitiate the install with the command:
installimage -a -c install-config.txt
That will go through about 17 stages. You don't need to do anything except watch the magic happen!
Configure Debian
So the install completed, give the server a reboot to get into proper Debian, and SSH back in using the password created by the rescue system.
I find it best to ensure the OS is fully updated first off:
apt update
apt -y full-upgrade
Followed by another reboot.
Next up is the PVE repo and install:
echo "deb http://download.proxmox.com/debian/pve bullseye pve-no-subscription" | sudo tee /etc/apt/sources.list.d/pve-install-repo.listwget http://download.proxmox.com/debian/proxmox-release-bullseye.gpg mv proxmox-release-bullseye.gpg /etc/apt/trusted.gpg.d/proxmox-release-bullseye.gpg chmod +r /etc/apt/trusted.gpg.d/proxmox-release-bullseye.gpgapt updateapt install proxmox-veHopefully, that installed all correctly. You can now access Proxmox via https://youripaddress:8006 You will need to ignore the SSL cert warning.
IP Addresses
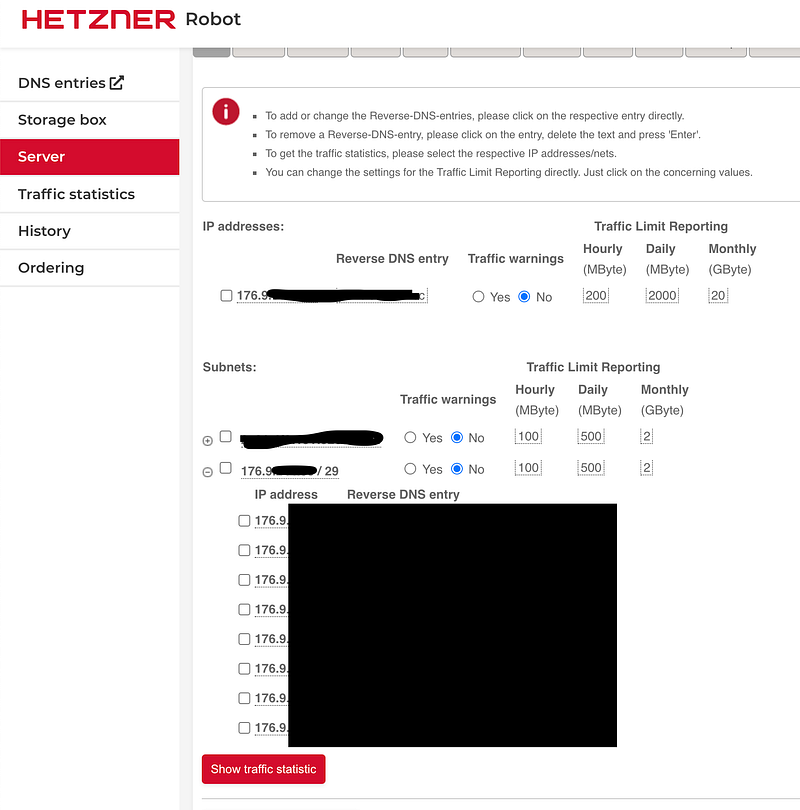
Hopefully, you have bought your subnet already and are ready to go. If you have a /29 as I do here that gives you 8 IP addresses. The very first one is the network address and not useable here, the last one is the broadcast address and again not useable. So we are going to take the second address and use that on our bridge.
Edit the file /etc/network/interfaces and we are going to add in a bridge interface. The code to add should look something like this:
auto vmbr0
iface vmbr0 inet static
  address <2nd IP in the list>
  netmask <netmask of the subnet eg 255.255.255.248>
  bridge_ports none
  bridge_stp off
  bridge_fd 0
This is the final file with the extra bridge added:
# /etc/network/interfaces
### Hetzner Online GmbH - installimage
# Loopback device:
auto lo
iface lo inet loopback

# device: enp1s0
auto enp1s0
iface enp1s0 inet static
  address <main IP>
  netmask 255.255.255.255
  pointopoint <gateway IP>
  gateway <gateway IP>

iface enp1s0 inet6 static
  address <address from the IPv6 subnet> #e.g. 2001:db8::2
  netmask 128
  gateway fe80::1
  up sysctl -p

auto vmbr0
iface vmbr0 inet static
  address <2nd IP in the list>
  netmask <netmask of the subnet eg 255.255.255.248>
  bridge_ports none
  bridge_stp off
  bridge_fd 0
I simply rebooted the host to have a nice clean boot ready to go!
First Guest
Ok so we are getting ready to set up your first virtual server to run the as a guest on the Proxmox box.
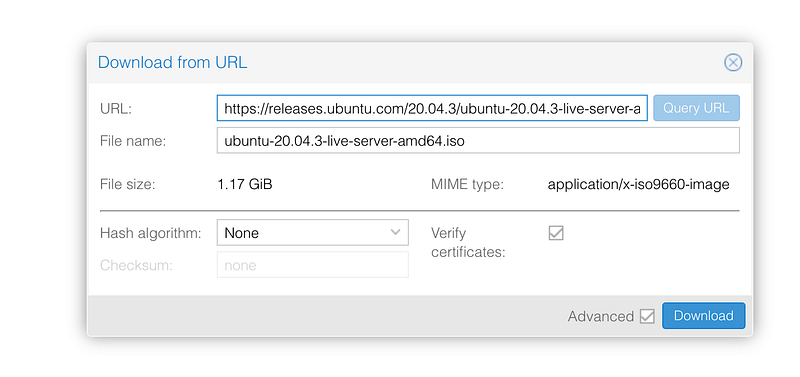
We are going to need an ISO to install from. Im going to use ubuntu. I have the download link from the Ubuntu site: https://releases.ubuntu.com/20.04.3/ubuntu-20.04.3-live-server-amd64.iso
In Proxmox navigate to the storage and the ISO section. Then the button at the top ‘Download from URL’ allows Proxmox to directly go out and get the needed ISO file. This makes life so much easier than having to download and reupload.
In the pop up put the URL in and click ‘Query URL’. Proxmox does the magic and ensures it will work.
Create the VM
Ok finally ready to create the VM. Top right there is the blue ‘Create VM’ button. This will guide us through creating the VM.
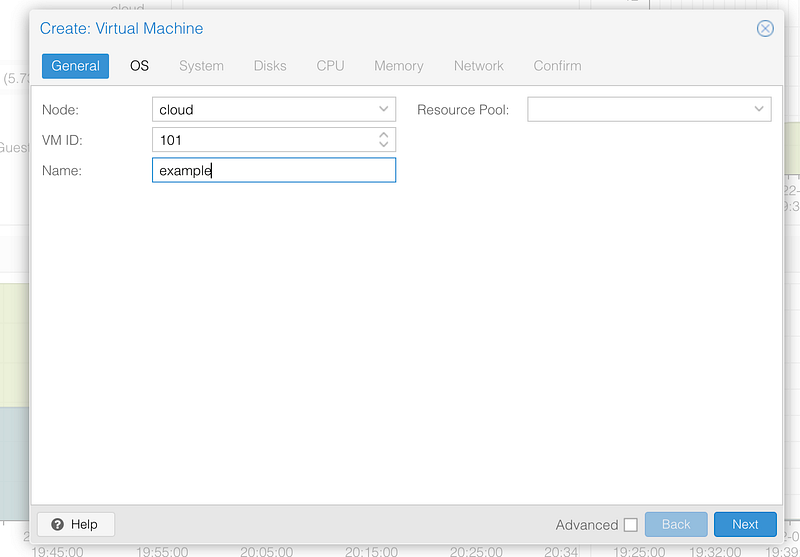
In the first screen we just need to give it a name and click Next:
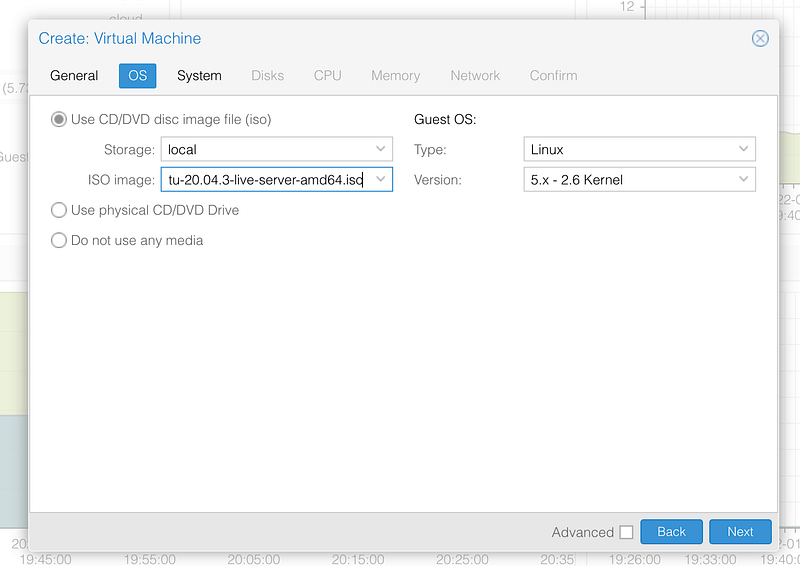
Select the ISO and Next:
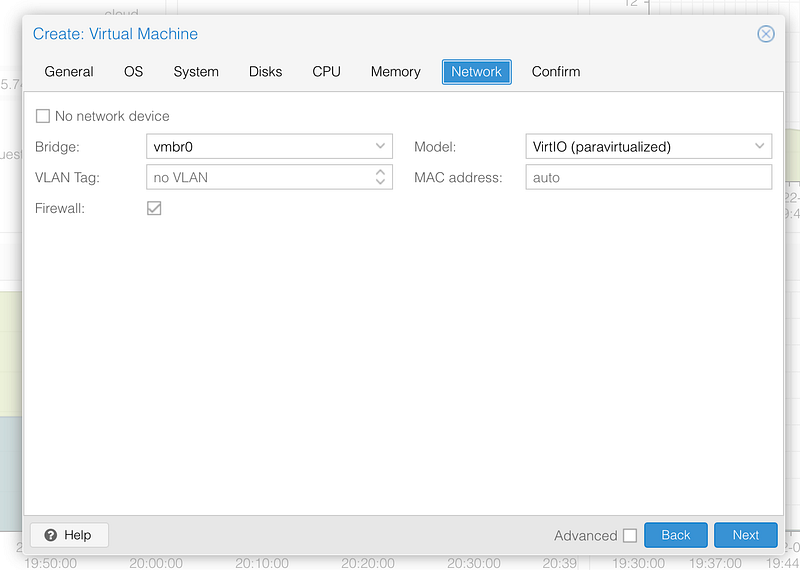
System can be default, Disk can be default but you might want to give more disk space if you need, CPU you need to add additional CPUs if you desire, memory again add more if desired. Lastly, the key step is to ensure vmbr0 is the network interface!
Confirm that and start the machine.
Guest Settings
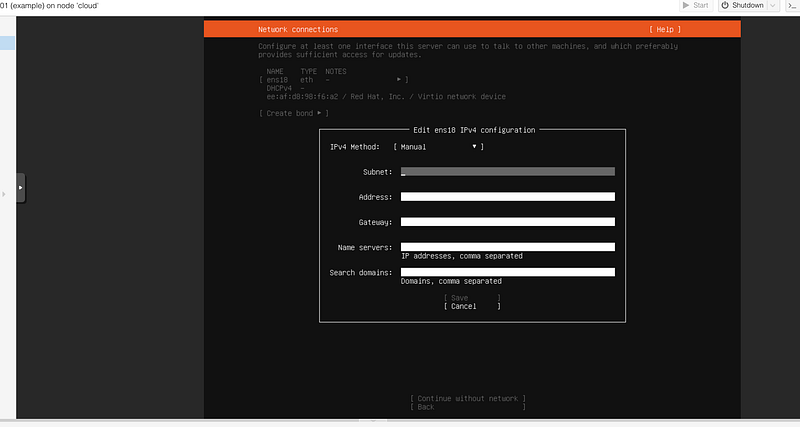
Final steps now! Follow your guest operating set up steps through to the network set up. When you get to the place in your new OS to enter the setting you are going to need to enter:
Subnet: the first IP of the subnet and the CIDR notation so mine is 176.9.x.x/29 Address is the IP in the range you want to use for this VM: 176.9.y.y Gateway is the IP you used on vmbr0 Name Servers are the DNS you want to use. I typically use 8.8.8.8 and 1.1.1.1 Leave the searchdomain blank.
Save the settings and continue with the rest of the OS set up. With a tiny bit of luck everything is working as expected and you have your first working VM ready to go!
Let me know how you get on and if you have any issues! What do you think of Hetzner as a provider? As of writing this guide their prices have significantly gone up, are you looking elsewhere?
If this guide was useful it would really be appreciated if you wanted to buy me a coffee!


