
How to Obtain an Access Token by using Username Only With Keycloak
Generate an access token for users dynamically using only the username

Do you need to obtain an access token only with a username? How to make this secure enough? Can Keycloak admin client create users with(without) dummy passwords?
Developers are having this issue as there’s no OAuth2 flow for this scenario. You don’t have a clear way to obtain tokens using only a username.
Here’s one relevant issue: KEYCLOAK: Obtaining Access token by ‘user name’ only (without password) — Stack Overflow. And another similar: how can I generate a Keycloak user access token without a password?
This issue bothers people. An issue without concrete steps to solve. So let’s try to solve it.
Let’s define the issue first.
Let’s say you want to issue tokens for your new or existing users. You want to create new users using an API (admin confidential client) and fetch the new tokens for your frontend (public) clients. Or you want to fetch new tokens for existing users.
An issue like this is where Keycloak's extensibility excels. We’ll use Token Exchange and Action Token SPI to accomplish the previous task.
Let’s go step by step on what you’ll need to accomplish this task.
1. Starting with the magic link repo
You’ll need a starting point for sending out magic links.
Magic links should come in the form of a short-lived action token. This way we can ensure the access token doesn’t get leaked. Also action token ensures the user can commit only certain actions and limited scope.
A good starting point for getting the magic link code is this repo: GitHub — p2-inc/keycloak-magic-link: Magic Link Authentication for Keycloak
From this repo, we’ll use everything related to the magic link.
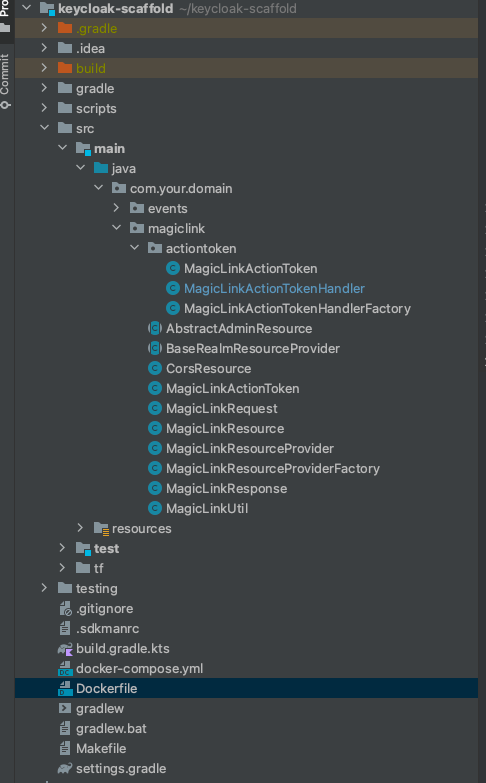
We won’t need authenticators, as we’ll right away issue tokens and start the session. So here’s what classes you’ll need for this part.
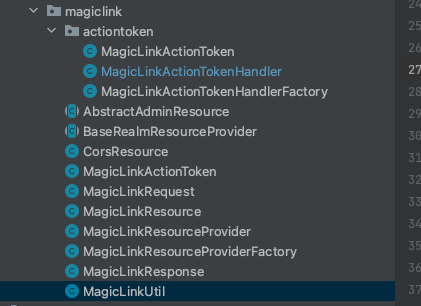
All these will give you a good starting point for generating the magic link. Sending part is also done within MagicLinkResource.
2. Handle action token and exchange it for an access token
The next part that we should change is the token handler. If you’d like to login user using the magic link, the current implementation works fine. But we’d want to fetch access tokens and log in the user.
So we’ll need to use token exchange and impersonation. You’ll need to setup direct naked impersonation and internal token exchange.
The flow will go like the following:
- Admin client requests the new magic link for the user
- Custom magic link resource creates new user/fetches existing user and creates the action token
- Custom magic link resource sends out the magic link
- The token handler exchanges the token from the magic link for the non-admin client (FE) and redirects
The meat of the action token handler should be in the form of this code:
// if needed we can omit this password setting
// if you'll use access token solely you don't need to set password
CredentialRepresentation cred = new CredentialRepresentation();
cred.setValue(TEST_PASSWORD);
user.credentialManager().updateCredential(
    UserCredentialModel.password(cred.getValue(), true));
Cors cors;
try {
  cors = new Cors(new HttpRequestImpl(MockHttpRequest.create("GET", token.getRedirectUri())));
} catch (URISyntaxException e) {
  throw new RuntimeException(e);
}

TokenExchangeProvider defaultTokenExchangeProvider = tokenContext.getSession().getProvider(TokenExchangeProvider.class);
MultivaluedMap<String, String> formParams = new MultivaluedHashMap<>();
formParams.add(REQUESTED_SUBJECT, token.getUserId());
// this should be the admin client
formParams.add(CLIENT_ID, "test-admin");
// this should be the target client
formParams.add(AUDIENCE, token.getIssuedFor());
org.keycloak.protocol.oidc.TokenManager tokenManager = new org.keycloak.protocol.oidc.TokenManager();
Map<String, String> clientAuthAttributes = new HashMap<>();
clientAuthAttributes.put("client_id", token.getIssuedFor());
var resp = defaultTokenExchangeProvider.exchange(new TokenExchangeContext(
    tokenContext.getSession(),
    formParams,
    cors,
    tokenContext.getRealm(),
    new EventBuilder(tokenContext.getRealm(), tokenContext.getSession()).event(EventType.TOKEN_EXCHANGE),
    tokenContext.getRealm().getClientByClientId("test-admin"),
    tokenContext.getClientConnection(),
    tokenContext.getRequest().getHttpHeaders(),
    tokenManager, clientAuthAttributes
    ));
OIDCRedirectUriBuilder redirectUriBuilder = OIDCRedirectUriBuilder.fromUri(redirect, OIDCResponseMode.QUERY, null, null);
var accessTokenResponse = (AccessTokenResponse) resp.getEntity();
redirectUriBuilder.addParam(OAuth2Constants.ACCESS_TOKEN, accessTokenResponse.getToken());
redirectUriBuilder.addParam(OAuth2Constants.REFRESH_TOKEN, accessTokenResponse.getRefreshToken());
redirectUriBuilder.addParam(OAuth2Constants.TOKEN_TYPE, accessTokenResponse.getTokenType());
redirectUriBuilder.addParam(OAuth2Constants.EXPIRES_IN, String.valueOf(accessTokenResponse.getExpiresIn()));

return redirectUriBuilder.build();
The code above exchanges the token generated by test-admin the client for test client for further use. This represents a direct naked impersonation, as the admin can impersonate any user in the system.
In essence, the code above does the following call:
curl -X POST \
    -d "client_id=test-admin" \
    -d "client_secret=the client secret" \
    --data-urlencode "grant_type=urn:ietf:params:oauth:grant-type:token-exchange" \
    -d "requested_subject=userId" \
    http://localhost:8080/realms/myrealm/protocol/openid-connect/token
The good thing about this approach is that our admin client exchanges the tokens for the less secure test client. Meaning our test client can be a public client, while test-admin the client can be a confidential client.
3. Add the permissions
Two permissions you’ll need to have:
Without these permissions you may run into issues such as :
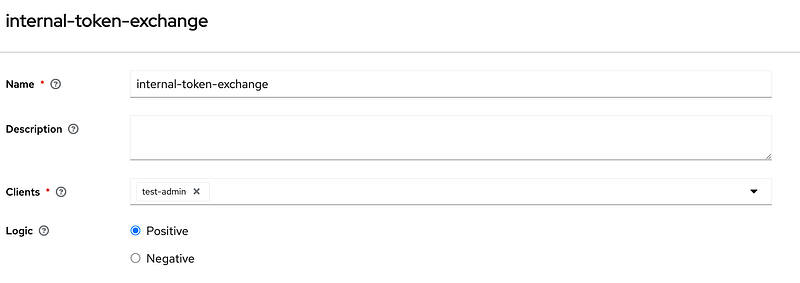
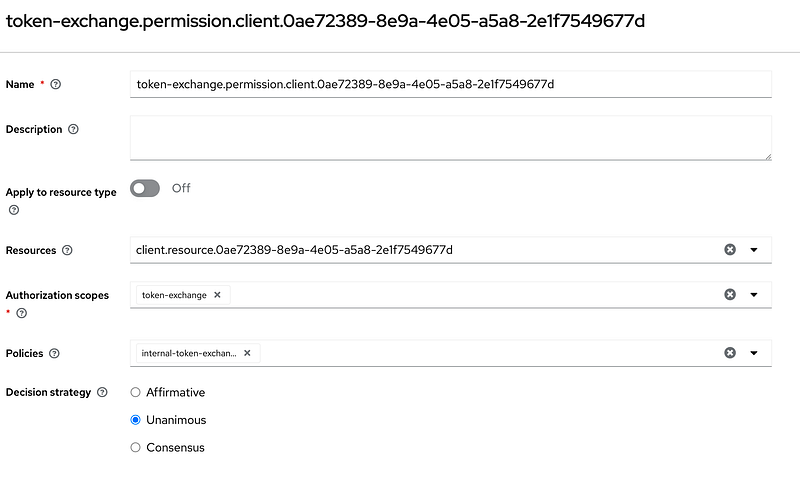
"error_description": "Client not allowed to exchange"The first permission is for the target client. This permission enables the source client token to be exchanged for the target client. To accomplish this you need client policy with the source client added as permission on the target client.
Client policy with start client test-admin is starting client in our case.
And dependent permission:
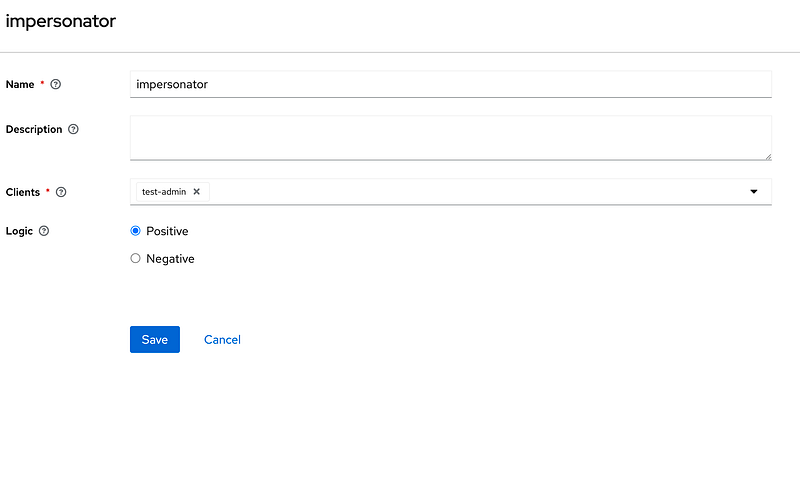
Second permission needs to be added to users. And this permission will enable test-admin to impersonate users.
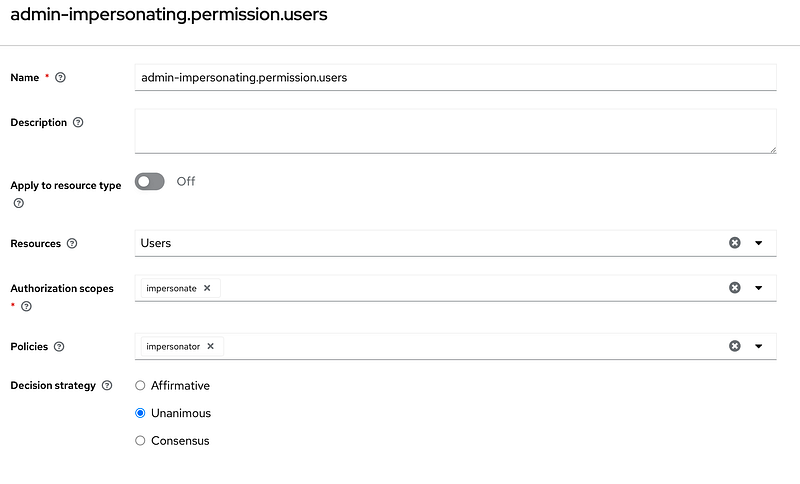
For the previous permissions, you’ll also need to enable features admin-fine-grained-authz and impersonation. Otherwise, the previous fine-grained authorization and impersonation won't be available.
4. So what’s the end result?
What we got is a magic link that can register & login users and gives us back the access token.
Do you need the whole project packaged up?
If you need the whole project setup for you to use visit my Gumroad.
Direct naked impersonation packaged up as Keycloak extension
What you’ll get when you buy the project?
- Full setup for Keycloak with nginx in docker-compose
- Gradle setup for building the extension
- Setup to build the custom Keycloak image
- Exported realm ready to use
- Basic theme setup to get started
- Magic link described in the previous article
Level Up Coding
Thanks for being a part of our community! Before you go:
- 👏 Clap for the story and follow the author 👉
- 📰 View more content in the Level Up Coding publication
- 💰 Free coding interview course ⇒ View Course
- 🧠 AI Tools ⇒ View Now
🔔 Follow us: Twitter | LinkedIn | Newsletter
🚀👉 Join the Level Up talent collective and find an amazing job


