
How to Maximize Your Writing Productivity With One Google Sheet
It’s about writing, not being busy

If you’re like me, when you have a new story idea, you immediately open a new story and start writing, even if it’s just a title. I have over 50 story ideas thus far in my drafts. You most likely start every new writing day by scrolling through your drafts to see what you’re going to write from a long list of incomplete stories. However, this is not the most productive way to get writing done, in fact, it waste’s more time.
Scrolling through your drafts with no idea where to start will most likely lessen your want to even try to write. Who wants to write about something they aren’t feeling passionate about when they don’t want to write at all?
While I recommend starting every idea as a draft, I don’t recommend this being your only place to organize your stories. Whatever you’ve edited most recently usually sits on top of your drafts, which can be great unless whatever you’ve worked on most recently isn’t even close to being done.
A great quote by Tim Ferriss author of the New York Times Best-Seller 4-Hour Work Week said it best:
“Focus on being productive instead of busy.”
In this quote, Tim Ferriss is saying that you can look and feel busy without getting much done.
Every day before writing, I do a mental check-in with myself to see how productive I’m feeling — do I feel passionate enough about a story idea to write it in its entirety? Or am I more in the mood to just edit? Once I’ve done this I check my Google Sheets to see what needs to be done. And what I feel up to doing.
It’s much better to be productive with your time writing by focusing your attention on one or two stories you are passionate about and getting them done. Then, coming back to the other stories later.
So let’s do that, let’s make your writing time productive to your overall improvement instead of just keeping you busy.
To Get You Started
Pick five to ten stories you are the most interested in writing about
These stories are the ones you are going to put in your Google Sheets document to get started, as to not immediately overwhelm yourself. Pick the ones that if you were told to start and finish right now you’d have enough interest in the topic to do it. Leave the stories that are no longer engaging you for later.
Go through each story and decide how much writing needs to be done
If it’s just a title, think about how long you expect it to be. If it’s almost done but needs to be edited, mentally make a note of that. Also, note if you want to self-publish or if you want to submit to a publication. You can always change your mind later, but this is good to start thinking about.
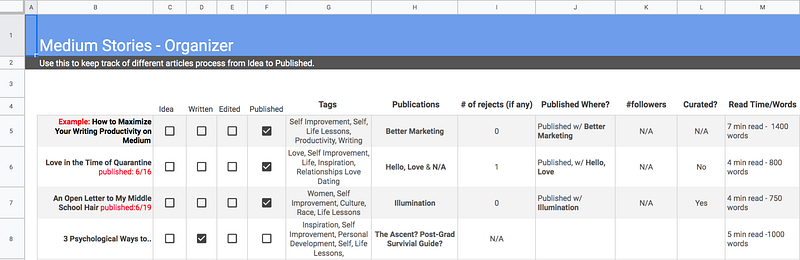
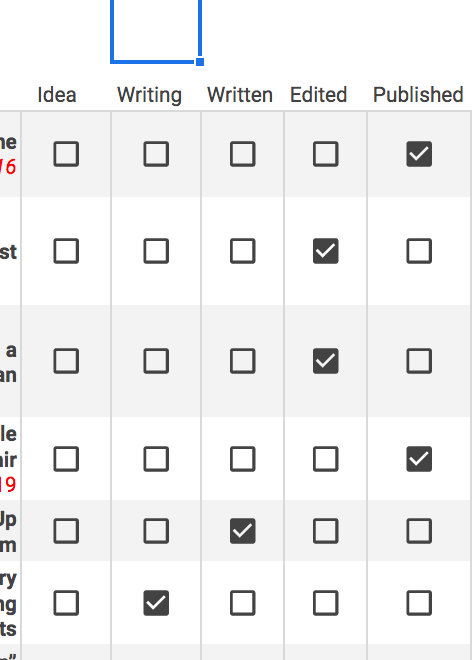
By the end of this article you should have a google sheet document that looks like this:
This is the link to my google sheets template, which you can copy into your google drive.
Now Let’s Start on Google Sheets.
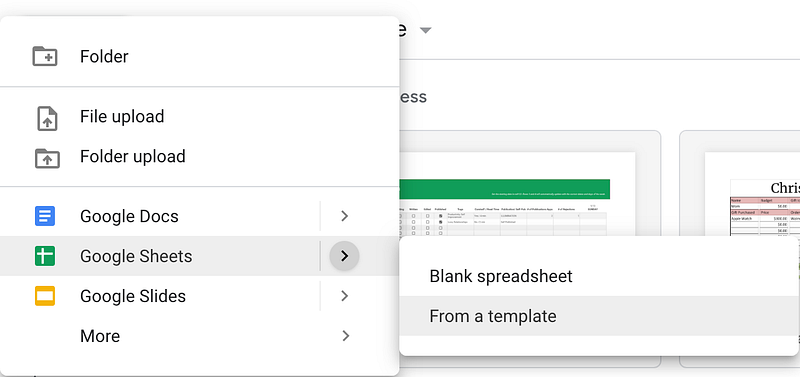
When you open up your google drive, click on new, then slide your arrow next to Google Sheets and choose “From a template.” Click on the template that says “schedule.”
It should look like this when opened:
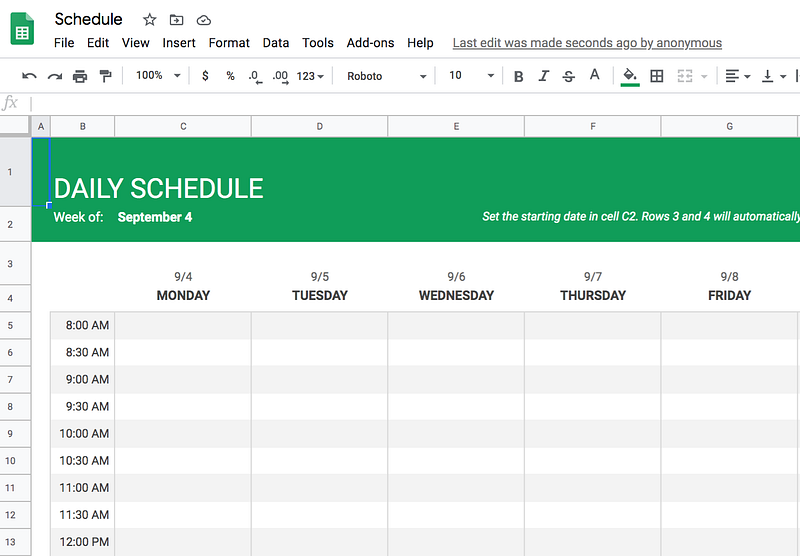
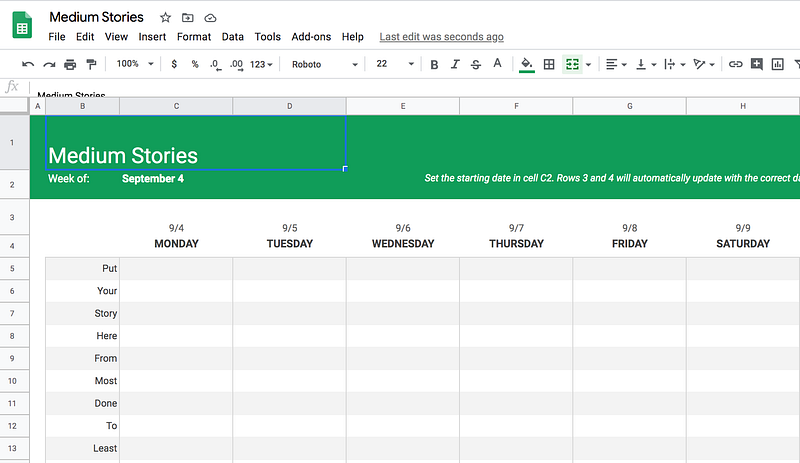
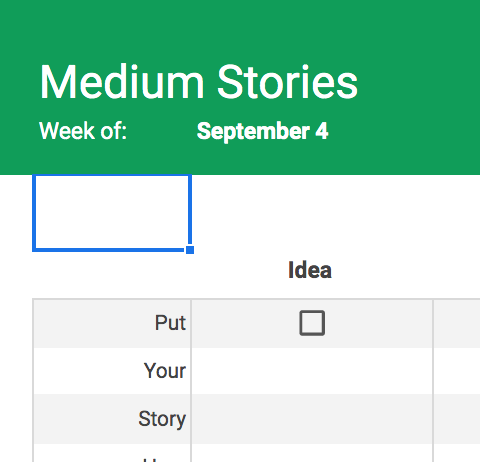
1. Rename the document from Schedule & Daily Schedule to whatever you want.
For this example, I titled mine: Medium Stories. Also, I didn’t for this example, but feel free to change the week section to whatever you want, a follower goal, story goal, money goal, etc.
2. Go through and Erase the Times in the B Column.
Put a story title in each #’d row. You can start the list with the story closest to being done and move down the list. If you want more space for your story titles, click on the letter column that the titles are in (in my case my titles are in column B). Hover over the end of the letterbox (B) and when the black arrow — pointing right — shows up move it to the right/left as far as you want.
3. Checkboxes to Show Each Stories Progress
Now, here is where I am going to add something that isn’t on this schedule but I find very helpful.
I make checkboxes for each story to show it’s progress. Starting from idea all the way to publish. This can be a little confusing so follow along closely.
On my personal Google Sheets document I have five columns for a story’s progress: Idea, Writing, Written, Edited, and Published. Here’s how I did it:
If you don’t like how this looks and don’t want to do it, feel free to skip to #4.
3.1. Rename Monday to Idea. Now, go down one row, this should put you in the same row as your first story title. Click on insert and click on the checkbox.
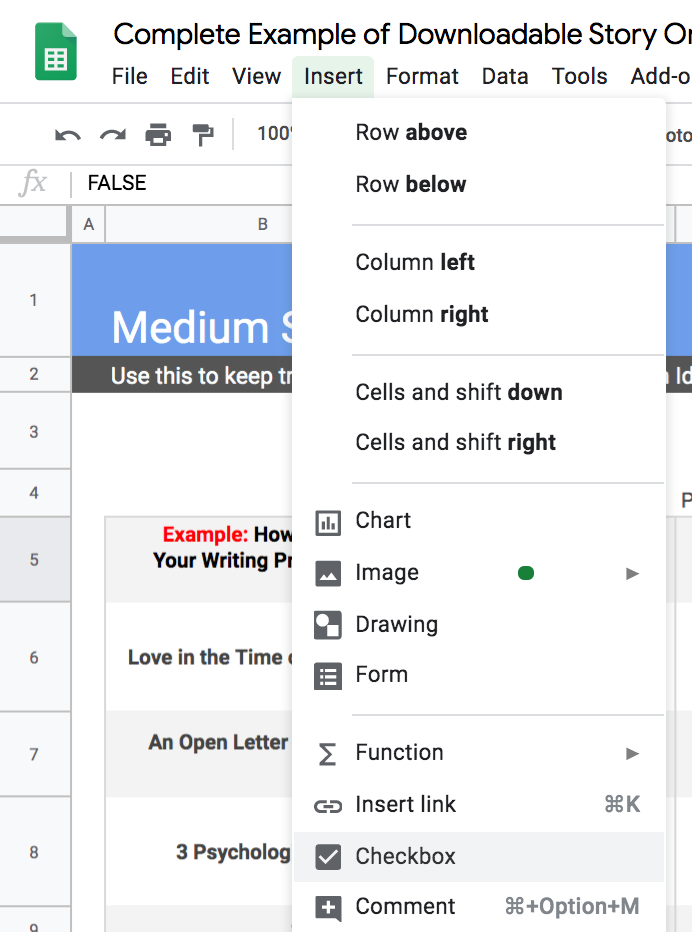
After doing that, it should show up in the box like this:
3.2. Now go down the row, copy step #1, and add a checkbox in the entire column under idea.
I recommend going all the way down the first time so you don’t have to do it again later. Don’t check any of the boxes yet, even if the story in that row is just an idea. Now, once you have checkboxes in the entire column under idea we’re going to duplicate that and create an entirely new row.
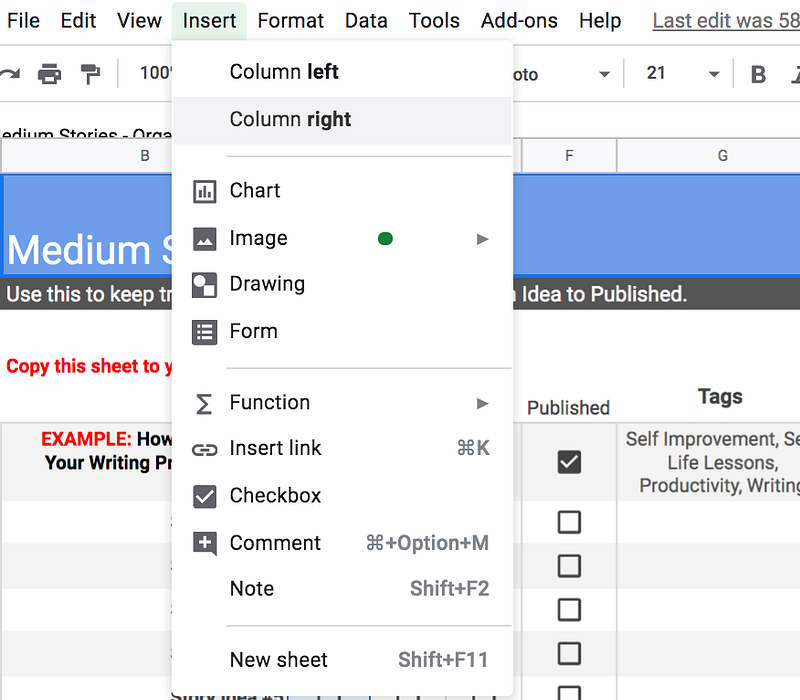
3.3. Click on the letter that is above the column, in this case, my idea column is under C.
Click on C so the entire column is blue, then click insert and click column right. This will create a new column with new checkboxes right next to the idea column. Title this column writing.
3.4. Keep repeating this step until you have the number of columns for checkboxes that you want.
You might find it more effective to have less or more. Now you can go through and check off each story’s current progress.
After you’ve done this if you want the columns to be smaller, copy the process from earlier (step #2) to make the columns smaller like my above photo with all my checkboxes.
4. Rename All the Days of the Week to Story Related Titles
Now, this is where you get to customize your sheet the way you want. Do you want one column where you put in the tags for each story so you know what tags you’ve written in? Or how about a column for the publications your story has been published in? Or whether or not your stories been curated? Don’t over complicate things for yourself, it’s okay to only have a few columns for now.
Feel free to add more checkboxes if you want. Take this time to think about what would help you be the most productive. What lists will help you organize your stories to benefit you the best? Here is a simple example:

5. Design the Sheet to Benefit You
For me, when I publish a story I add the date in red into the same box that the story title is in. I also like to keep track of not only what publication my story is published under but where my story was rejected. This way I know in the future what works for a publication and what doesn’t. These are both just preferences, mess around and see what feels right to you.
Now, if used regularly this can increase your productivity. I’ve already seen an increase in my productivity. I have sent several stories off to publications in the last few days, I finished an entire story today that I am now editing, along with both starting and finishing this story as well. I am feeling especially productive today so take that into account, not every day can be like this.
Also, just getting to move my checkmark from writing to written or from edited to published gives me a great sense of accomplishment. It’s an observable way to see that I’m getting work done. If you want to publish more often and make writing every day a habit, this list will help keep you accountable. Even if it’s only a five-minute check-in before you start your writing for the day.
So the next time you go to click on your stats for the tenth time that day, decide to instead open your Google Sheets document and get some work done.