
How To Manage Sessions in Node.js Using Passport, Redis, and MySQL
A dive into the world of session management
HTTP and HTTPS are internet protocols that allow data to be sent over the internet by sending a request via a web browser. Because they are stateless, each request sent to the browser is treated independently. This means that the browser cannot remember the source of a request, even if the same user makes it. HTTP sessions solve this problem.
This article will look at session management and how tools like Passport, Redis, and MySQL can help us manage Node.js sessions. Let’s dive in.
How Do HTTP Sessions Work?
HTTP sessions allow web servers to maintain user identity and store user-specific data across multiple request/response interactions between a client app and a web app. When a client logs into the application, the server generates a SessionID. The session is saved in memory using a single-server, non-replicated persistent storage mechanism. Examples of such mechanisms include JDBC persistence, file system persistence, cookie-based session persistence, and in-memory replication.
When the user sends a subsequent request, the sessionID is passed in the request header, and the browser checks if the ID matches any on in the memory storage and grants the user access until the session expires.
HTTP sessions store the following data in memory:
- Specifics about the session (session identifier, creation time, time last accessed, etc.)
- Contextual information about the user (for example, client login status)
What is Redis?
Redis (Remote Dictionary Server) is a fast, open source, in-memory key-value data store used as a database, cache, message broker, and queue.
Redis has sub-millisecond response times, allowing millions of requests per second for real-time applications in industries such as gaming, ad-tech, finance, healthcare, and IoT. As a result, Redis is now one of the most popular open-source engines, having been named the “Most Loved” database by Stack Overflow five years in a row.
Due to its fast performance, Redis is a popular choice for caching, session management, gaming, leaderboards, real-time analytics, geospatial, ride-hailing, chat/messaging, media streaming, and pub/sub-apps.
What Are We Building?
To demonstrate session management in Node.js, we will create simple signup and sign-in application. Users will sign up for and sign in to this application by providing their email address and password. A session is created and saved in the Redis store for future requests when a user signs in. When a user logs out, we will delete their session. Enough talking. Let’s get started!
Prerequisites
This tutorial is a hands-on demonstration. Ensure you have the following installed before getting started:
The code for this tutorial is available on my GitHub repository. Feel to clone and follow along.
Project setup
Let’s start by creating a project folder for the application with the command below:
mkdir Session_management && cd Session_managementThen, initialize a Node.js application to create a package.json file with the command below:
npm init -yThe -y flag in the above command tells npm to use the default configuration. Now create the following folder structure in your project root directory.

With our package.json created, let’s install the required package for this project in the next section.
Installing Dependencies
We’ll install the following dependencies for our application:
Bcryptjs— This module will be used to hash the user’s password.Connect-redis— This module will provide Redis session storage for Express.Express-session— This module will be used to create sessions.Ejs— This module is our template enginePassport— This module will be used for user’s authenticationPassport-local— This module will be used for local username and password authenticationSequelize— This module is our MySQL ORM to connect our application to MySQL database.Dotenv— This module will be used to load our environment variables.
Use the command below to install all the required dependencies.
npm install bcryptjs connect-redis redis express-session ejs passport passport-local sequelize dotenvWait for the installation to finish. Once the installation is complete, proceed with setting up the MySQL database in the next section.
Setting up MySQL Database
We’ll create a MySQL database for our application. But before that, run the command below to create a MySQL user account:
CREATE USER 'newuser'@'localhost' IDENTIFIED BY '1234';Now create a database, session_db, and grant the newuser access to the database with the command below:
#Create database
CREATE DATABASE session_db;

 #grant access
GRANT ALL PRIVILEGES ON session_db TO 'newuser'@'localhost';

ALTER USER 'newuser'@'localhost' IDENTIFIED WITH mysql_native_password BY '1234';
Now reload all the privileges with the command below:
FLUSH PRIVILEGES;With our MySQL database setup, let’s create our users database model in the next section.
Create Express Server
With our MySQL database setup, let’s create an express server for our application. Open the src/server.js file and add the code snippet below:
In the above code snippet, we create an express server, which will listen to requests on Port 4300. Then, we parse the incoming requests with JSON payloads using the express.json() middleware and parse incoming requests with urlencoded using Express.urlencoded() middleware.
Create the Database Model
At this point, our Express server is set. Now we’ll create a Users model to represent the user data we'll see the database using Sequelize. Open the src/models/index.js file and add the code snippet below:
In the above code snippet, we import Sequelize and DateTypes from sequelize to connect to our MySQL database and assign a data type to our model properties. Then, we connect to MySQL by creating a sequelize instance from the Sequelize class and passing in our database credentials. For example, with the sequelize instance, we defined our model and its properties. We only want this tutorial's id, email, and password fields. But sequelize creates two additional fields, the createdAt and updatedAt fields.
Setup Passport and Redis
To handle and store our user’s credentials, we’ll use and configure Redis. To do that, open the src/index.js file and import the following dependencies below:
const session = require("express-session");
const connectRedis = require("connect-redis");
const dotenv = require("dotenv").config()
const { createClient } = require("redis");
const passport = require("passport");
Then, locate the area commented //Redis configurations and add the code snippet below:
const redisClient = createClient({ legacyMode: true });
redisClient.connect().catch(console.error);
const RedisStore = connectRedis(session);
In the above code snippet, we established a connection to our database, which will manage our user’s username data.
Next, locate the area commented //Commented session middleware and add the code snippet below:
In the above code snippet, we created a SESSION_SECRET variable in a .env file to hold our session secret, then created a session middleware and used Redis as our store. For the session to work we add two more middlewares the passport.initialize(), and passport.session().
Create Application Controllers
With our Redis and express session setup, we’ll create a route to handle users’ information. To do that, open the src/controllers/index.js file and add the code snippet below:
In the above code snippet, we import bcrypt and our User model, we destructure the user's email and password from the req.body object. Then we hashed the password using bcrypt and create a new user using the sequelize create method.
Next, create a home page, registration page, login page with the code snippet below:
In the HomePage, we’ll render some of the authenticated user’s details alongside the home view.
Finally, create the logout route, to delete the user's username data with the code snippet below:
exports.Logout = (req, res) => {
 req.session.destroy((err) => {
   if (err) {
     return console.log(err);
   }
   res.redirect("/");
 });
};
Create the Passport Strategy
At this point, users can register, log in, and log out of our application. Now, let’s create the passport strategy to authenticate the users and create a session. To do that, open the src/utils/passport.js file, and add the code snippet below:
In the above code snippet, we import passport, bcrypt, and our User model, and we create a passport middleware to use the local-strategy. Then we rename the default file name to the field names ( email , password) we are using to authenticate the users. Now, we check if the user details exist in the database before a session can be created for them.
The Passport.serialize and passport.deserialize commands are used to persist the user's id as a cookie in the user's browser and to retrieve the id from the cookie when necessary, which is then used to retrieve user information in a callback.
The done() function is an internal passport.js function that takes the user id as the second parameter.
Create the Application Routes
With our passport strategy created, let’s proceed with creating routes for our controllers. To do that, open the src/routes/index.js file and add the following code snippet below:
In the above code snippet, we import our controller functions and created a route for them. For the signin route, we used the passport.authenticate method to authenticate the users using the local strategy in setup in the previous section.
Now back to our server.js file, we’ll create a middleware for our routes. Before that, we need to import our router and the passportConfig function.
const router = require("./routes");
const { passportConfig } = require("./utils/passport");
Then, we’ll call the passportConfig function right below the code in the areas commented //Configure session middleware.
passportConfig();Then, we’ll create our route middleware right after the area commented //Router middleware.
app.use(router);Create Our Application Views
With our routes created, we’ll create views rendered in our HomePage, LoginPage, and RegisterPage controllers. Before that, we'll set up our ejs view engine in the server.js file with a code snippet below right below the area commented //app middleware.
app.set("view engine", "ejs");Then, we’ll start with the home page, open the views/home.ejs file and add the following markup:
Here in our home page, we used bootstrap to add some styling to our markups. Then we check if the user is authenticated to show the logout button. Also, we display the user’s Email, sessionID, and ExpirationTime from the backend.

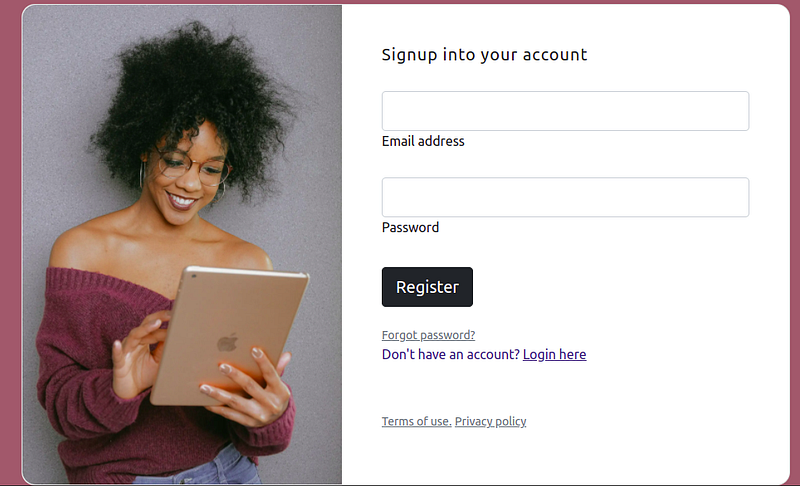
Next, open the src/views/auth/resgister and add the following markup below for the register page:
On the register page, we created an HTML form to accept the user's details. In the form, we also add the active attribute and specify the signup endpoint. This means that when a user clicks on the submit button, a request will be sent to the /api/v1/signup endpoint.
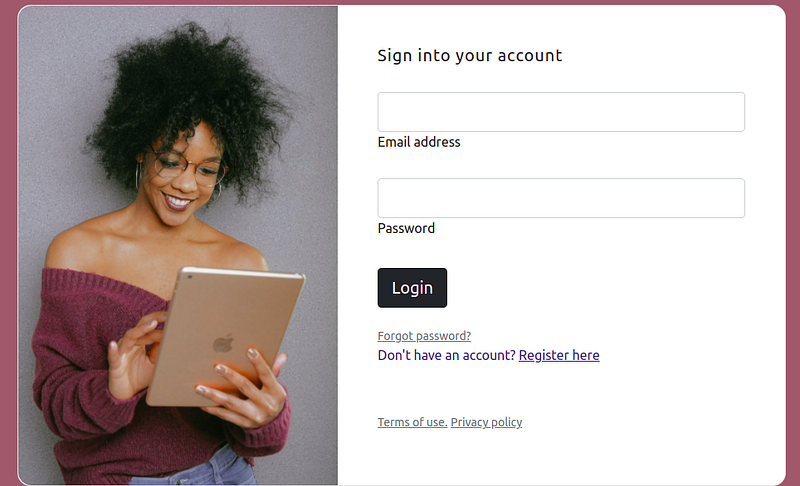
Finally, open the src/views/auth/signin.js file, and add the following markup snippet below:
In the above markup, we added an HTML form that will be used login a user by sending a request to the /api/v1/signin endpoint.
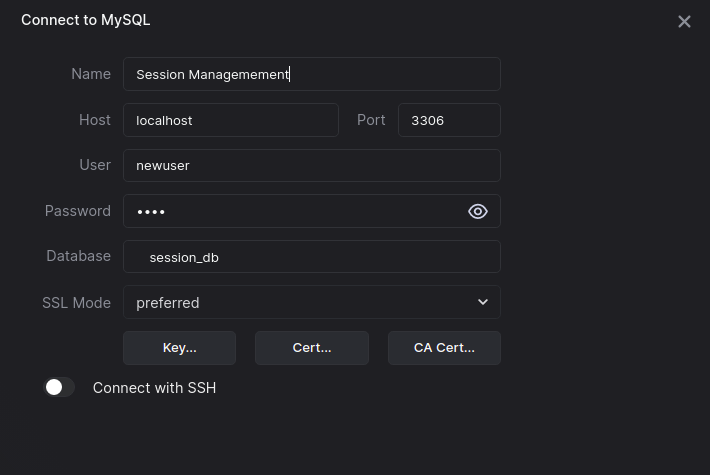
View Users’ Data With Arctype
We have now successfully created a Node.js session management application. Let’s look at the users’ data with Arctype. To begin, launch Arctype, click the MySQL tab, and enter the following MySQL credentials, as shown in the screenshot below:
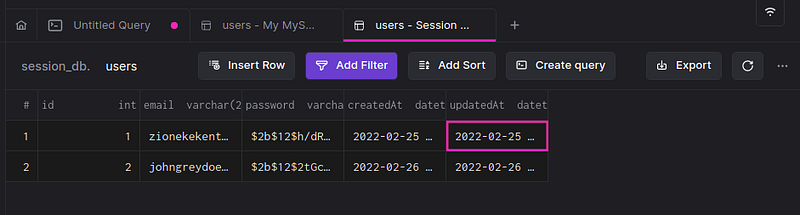
Then, click on the users table to show the registered users as shown in the screenshot below:
Conclusion
By building a demo login application, we’ve learned how to implement session management in Node.js using Passport and Redis. We started with the introduction of HTTP sessions and how they work, then we looked at what Redis is, and created a project to put all this into practice.
Now that you have the knowledge you seek, how would you authenticate users’ projects?


