
How To Make Your Writing Better in Four Easy Steps
Want to learn how to turn your rough draft into a polished article in four easy steps? Here’s how.

If you’re anything like me, you always look for ways to improve. Especially when it comes to your writing. I’m trying to learn how to compose better stories and make them more appealing, compelling, intriguing, and a pleasant reading experience.
One way to improve your writing is to edit it before you post. Of course, this won’t improve your article’s content — that’s another beast — but it’ll improve its readability and the overall experience for your reader.
Although it takes some extra time, proofreading and editing your articles will improve them. So keep reading to find out the four simple, easy, and free steps you can take after writing your posts to take them to the next level.
1. Walk away
Close the document and walk away.
Literally, if you can. Go watch TV, do some gardening, or bring the kids to the playground.
Engaging in other activities will give your brain a break. This breather will allow you to take some distance from your work. Then, when you come back, you’ll be able to see things with fresh eyes.

It isn’t always possible to take this step. Perhaps the deadline is looming, and you can’t afford to stop. If this is your case, try to work on something else for a couple of hours before jumping into edit mode.
The two main benefits of walking away are:
- Fresh eyes: editing your work requires you to catch your own mistakes. And that can be very hard. If you take some time off from your text, you’ll be able to see it with fresh eyes. This will allow you to spot problems that you’d otherwise have missed.
- Your brain continues working on it: you will stop working on that article, but your brain will not. And that’s a good thing. When you’re not actively thinking about a problem, sometimes you come up with ideas, solutions, or insights. Those aha moments won’t happen every time. When they do, though, they’ll add some extra oomph to your articles. Make sure to have a notepad (or a notes app) handy to write down anything interesting.
2. Read your work carefully
In an ideal scenario, you stepped away from your article for a day or two. Now it’s time for the first active step in your editing journey. It’s time to read your work carefully.
The first thing you’re looking for is structure. Check all your article’s components — headline, subheadline, introduction, body, and conclusion. You may find that you left an idea unfinished, or that your conclusion doesn’t align with something you added later. Next, ensure your text is nice to read, engaging, and flows logically.
You’ll also be checking all the elements in your article. Do you have everything you planned? Check quotations, lists, images, graphs, tables, embedded links, videos, etc.

Don’t forget to review your work — including proofreading and fact-checking. This means double-checking everything: facts, figures, dates, and spellings (including proper nouns). A misspelt word or incorrect figure can make your writing seem less credible.
You don’t have to include references in every article. But having them saved somewhere is a good idea, so you can easily back up your claims.
Remember to give credit where credit is due. First, ensure you have the right to use an image or any other material from someone else. Then, reference the source and give credit. If you have quotes from other authors, say who they belong to.
Finally, check your disclaimers. Which ones are required depends on the platform you’re publishing on. If you have any affiliate links, you’ll probably need to label them, or add a disclaimer at the end of your post. If you’re writing on Medium, you must also disclose the use of AI-assistive technology.
3. Use a spelling & grammar checker tool
If you did step 1, you’ll be more likely to be able to spot your own typos and spelling mistakes during step 2.
However, either way, sometimes we can’t see our own mistakes. Our brain overlooks some of our usual blunders.
For instance, I often write “definately”. Obviously wrong, but also I often miss it if I don’t use a spell checker. My brain seems to love that incorrect “a” right where it is.
Using a spell checker is even more important if you’re not writing in your native language. Silly grammar or spelling mistakes can cost you credibility. And they’re fairly easy to fix.
There are many tools you can use, from the spell checker native to many text editing apps to more advanced options such as Grammarly and ProWritingAid. I use Grammarly — the free version will check your spelling, grammar, and punctuation.
Just ensure you’re not “fixing” problems that aren’t there — these tools aren’t perfect. Use common sense.

4. Read your article out loud or, even better, listen to your article read out loud
Your article could be published now, and it would be okay. But this fourth step makes a huge difference.
When you read something out loud, it forces you to go slower. This way, you can catch some stuff that previously eluded you. It’s also the best way to ensure your writing is flowing pleasantly.
Medium offers an even better alternative to reading aloud: the “listen” function.
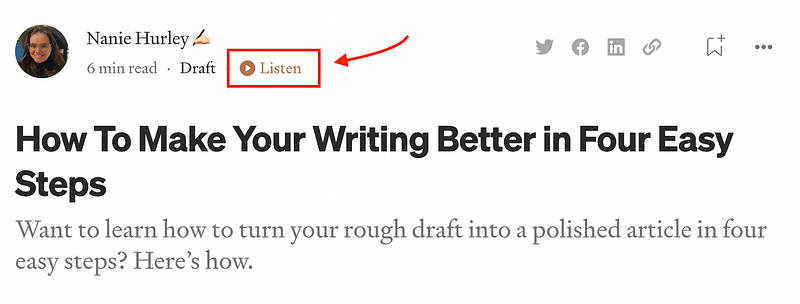
Medium has a version of Speechify inbuilt into all their articles, including your drafts. You probably already used this function when listening to other articles on the platform — and if not, you should! It’s really good, and it turns any story into a podcast.
But perhaps you never realized it’s also available for your drafts. If you don’t know how to find it, click the three dots at the top of your Medium text editor and then “share draft link”. This will give you a link for your draft. It’s handy to review how your final article will look once published, and you can use the “Listen” function.
This last reading (or listening) of your article will ensure you have a text that is high quality, engaging, and as good as you can make it.
Once you’re done writing, you may feel the urge to publish your article straight away. It’s understandable. But it’s not the best practice.
Skipping the editing phase will prevent your work from being as good as possible. Silly mistakes can cost you your credibility. And, ultimately, some readers. To make your article as sharp, credible, and engaging as possible, take the time to edit your work.
Following these four steps — walk away, read your text carefully, use a spell checker tool, and read it out loud — will help your writing be as good as you can get it. And, in turn, that will mean more views, more reads, and more engagement. It’s time well spent, and it’s well worth it.