
How to make your public repository as private and vice versa in GitHub?
Fundamentals of Git and GitHub
While creating a repository in GitHub, according to requirement, the repository is made either public or private but later on the requirements of an individual can change as well due to which the repository settings might have to be changed. Hence, in this blog, I will be discussing how you can make your public repository as a private repository and vice versa. But first of all, let’s have an overview of what does public and private repository refers to in GitHub.
Public Repository
Public repository refers to those repositories which can be accessed by any people all around the world who use GitHub.
Private Repository
Private repository refers to those repositories that can be accessed only by yourself and the individuals with whom you have shared the repository.
Procedure for changing your public repository as a private repository
Step 1: Select the ‘public repository’ which you want to change into ‘private repository’. Then, click on ‘Settings’

Step 2: Now, scroll down and go to the ‘Danger Zone’.

Step 3: Here, in ‘Danger Zone’, click on the ‘Change visibility’ button.

Step 4: Select the ‘Make private’ option as shown in the image below.

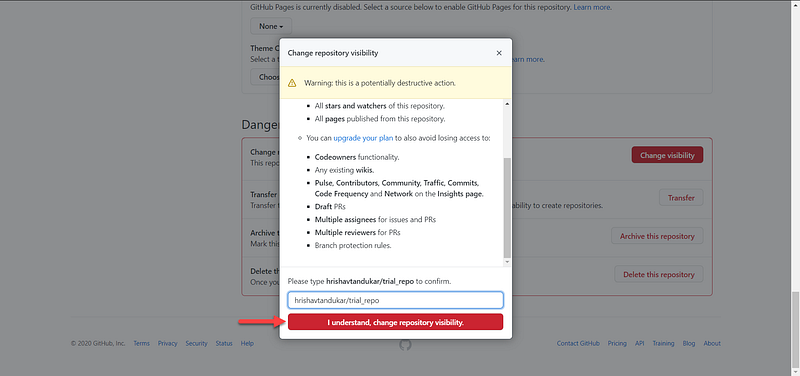
Step 5: Now, provide the repository name which you are willing to make private in the text field as shown in the image below.

Step 6: Click on the ‘I understand change repository visibility’ button.
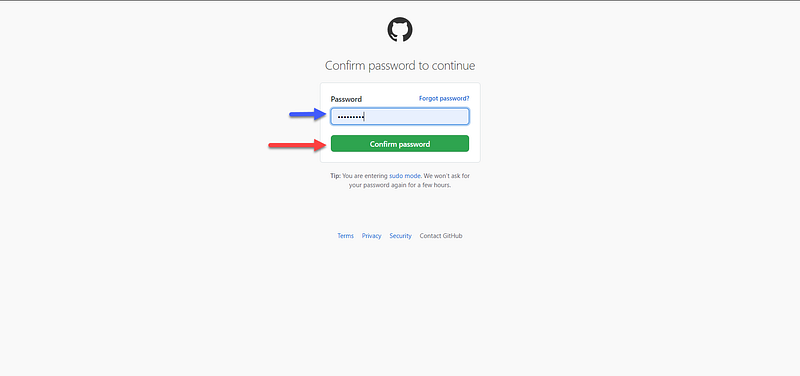
Step 7: Now, you have to provide your GitHub account password for confirming the action of repository settings.
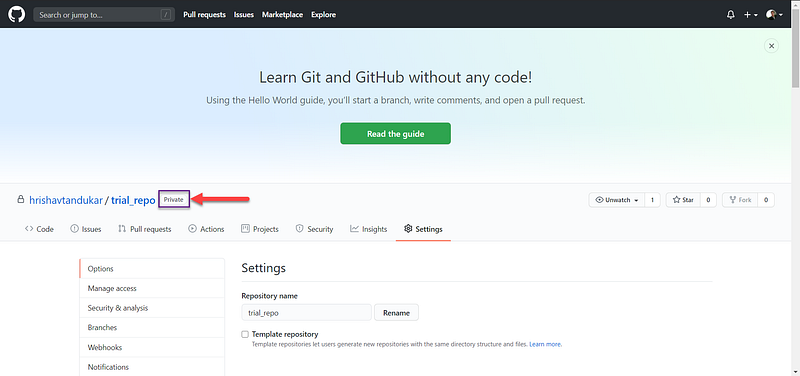
Step 8: Finally, you can see that your public repository has now become a private repository.
Procedure for changing your private repository to a public repository
Step 1: Select the ‘private repository’ which you want to change into the ‘public repository’. Then, click on ‘Settings’.
Step 2: In the ‘Settings’ page, scroll down until you find ‘Danger Zone’. Here, click on the ‘Change visibility’ button.

Step 3: Now, a pop-up appears after you click on the ‘Change visibility’ button. Here, select the ‘Make public’ option and enter the repository name which you want to change into a public repository.

Step 4: Now, click on the ‘I understand change repository visibility’ button.

Step 5: Now, you have to provide your GitHub account password for confirming the action of repository settings.

Step 6: Finally, you can see that your public repository has now become a private repository.
