
How to make XGBoost available in the Spark Notebook
This is a step by step tutorial on how to install XGBoost (an efficient implementation of gradient boosting) on the Spark Notebook (tool for doing Apache Spark and Scala analysis and plotting graphs, similar to the Jupyter notebook).
If you don’t have the Spark Notebook installed you can follow this quick guide.
Step 1: Build XGBoost
For this step we need to clone the repository from github and build the project:
git clone --recursive https://github.com/dmlc/xgboostNext we need to go into the newly cloned repository and build the project:
cd xgboost
make -j4
For Mac users you have to do an additional step, before building with make :
cp make/config.mk ./config.mkStep 2: Create the XGBoost jar
Before we are able to build the jar we need to make sure we have JAVA_HOME set up and pointing to the JDK directory. We also need maven installed. Next we need to run maven in the xgboost directory and publish the artifact on your local maven repository:
mvn installThis command will also run some tests, but we can skip that to make the installation faster. If you wish to do that simply run this command instead:
mvn -DskipTests installStep 3: Include the XGBoost jar into the Spark Notebook
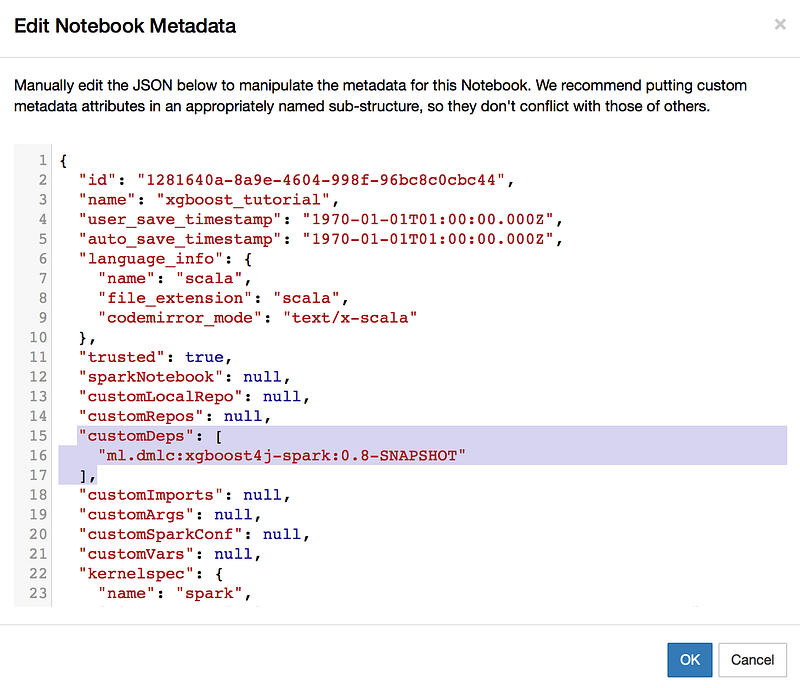
As we now have the jar available in our local repository we can include it as a dependency in the notebook. In order to do that we need to go to the notebook and open the metadata window in the menu:
Edit -> Edit Notebook MetadataA window will open containing a configuration JSON file. We will add the xgboost dependency in the customDeps property as shown in the screenshot below:
"customDeps": [
   "ml.dmlc:xgboost4j-spark:0.8-SNAPSHOT"
]
Please note that at the moment this tutorial was created I was using xgboost version 0.8.
The last step is to restart the kernel of the notebook and we should have the dependency available. To restart the kernel go in the menu at the kernel tab and run restart:
Kernel -> RestartNow we should be able to import XGBoost:

When we add import ml.dmlc.xgboost4j.scala.spark into a cell of the notebook and we run the code (in the menu Cell -> Run ) it should run succefully.


