
How to Lint Commit Messages with Husky and CommitLint
Take your commits to the next level with CommitLint

Introduction
How many times have you come across a git log that looks like this?
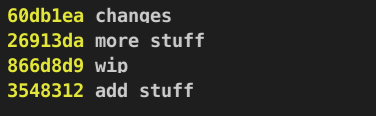
More than you’d like, right? We developers have a tendency to become lazy, and not put much effort into things we don’t consider important (which is mostly everything outside of our code). However, it is absolutely impossible to understand what is going on in our repository from these undecipherable commits. This makes it very difficult for teams to work together effectively.
So, if maintaining a clean git log is so important, how do we do it? How can we force ourselves to write better, cleaner and semantic commits which are easy to understand at a glance?
Behold, the ultimate commit linting tool: CommitLint.
This tutorial will show you how to install and configure CommitLint, together with Husky.
Index
- Installing CommitLint
- Installing Husky
- Testing
Installing CommitLint
CommitLint is a commit linting tool that will force us to write beautiful commits. How does it do this?
CommitLint works with something called conventions, which are basically a series of rules that our commits need to follow. If we try to make a commit that doesn’t follow the convention that we choose, it will fail. You can find a list of all of the available conventions here. For this tutorial, I’ll use the conventional commits specification, which is based on the angular convention. It looks like this:
type(scope?): messageTo install both CommitLint and config-conventional, let’s run the following command:
npm i -D @commitlint/{cli,config-conventional}To use the config-conventional rules with CommitLint, we have two options:
- Create a
.commitlintrc.jsonfile in your app root, which will extend the config-conventional rules.
2. Create a commitlint.config.js file, which will export the config-conventional rules.
Note: I usually go with the first option, but either one is fine, as long as you don’t do both!
Option 1: creating a .commitlintrc.json file
First, we create the file in the root of our application:
touch .commitlintrc.jsonThen, we extend the config-conventional rules:
{
  "extends": ["@commitlint/config-conventional"]
}
Your .commitlintrc.json file should look like this:

Option 2: creating a commitlint.config.js file
First, we create the file in the root of our app:
touch commitlint.config.js
We export the config-conventional rules:
module.exports = {
  extends: ['@commitlint/config-conventional'],
};
That’s all! CommitLint is all set up. It’s time to install husky.
Installing Husky
Git provides us with a little something called hooks, which we can use to tap into the different stages of the git workflow. Since we want CommitLint to lint our commit messages, we can use the commit-msg hook, which will run every time we try to add a commit message. If the message doesn’t follow the convention, CommitLint will error out, and we’ll have to try again.
The first thing we’re going to do is install husky. We can do so by running the following command:
npm i -D huskyNext, we need to enable Husky’s git hooks, which we can do with this command:
npx husky installOr, if you have Husky installed globally:
husky installTip: If you get the following error: fatal: not a git repository (or any parent up to mount point ''), it means that you haven’t initialized git, and you have to do so by running the git init command.
If all goes well, you’ll see the following message in your terminal:

After running the command, you should have a new hidden directory in the app root, named .husky, which contains Husky’s config. Once we’ve made sure it’s there, we can forget all about it, since we won’t need to edit it ourselves.
Finally, we need to add the commit-msg hook:
npx husky add .husky/commit-msg 'npx commitlint --edit $1'Note: It’s very important that you use single quotes to specify the command, because if you use double quotes the $1 will be escaped.
If all went well, you should have the following output in your terminal:

We’re done! It’s time to test if it works.
Testing
Let’s try and commit something without following the convention:
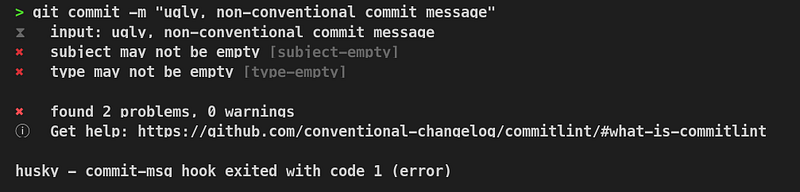
As you can see, our commit fails. Let’s try again with a commit that does follow the convention:
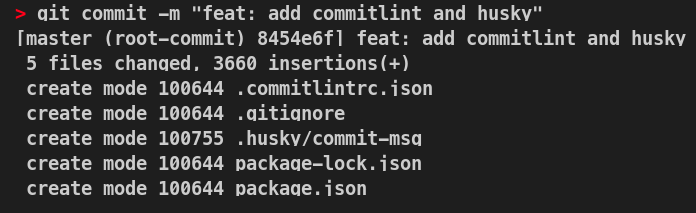
Well done! You’ve successfully added CommitLint and Husky to your project!
Conclusion
That’s all folks! If all went well while following this tutorial, your git log is about to become beautiful and sparkling clean (and your team members will love you for it).
You can find the source code for this repo here.
Thanks for reading.


