How to install Ubuntu Server on Raspberry Pi
It is easier than you think.
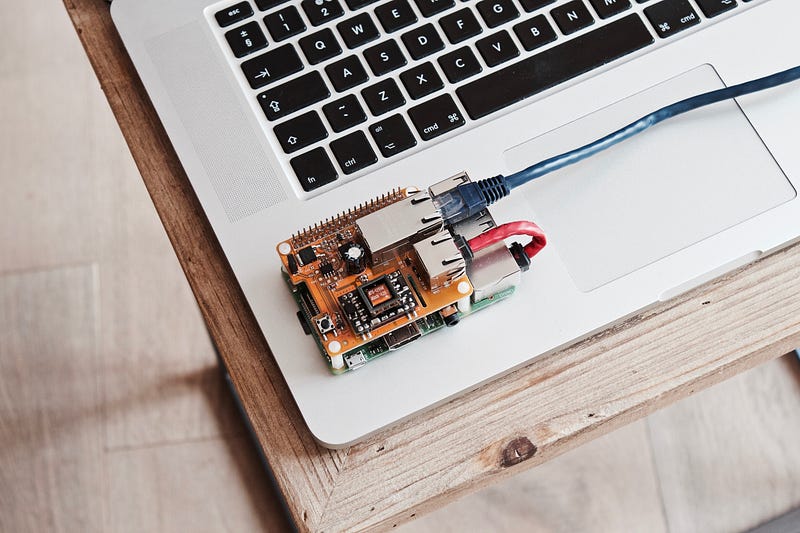
The Raspberry Pi is a low-cost, mini PC board with the size of a credit card. It is a great option for those who like to make some electronic and maker projects.
It has 40 GPIO pins, video interface, camera, sound and can run the most famous operating system.
And the version 4 includes 4GB of RAM, a powerful Broadcom CPU and dual 4K HDMI display.
In this tutorial, we are going to install and configure the Ubuntu Server.
Note: this tutorial was done on a notebook with Ubuntu 20.04 installed. Some of the steps might not work on other systems.
Ubuntu Server
The Ubuntu Server is an open-source operating system that is used especially on servers. And it has a distribution for the RPi.
To install it, we are going to use the Raspberry Pi Imager program. This is a program developed by the Raspberry Pi Foundation and it helps a lot during the installation.
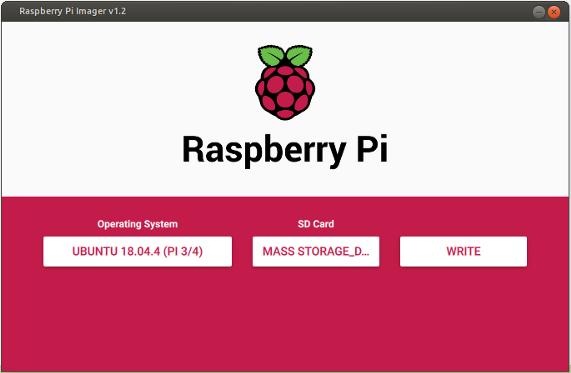
- Download the program for your OS from this link.
- Open the program, select “Ubuntu Server 20.04” as your operating system by clicking on the button “Operating Server”. In this tutorial, we are going to use the 64-bit version 20.04.
- Insert the SD card on your computer and select the correct driver on the button “SD Card”.
- Click in “Write” to start the recording process. The software will download the image file for the first time, so it might take a while.
WiFi configuration
After the process is finished, your SD card must have two partitions, system-boot and writable.
In your computer, open the file system-boot/network-config and uncomment (remove the # at beginning) the following lines:
wifis:
  wlan0:
    dhcp4: true
    optional: true
    access-points:
      "<wifi network name>":
        password: "<wifi password>"
Change the wifi_network_name and wifi_password by the configuration of your WiFi. You file should have something similar to this:
Passwordless SSH
Every time you have to access your RPi via SSH, you will need to type your password. To avoid this, you can configure a key and the login process will be done automatically.
If you already have generated keys on your computer, you can skip the next step. To check it, list the folder ~/.ssh for a .pub file:
ls ~/.sshGenerating new key
If you don’t have any keys, or just want to generate a new one, type the following command:
ssh-keygenAfter hit enter, you will be asked where you want to save the key. Let the default file ~/.ssh/id_rsa and hit Enter.
Leave the passphrase empty as well and hit Enter again. After a while, the key will be created. You can look in the folder ~/.ssh and these two files must be there:
id_rsa id_rsa.pubThe file id_rsa contains the private key and it must be only on your computer. The file id_rsa.pub contains the public key and it is this content that you’re going to share with the RPi.
Configuring
Open the file writable/etc/cloud/cloud.cfg.
Copy the content from the id_rsa.pub file and paste it in the field ssh_authorized_keys, in the system_info settings.
The content must be something like this:
Note: Remember to substitute
YOUR_SSH_PUB_KEYfor your public key created before. Otherwise you will have to type the default key when trying to access the RPi.
Accessing
Now, eject your SD card from the computer and put it on the RPi. Turn it on and wait for some minutes.
Note: In the first boot, the RPi will configure the system, but will probably fail to connect to the wifi. Wait a few minutes (five is a good choice) and then restart the RPi. It should work then.
Your RPi must get an IP address from your router. You can check it using your router admin page or using nmap command:
nmap -sT 192.168.0.1/24Finally, try to access your RPi:
ssh ubuntu@<IP>You should access directly without typing the password. If it still asks for a password (or you didn’t configure SSH), just type the default ubuntu.
Note: change the default password after the first access.
Conclusion
The Ubuntu Server is a great operating system and has a lot of support from the community. And you can use its power on a Raspberry Pi.
You can also check this tutorial on how to configure the VSCode to access your RPi remotely:
Follow me on Twitter for more content like this.