
Setting Up Redis (Redis-Stack) with Docker Desktop on Windows: A Step-by-Step Guide
Intro
Here is an article that helps you to know the difference between Redis from docker official image and redis-stack: About Redis Stack — Redis.


Pre-requisite:
The Docker desktop must be installed first. Here is the link for install docker desktop: Install Docker Desktop on Windows | Docker Docs
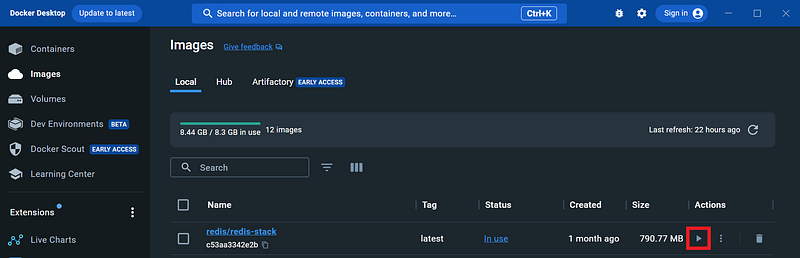
Step 1 (Search Redis image)
Open the search bar at the top of the docker desktop, then type redis-stack. Click the pull button to download the image, wait for the download process to complete.

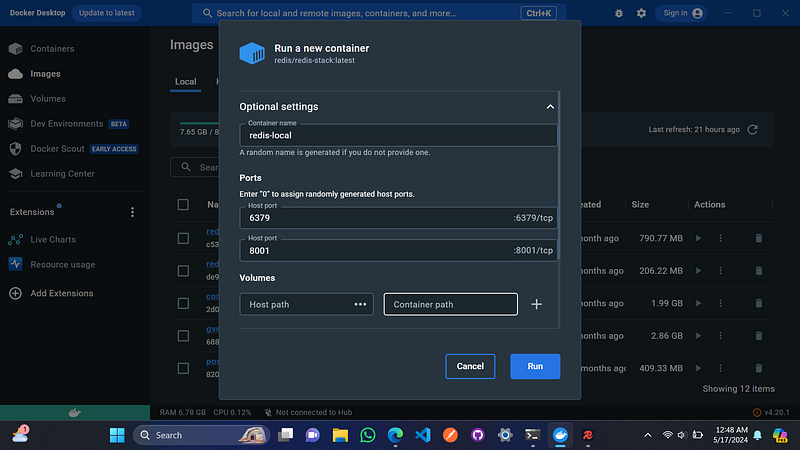
Step 2 (Running image)
Click the run button to the right of the redis-stack image.
Then click the optional settings dropdown and fill in the container name and port as follows. The first port is 6379 for Redis server and 8001 for Redis insight.
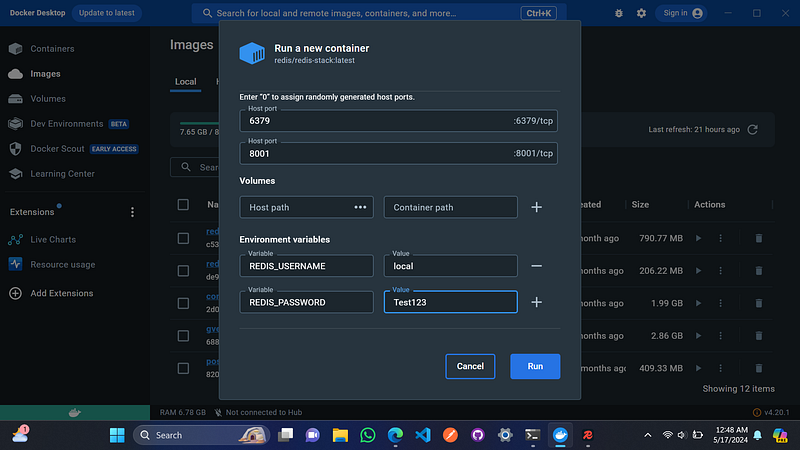
Add the environment variables REDIS_USERNAME and REDIS_PASSWORD, then click the run button.
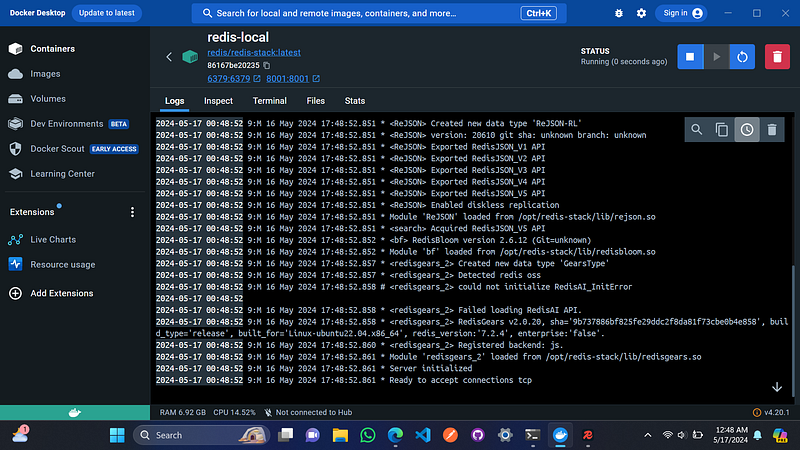
The Redis container will be displayed in the containers tab.
Step 3 (Use CLI or Install GUI to manipulate data)
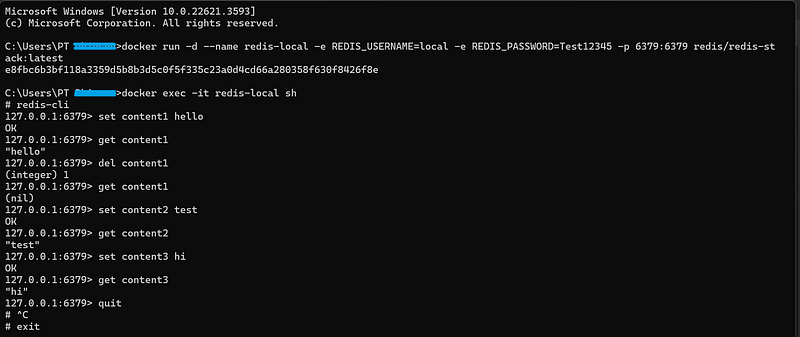
- Using CLI
To open Redis CLI, first run the following command:
docker exec -it your_container_name shThen type redis-cli as shown below, we can use keywords like set, get and del to manipulate data in Redis. Here are examples of some commands in redis-cli:
2. Using Redis-insight
Redis insight is the official Redis GUI which you can download here. Once the download process is complete, place the file into your local directory and install it.
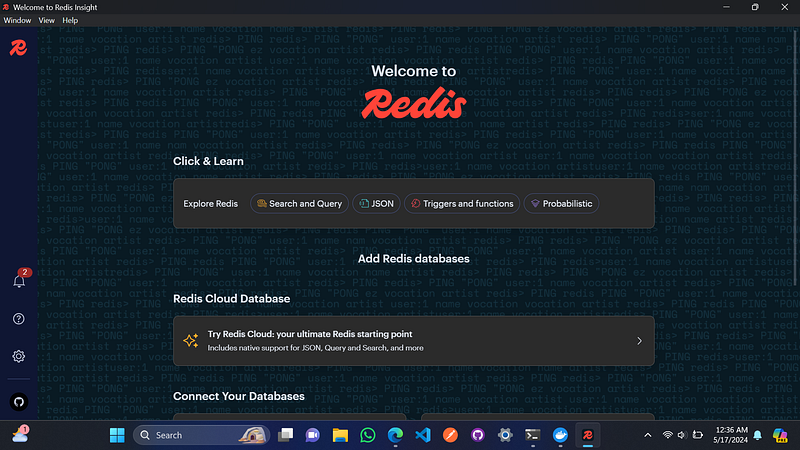
Here is how Redis insight looks like.
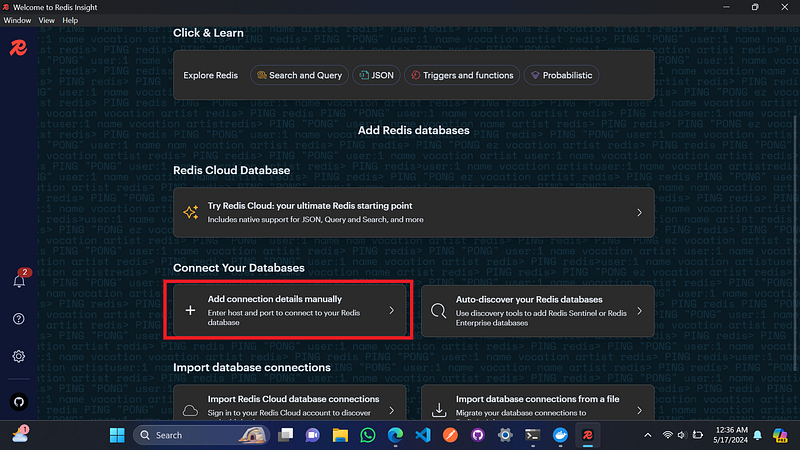
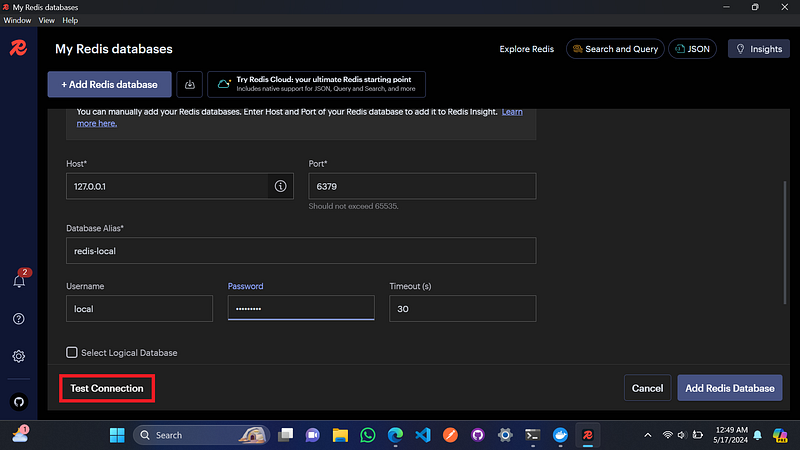
Add connection details manually to open the database.
Fill in the username and password and click test connection. If it fails, try leaving the username and password blank. If successful, click add Redis database.
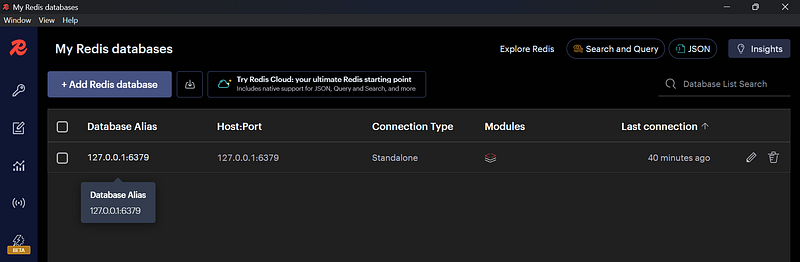
Your database will be displayed in My Redis Databases tab.
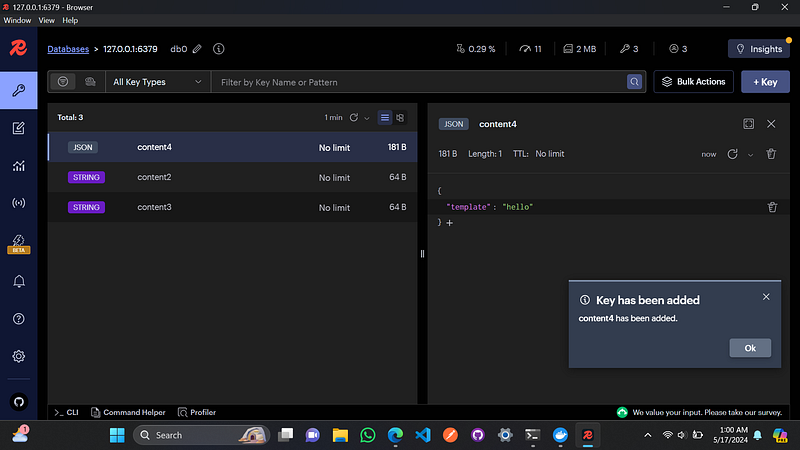
To add multiple key-values, we can add them by using the +Key button on the right panel. Select the key type as needed, fill in the TTL if needed if you want to set a temporary key, fill in the value, then click the add key button.

Your key-value will be shown in the database as follows.
Thank you for reading.