How to Install PostgreSQL on Amazon Linux 2023

Introduction
PostgreSQL is a powerful open-source relational database management system widely used for storing and managing data. If you’ve recently installed Amazon Linux 2023 on your AWS EC2 instance and need guidance on how to install PostgreSQL 15, you’re in the right place.
Prerequisites:
Before you start, ensure you meet the following prerequisites:
- An AWS EC2 instance running Amazon Linux 2023 with administrator privileges.
- A minimum of 1GB of available hard disk space, 1GB of RAM, and a single-core CPU.
Launching and Configuring Your EC2 Instance
Step 1:- Log in to AWS services and select EC2.
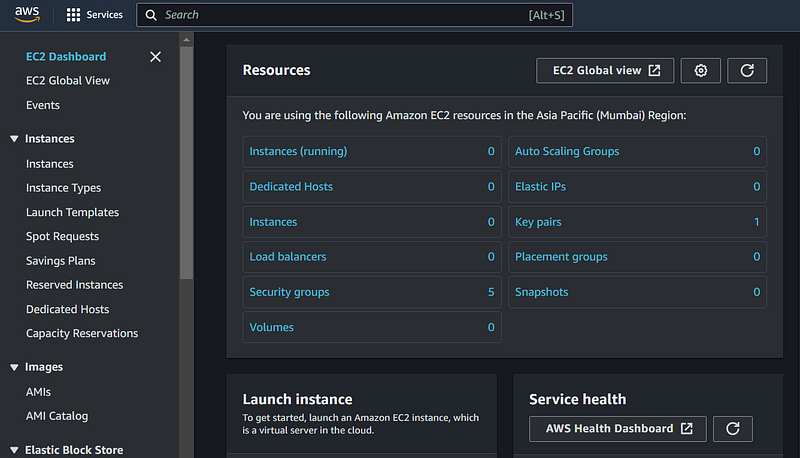
You can click to “launch instance” button to create an EC2 instance.
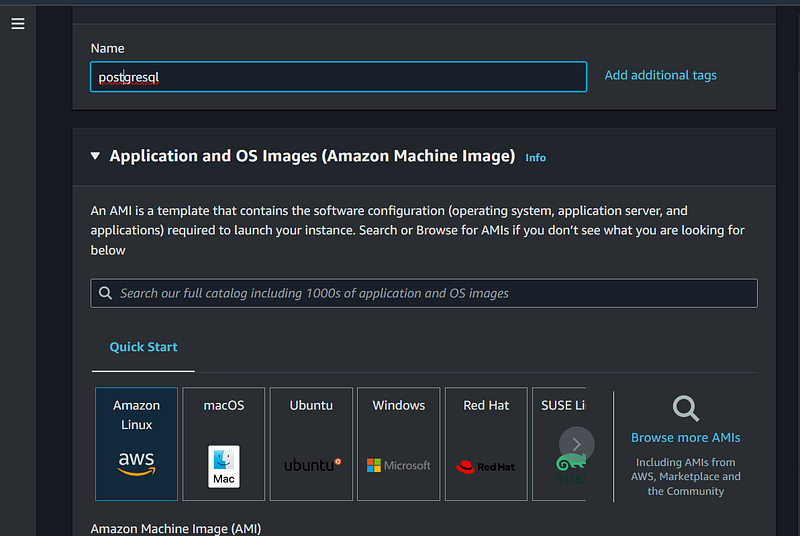
Step 2:- Configure the instance name and the OS image as follows
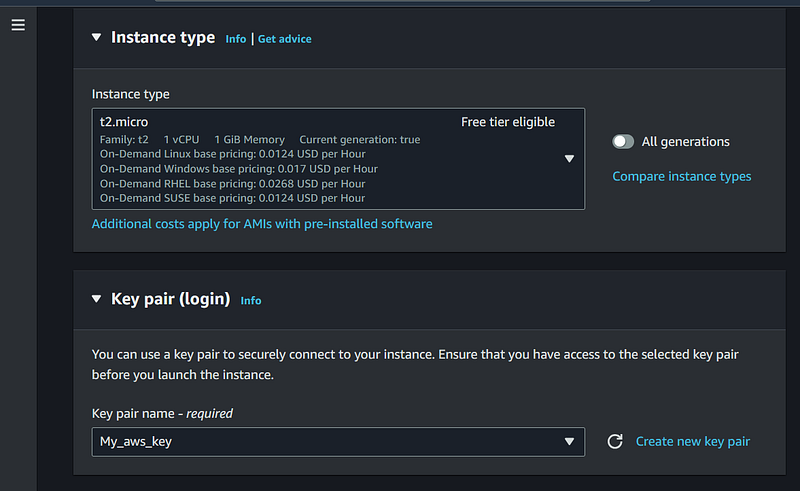
Step 3:- Scroll down and configure the instance type and key pair
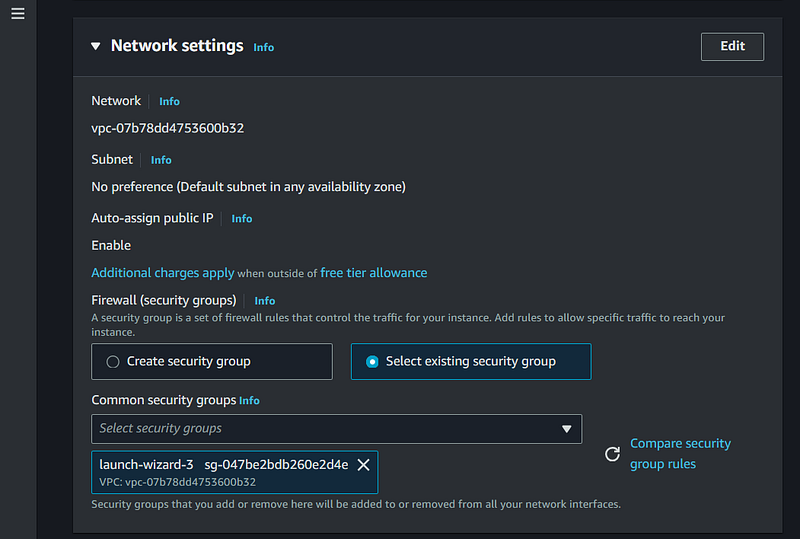
Step 4:- Create or select a security group
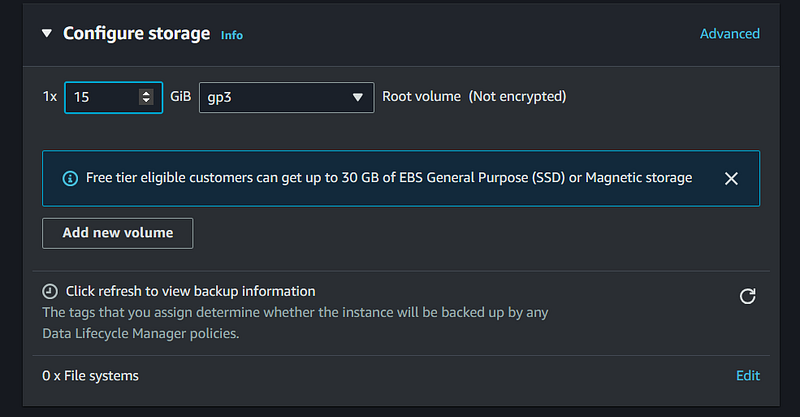
Step 5:- Modify to disk size as 15 GB
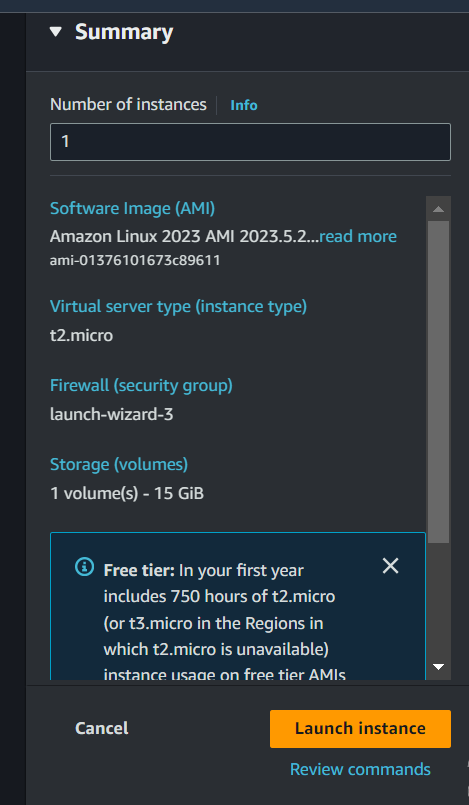
Step 6:- Check the Summary and click Launch instance (right pane) under the Summary section to launch your EC2 instance

Step 7:- Accessing Your EC2 Instance
The server is ready now select the server and click the connect button

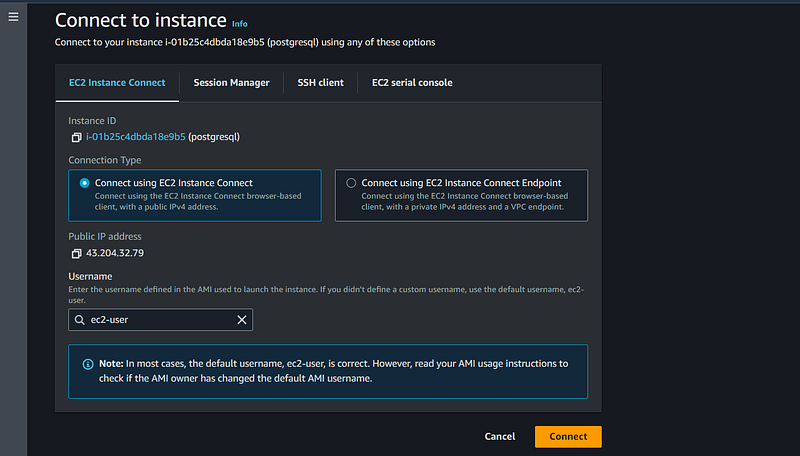
Congratulations! You have successfully set up EC2 Instance. Now we have multiple options to connect with our instance. We can use ssh or we can direct connect and access our instance on the browser page itself.
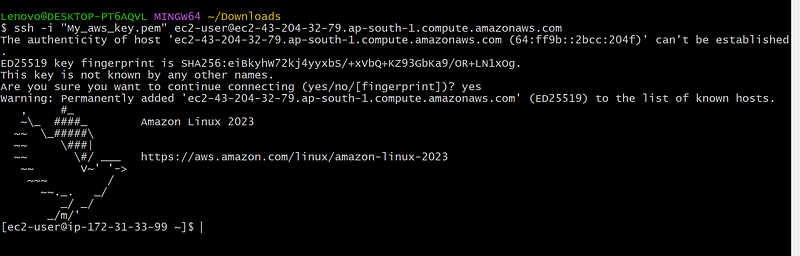
Here I am using SSH to connect with the instance.
The server is ready we can install the Postgresql. Please follow the below steps.
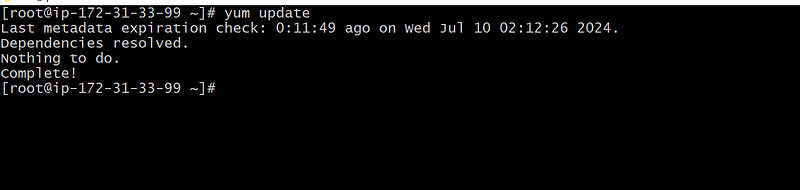
Step 8:- Update Amazon Linux 2023 Packages
Before installing any packages, ensure sure you have the most recent updates installed on your system and clear the DNF package cache. Open a terminal window and type the following command, or use SSH to log into your Amazon Linux instance:
sudo dnf update
  or
sudo yum update
Step 9:- Installing PostgreSQL on Amazon Linux
The good news is that you don’t need to add any additional repositories to get PostgreSQL version 15 on your Amazon Linux 2023 because it is available through the default system repository.
Run the following command to install both the client and server components of the PostgreSQL database system:
sudo dnf install postgresql15.x86_64 postgresql15-server -y
    or
sudo yum install postgresql15.x86_64 postgresql15-server -y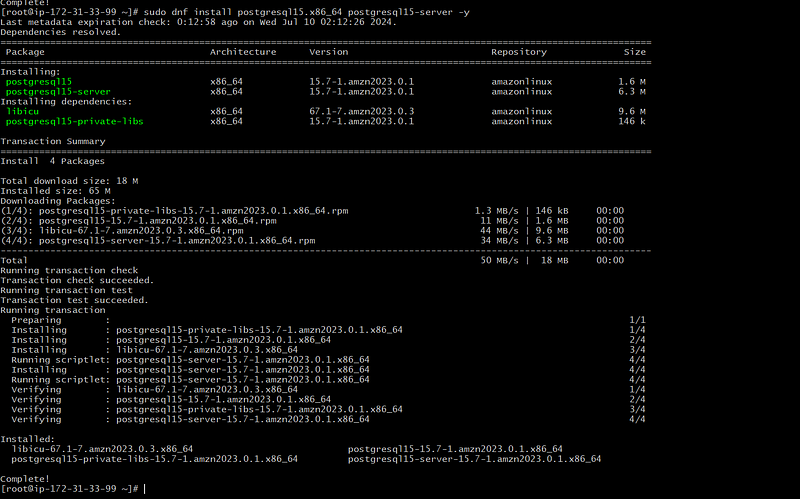
Step 10: Initializing PostgreSQL Database
Before starting and enabling the database service, let’s initialize it. Use the initdb command, which will create a new PostgreSQL database cluster referring to a collection of databases managed by a single server instance:
sudo postgresql-setup --initdb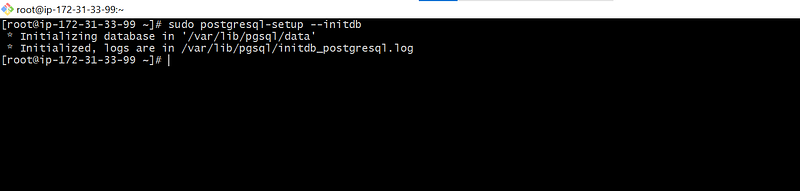
Step 11: Starting and Enabling PostgreSQL Service
After completing the initialization, start and enable the PostgreSQL server service, so it starts automatically with system boot:
sudo systemctl start postgresql
sudo systemctl enable postgresql
sudo systemctl status postgresql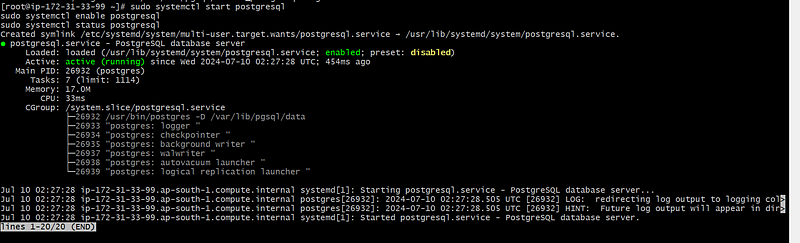
Step 12:- Configure the PostgreSQL
1. Set password for SSH Postgres user and admin Postgres database password
For security, set a strong password for the system user and default database admin user account. Use the following commands:
# Change the ssh user password:
sudo passwd postgres

# Log in using the Postgres system account:
su - postgres

# Now, change the admin database password:
psql -c "ALTER USER postgres WITH PASSWORD 'your-password';"
exit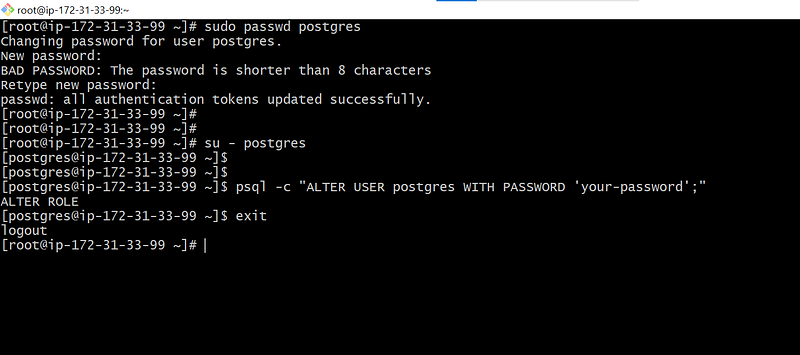
2. Primary Configuration File
Access the primary configuration file of PostgreSQL located at /var/lib/pgsql/data/postgresql.conf. Before making any changes, back up the configuration file:
sudo cp /var/lib/pgsql/data/postgresql.conf /var/lib/pgsql/data/postgresql.conf.bckEdit this file with a text editor:
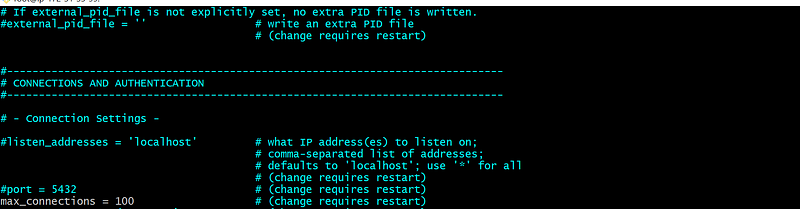
sudo vim /var/lib/pgsql/data/postgresql.confBy default, PostgreSQL only listens to localhost
listen_addresses = 'localhost'if you want to listen to all IP addresses:
listen_addresses = '*' # what IP address(es) to listen on;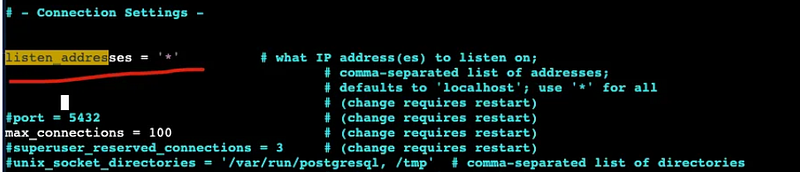
3. Authentication
For authentication, there is a separate file called pg_hba.conf in the same directory as the primary configuration file.
Before making any changes, back up the configuration file:
sudo cp /var/lib/pgsql/data/pg_hba.conf /var/lib/pgsql/data/pg_hba.conf.bckEdit this file with a text editor:
sudo vim /var/lib/pgsql/data/pg_hba.conf# You can change ident as md5 To allow connections from absolutely any address with password authentication
host all all 0.0.0.0/0 md5OR
sudo sed -i 's/ident$/md5/' /var/lib/pgsql/data/pg_hba.confTo apply any of the changes, you have to restart the PostgreSQL service using the following command.
sudo systemctl restart postgresql

4. Create a User & Database
Use this section to create a new user and database on PostgreSQL:
# Connect to the PostgreSQL server as the Postgres user:
sudo -i -u postgres psql

# Create a new database user:
CREATE USER yourusername WITH PASSWORD 'password';

# Create a new database:
CREATE DATABASE database_name;

# Grant all privileges on the database to the user:
GRANT ALL PRIVILEGES ON DATABASE database_name TO yourusername;

# To list all available PostgreSQL users and databases:
\l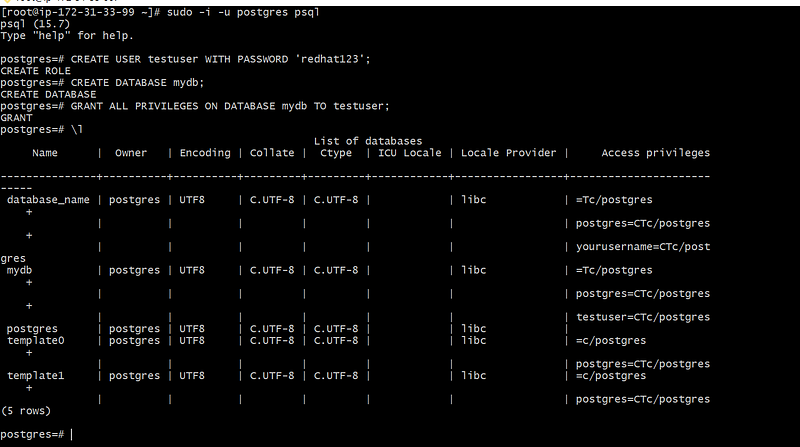
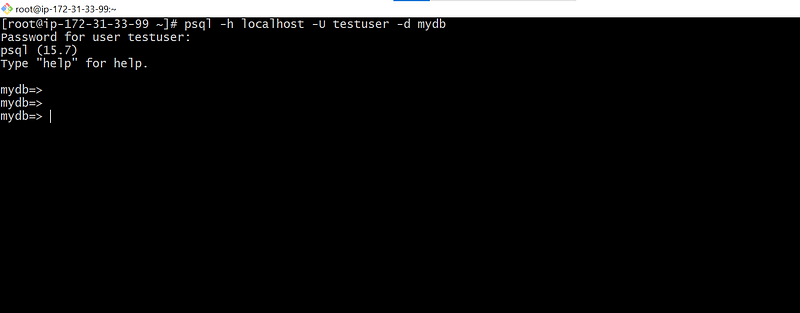
Step 7: Accessing the Database
You can access the database you created using the PostgreSQL client command psql. Local or SSH server connection users can use the following syntax:
psql -h localhost -U username -d database_name
Remote users can use:
psql -h server-ip-address -U username -d database_nameReplace username with the user you created and database_name with the name of the database assigned to that user.
Access the postgres account on your server by typing:
sudo -i -u postgresNow you can immediately access the Postgres prompt by typing:
$ psql
postgres.

# To list the databases:
postgres=# \l

# You can exit Postgres prompt by typing:
postgres=# \q
Note:- To access your PostgreSQL database from external sources, make sure to configure your Amazon Linux EC2 security group to allow incoming traffic on port 5432, which is the default port used by PostgreSQL
Conclusion
In this guide, we looked at the steps to install PostgreSQL on an Amazon Linux ec2 server.


