
How to install Kali Linux on VirtualBox in a few minutes — StackZero
In this tutorial, we are going to see how to install Kali Linux on Virtualbox, but before starting maybe would be good to know what is Kali Linux.
Kali Linux is a Debian-derived Linux distribution that Offensive Security Ltd has designed for digital forensics and penetration testing. The peculiarity of this OS is that it contains a large amount of penetration testing tools from various different niches of the security and forensics fields. These tools are packed into a custom security distribution that you can run from a live CD, live USB, or installed on a hard drive. In this article, we’ll see step-by-step how to install Kali Linux on our Virtual machine.
If you still don’t have VirtualBox installed, take a look at this post.
Downloading Kali Linux
The first step in the installation of Kali Linux on Virtualbox is the download of the iso image. So go to this link to download Kali Linux.
Kali offers their product for different platforms, but we need to download Kali Linux for our computer system. Scroll down to find the ‘Bare Metal’ Kali Linux setup. It offers Kali Linux ISO images for Windows 64-bit, Windows 32-bit, and Apple M1. Select your desired operating system.
At this point, there are different kinds of installers available, but we will download Installer that will perform complete offline Installation with customization.
Finally, click on the download Icon on the Installer little box the setup will start downloading automatically.
Create a Kali Linux VM in VirtualBox
Start VirtualBox and click on the ‘New’ icon.
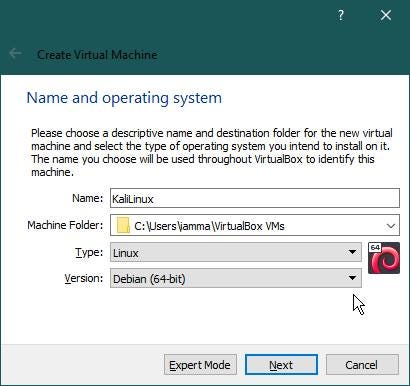
A new dialog ‘Create Virtual Machine’ will open.
First, it will ask the user for the name of a new machine.
Secondly, it also asks the user to select the destination folder for the new virtual machine. For simplicity would be ok to keep the default configuration.
In the next option, the user has to select the ‘Type’ of the operating system from the drop-down menu, and for that, just select ‘Linux’.
In the last option, please select the version of the operating system. Use the drop-down menu to select “Debian (64 bit)”. If your ISO is 32-bit Kali, then you should select “Debian (32 bit)”.
Then click “Next”.
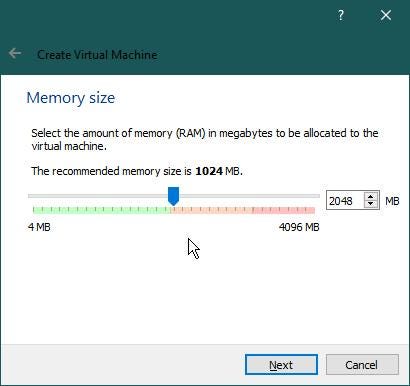
Select the amount of memory (RAM) to be allocated to this virtual machine. The more RAM allocated, the faster the machine will run.
Minimum RAM should be 1024 MB. However, in order to have a good experience, try to allocate half of your computer’s RAM. Remember to stay within the Green area.
The VM needs Virtual Hard Disk. Now, it requests the user to select the ‘Hard Disk’ type.
Select “Create a virtual hard disk now” and click ‘Create’
After that, it’s time to select the Hard Disk File Type for the new Virtual Hard Disk.
Then select “VDI (VirtualBox Disk Image)” and click ‘Next’.
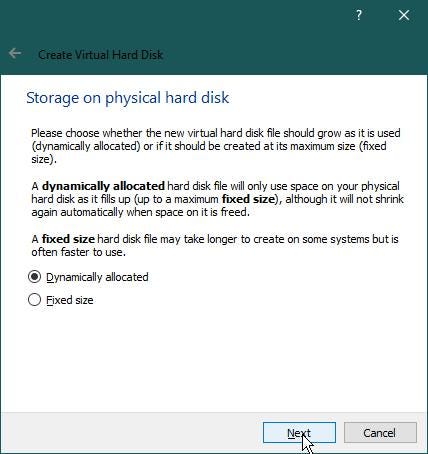
Now, select ‘Storage on Physical Hard Disk’. Let’s select “Dynamically allocated” as it can use physical hard disk memory if the virtual hard disk has no free space. Click ‘Next’.
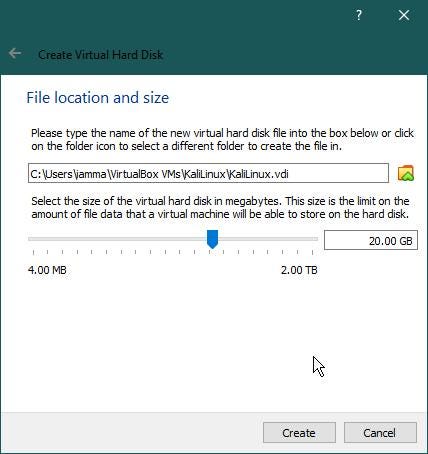
Here, we have to select the location of the hard disk file. It is recommended to keep it default.
Next, select the size of the virtual hard disk. You have to give a minimum 8 GB hard disk. 20GB Hard disk is highly recommended to avoid storage problems at a later stage.
Finally, Create the virtual machine!
Configure Kali Linux Virtual Machine
After adding a new Virtual Machine ‘Kali Linux’, it’s time to make some settings. Click the ‘Setting’ icon.

General
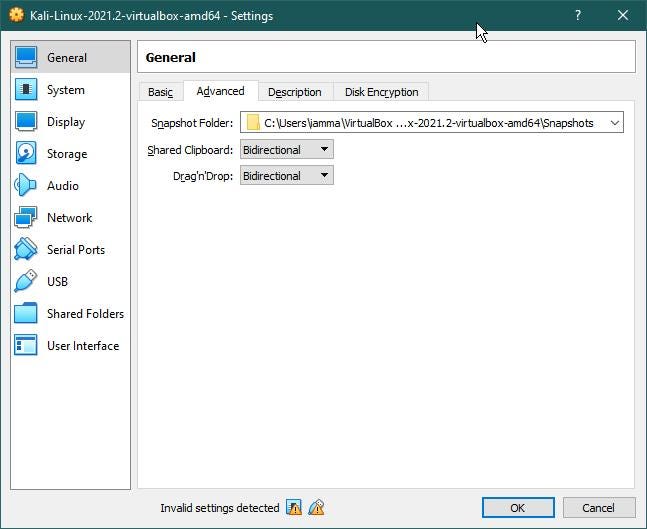
In General settings, ‘Advanced’ tab:
VirtualBox snapshot is a helpful feature that allows users to save the current state of the Virtual Machine for later use. The snapshots can be used to restore the last state of the Virtual Machine. The only changes you should do is:
- Drag and Drop to ‘Bidirectional’
- Shared Clipboard to ‘Bidirectional’
These parameters allow users to copy or move files from Virtual Machine to computer and vice versa.
Display
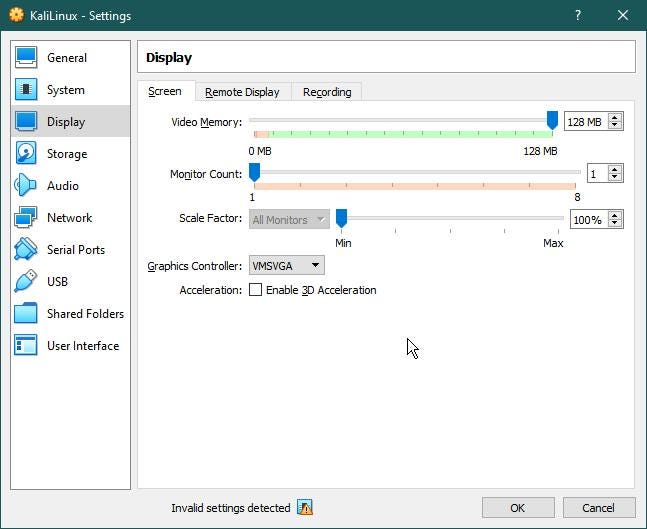
Then go to Display->Screen tab and set Video memory to the maximum:
Storage
In Controller: IDE, click “Empty”
On the Right side: Click the small (Disk) icon and select ‘Choose a disk file…’
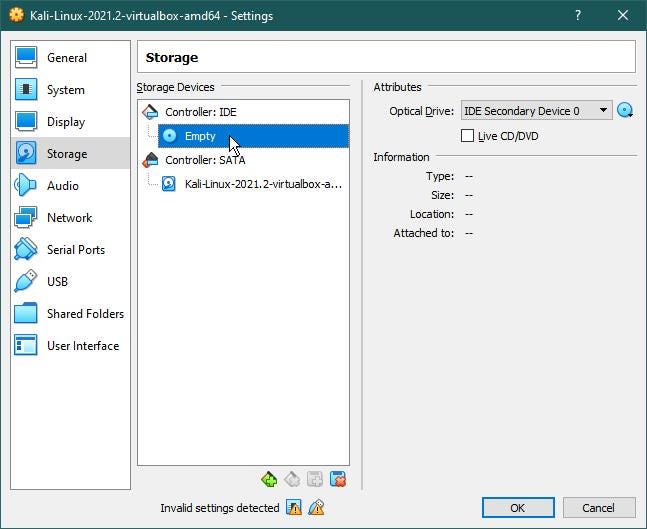
After that select the ‘Kali Linux ISO’ file and click Open.
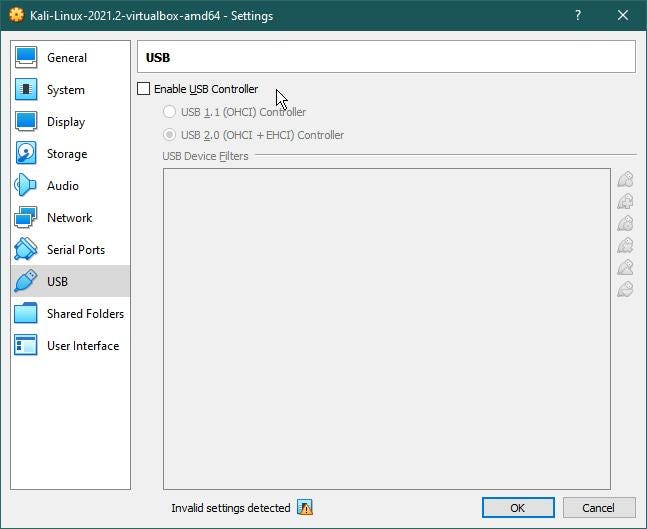
USB
Finally, go to the USB tab and disable the USB Controller
Install Kali Linux
Now that the VM setup is complete, we can proceed with the install, just click on the green arrow “Start”.

Kali Linux Setup will start within a few seconds.
You can use the keyboard arrow keys to scroll up and down. Select ‘Graphical Install’ and hit Enter.
Now there are some simple settings with the guided setup, and the first parameters are extremely simple and intuitive, so set them as you want
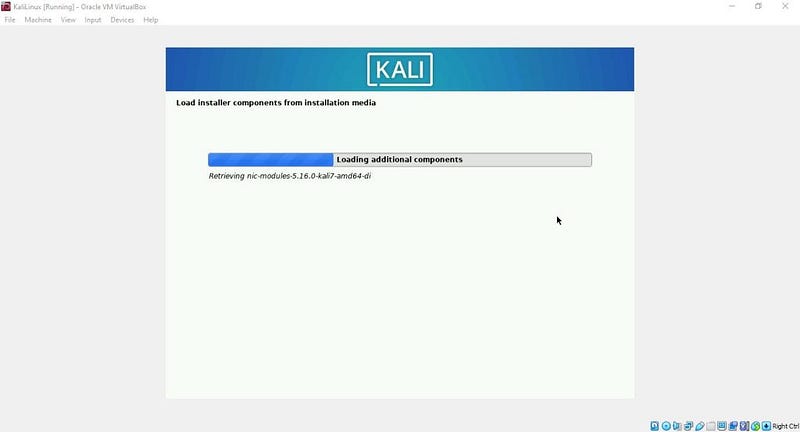
The setup will load additional components
When all is complete, you can configure the Network.
Enter desired hostname which will identify your system to the network.
Finally, click ‘Continue’.
You can add a ‘Domain Name’ if you want.
Click ‘Continue’ again.
Got here, enter your Full Name and click “Continue”. This name will be used within the system.

The next two steps are the ones needed to login into the system:
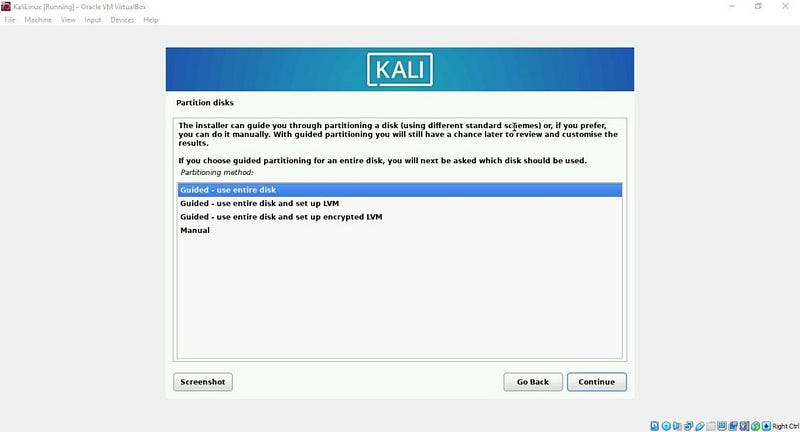
Keep track of what you insert, then set the clock and go further to the Partition Tab.
Here click on “Guided — use entire disk”. It will automatically manage disk partitioning.
It asks which disk to partition for installing Kali Linux. We have only one. Select the given disk and click ‘Continue’.
If you have done everything correctly, this screen asks users to review their disk partition settings. If you want to change the setting, you can click Undo changes to partitions.
Select “Finish Partition and write changes to disk” and click ‘Continue’.
Click again “Continue” and the system will start installing Kali Linux. This process might take 10–60 minutes.
Once it finishes, will ask “Software Selection”, Default settings are ok, so click “Continue” again and It will keep installing.
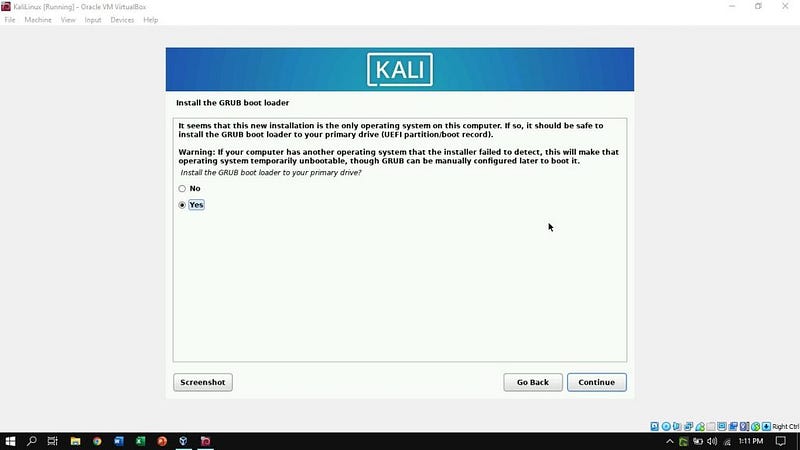
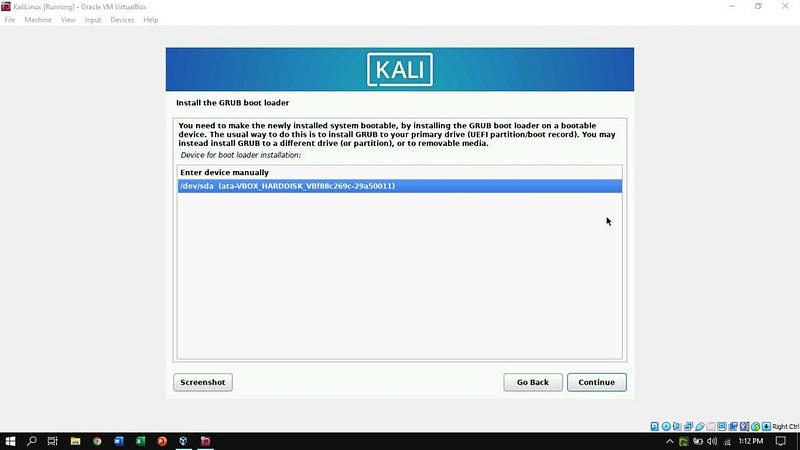
Now, the Installation process asks for Installing the GRUB Boot Loader. It asks users to install GRUB to the primary drive. Select “YES” and click ‘Continue’.
At this point of the installation will ask for making the newly installed operating system bootable, by installing the GRUB boot loader on a bootable device. Select the given disk for automatic operation and click ‘Continue’.
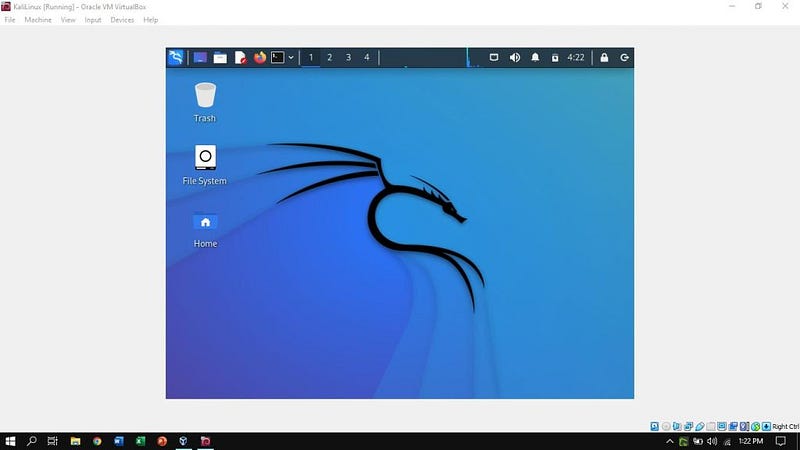
After 5–10 minutes, depending on your computer speed, Kali Linux will ask for a reboot, so we can continue and look at our fresh installation!
Finally, let’s insert our login data and we are ready to use our VM.
Originally published at https://www.stackzero.net on June 30, 2022.