How to install Conda and create virtual environments on Mac M1
Installing software on my Mac has been nothing short of a nightmare, and if you’re a fellow Mac user, you might have experienced the same frustration. One of the culprits? Compatibility issues that seem to lurk at every turn. This isn’t a problem exclusive to Mac users; it’s a challenge that transcends platforms.
Picture this: you’re juggling multiple projects, and each one demands its unique set of Python packages and modules. The catch? These packages often clash in version requirements, creating a minefield of compatibility dilemmas. Take Project A and Project B, for instance. Both rely on Library A to achieve their objectives, but the catch is, Project A insists on one version of Library A, while Project B has a different one in mind. Even if your projects all share the same Python version, a simple update to a package could inadvertently break the functionality of another project. It’s a real conundrum.This is where virtual environments come in…
What is a virtual environment?
To quote the conda documentation (https://docs.conda.io/):
A virtual environment is a tool that helps to keep dependencies required by different projects separate by creating isolated spaces for them that contain per-project dependencies for them.
In essence, virtual environments offer you an isolated environment in which to develop your project, where software installations and version choices remain wholly independent of one another. It’s like having a dedicated sandbox for each of your endeavors. What you install in one environment remains confined to that space, completely shielded from affecting any other project. Perfect, isn’t it?
What is Conda?
Let’s have a look at the conda documentation again (https://docs.conda.io/):
Conda is an open source package management system and environment management system that runs on Windows, macOS, and Linux. Conda quickly installs, runs and updates packages and their dependencies.
Originally tailored for Python, Conda has expanded its horizons, now able to package and distribute software for a variety of programming languages. This newfound versatility is a game-changer.
Conda simplifies the process of creating and managing virtual environments. With just a few simple commands, you can set up a completely separate environment with a different Python version or even an entirely different programming language. The best part? Your primary Python environment remains untouched and readily accessible.
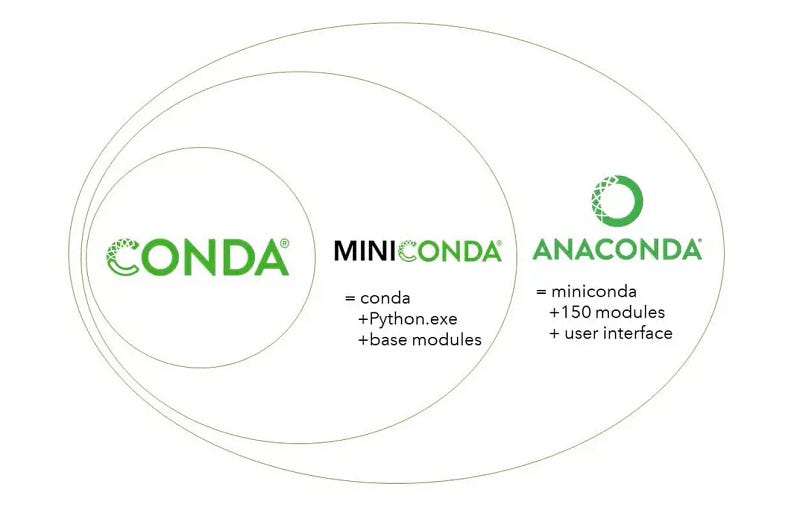
Miniconda vs Anaconda
If you’re anything like me, you might be pondering the same question: Why are there two versions of Conda, and which one should you opt for? Allow me to shed some light on the matter.
Anaconda and Miniconda and both distribution platforms for computing. However, they serve distinct purposes and cater to different user requirements.
Anaconda:
- It’s a comprehensive data science platform, providing a fully configured environment for tasks like analysis, machine learning, and computing.
- Loaded with a wide array of pre-installed packages, tools, and libraries commonly used in these domains.
- Tailored for users seeking an all-in-one solution, offering nearly every package needed for data science.
- It is a relatively large installation because of this extensive package collection.
- Great for users who want to minimise the effort required to set up a data science platform.
Miniconda
- In contrast, Miniconda is a minimal installer derived from Anaconda, offering only the core package management system and Python interpreter, devoid of additional packages or libraries.
- Designed for users who crave greater control over their environment and wish to install only the packages they need.
- Notably more compact in size compared to Anaconda, given its lean package selection.
Personally, I tend to lean towards Miniconda due to its smaller storage footprint and the clarity it provides regarding the contents of each environment I create. In contrast, Anaconda might be a better fit for individuals with ample disk space or those who are just embarking on their journey with Conda or Python.
Why conda environments over venv?
It’s important to note that the choice between Conda environments and venv is highly individual, and I’ve found that Conda environments align better with my personal preferences. Now, let’s explore the key advantages of Conda environments compared to venv:
- Cross-Platform Compatibility: Conda isn’t restricted to Python and excels at managing environments for various programming languages, offering greater flexibility across a wide range of projects.
- Dependency Resolution: Conda shines when it comes to resolving complex dependency issues, ensuring seamless collaboration between packages.
- Isolation and Package Management: Conda environments are intentionally isolated, simplifying the management of distinct project dependencies.
- Cross-Version Compatibility: Unlike venv, Conda allows you to create environments with different Python versions, promoting versatility in your development environment.
- Version Pinning and Reproducibility: Conda enables precise specification of package versions, ensuring reproducibility in your environments.
Remember, the choice between Conda and venv should be driven by your specific needs and preferences. While Conda environments work wonders for me, the right choice for you depends on your unique requirements and workflow.
How to run the Installation
- Go to the Miniconda installation webpage: https://docs.conda.io/projects/miniconda/en/latest/. You should be able to see this table (or something similar!).
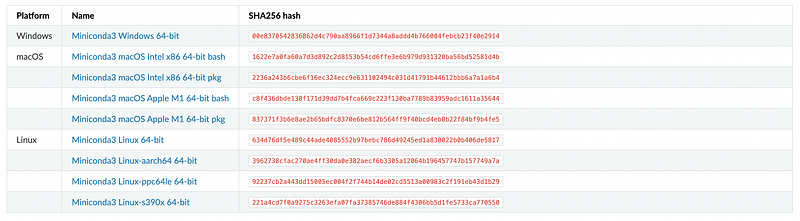
2. I have a Mac with an M1 chip, so I installed the fourth option under masOS. ‘Miniconda3 macOS Apple M1 64-bit pkg’. There might be a more recent version by the time you read this so make sure you install whichever is most recent!
3. Once this has downloaded, open the file and the installer window should look something like this:
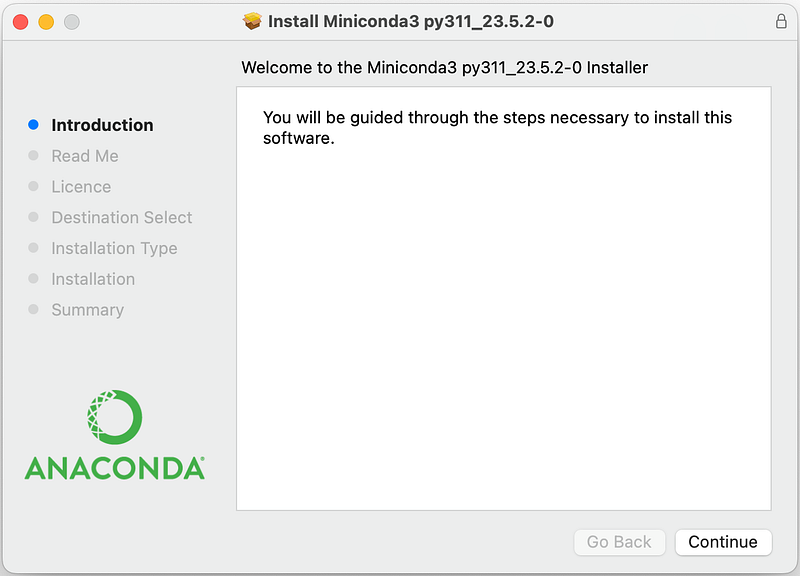
4. Press continue to get through the set-up, then miniconda should be installed on your machine!
5. Open a terminal window on your mac and type in the following command. This opens the .bashrc file found in your $HOME directory.
touch ~/.bashrc; open -t ~/.bashrc6. When the file is open, copy and paste the following lines to the bottom of the file. You can remove these lines at any time to remove the path.
# add path to conda
export PATH="$HOME/miniconda3/bin:$PATH"
7. Save and close the text editor.
8. Return to terminal and paste in the following to append the conda path to the ~/.bashrc file.
printf '\n# add path to conda\nexport PATH="$HOME/miniconda3/bin:$PATH"\n'9. Restart terminal for the environmental variable changes to take effect.
10. After restarting terminal, you can activate the base environment with the following command:
conda activate
You should be able to see (base) written to the left of your directory once activated.
11. To get out of the base environment type in:
conda deactivate
And you’ve completed the installation!
How to create and use a Virtual environment
There are a ton of settings you can add to the command when creating a conda environment. However, I’m just going to share the most simple with you here which is what I tend to use most of the time.
Make sure you have deactivated the base environment, then type in this command to create a new environment:
conda create -n my-first-venv python=3.8
Right, let’s break this down. First, as expected you type conda create, which is what initiates the virtual environment creation. The following flag n indicates that you’re about to give the name of your virtual environment. You can also use --name in place of this. Next I’ve given the name of my virtual environment, which is my-first-env. Finally, I’ve specified the version of Python I want to use, which in this case is version 3.8. You can use any version here though!
Once you’ve run this it will list all the packages it will install and ask you if you’d like to proceed. Enter y.
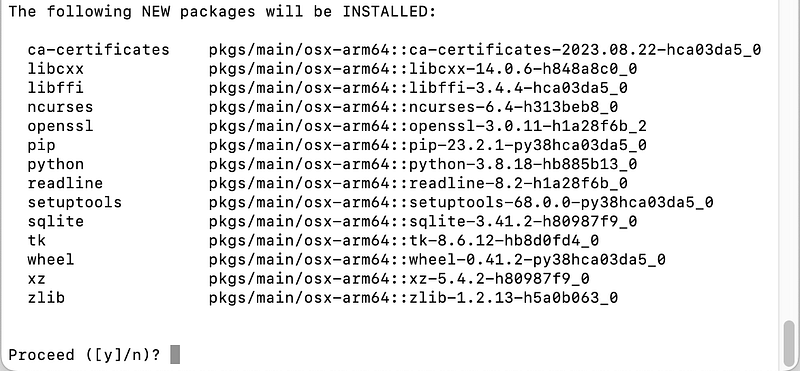
It will then take a moment to install all of these and load your environment.
To activate your environment you then type:
conda activate my-first-venv
You should then see the name of your virtual environment written to the left of your directory.

Now install any packages you want using pip install and use the environment as you usually would!
How to view all your virtual environments
To see all your environments you can use the command:
conda info --envs
Alternatively you can use:
conda env listThey both give the exact same output, so it’s up to you which you prefer! This is the output I get when I run the command:

As you can see, I just have the base environment and a new one I’ve just created called wildlife-cam (which gives you a little insight into a new project I’m working on!).
How to delete a Virtual environment
If you want to delete an environment, perhaps because you made a spelling mistake in the name, you don’t need it anymore or you just want to do a bit of a tidy up, it couldn’t be easier. Just make sure you’ve deactivated the environment you’re in and type in:
conda remove -n my-first-env --all
Again, it will ask you if you want to proceed. Enter y.
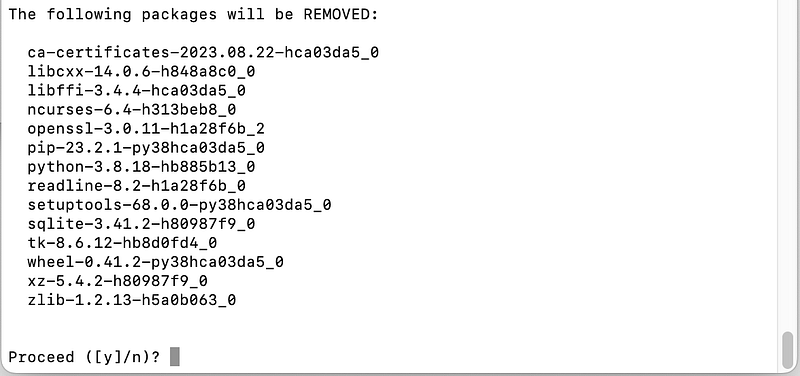
The environment will then be removed.
Conclusion
I hope this was helpful to you! Please leave any questions in the comments!


