
WRITING TIPS
How to Insert Links to Your Photo Credits
An easy step-by-step guide
Being a writer isn’t always easy. There are so many rules we need to know, guidelines we need to follow, and other things restricting our creativity. We need to properly cite sources when we copy information from another site and we also need to credit the images we use.
After all, we don’t want to be plagiarized but we also don’t want to be the ones plagiarizing others, right?
Leading to the topic which is still bringing us, the editors of Globetrotters, the most work in. Not properly credited images. Oftentimes we get answers from our writers such as “everywhere else this is accepted” or “other publications never say anything”.
That might be the case but the only reason why we are making such a scene around properly credited images is to protect us, as publication owners, and you, as the writer publishing a story.
Why do we credit images?
- Crediting images makes it transparent the picture does not belong to the user and is the property of the image owner.
- It also gives a fair warning to those who would like to use the piece of work and presents the image owner’s terms and conditions.
More often than not, the presented information will only be the image owner’s name and a copyright notice. That on its own should signal who to contact in the event of re-use. (pixsy.com)
Also, you could be risking a potential lawsuit if you don’t credit images properly.
What is an image credit?
Image credit is where the image user gives attribution to the image owner. (pixsy.com)
You need to make sure of the following points before using a foreign image in your work:
- Do you have the right to use the image?
- Do you have the correct license to share the image on a foreign platform? Some authors do restrict this.
- Place the image credits visible underneath the image and use the right template.
How to credit images?
Now, I do know most people know how to credit images but simply don’t know the technologies around it on how to include links. And then there are those who simply don’t care.
The latter group of people, we can’t help. But the first group is the ones we’re interested in and the exact clientele this article is written for.
In this article, I will explain in an easy step-by-step guide how to properly credit images on Medium.
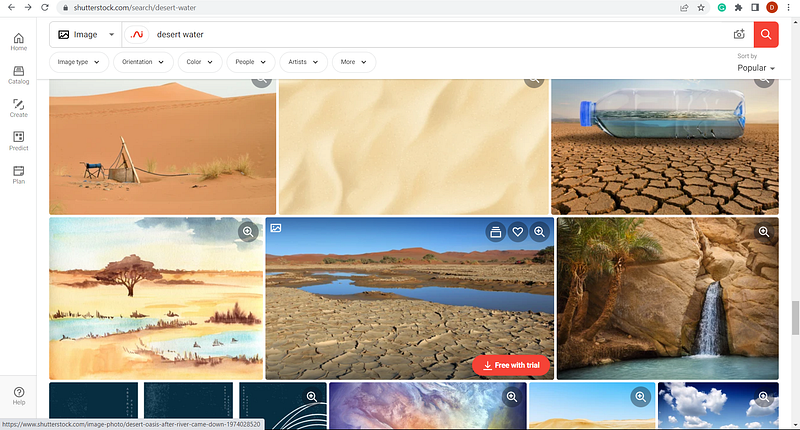
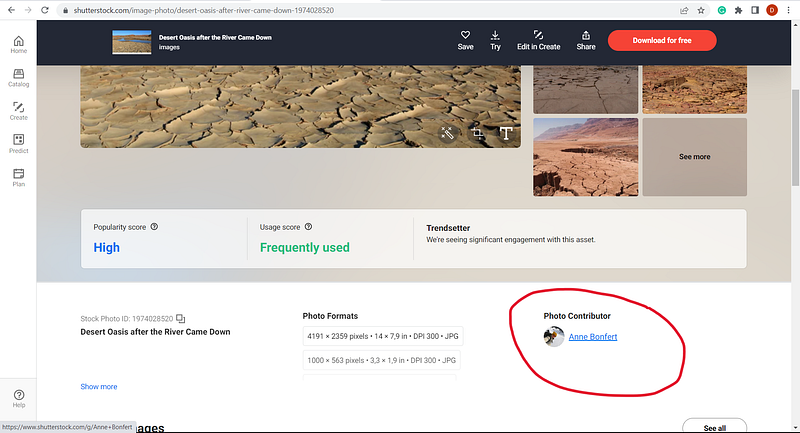
- Open a stock photo website
Search for your desired topic.
I went onto the page of Shutterstock and typed in “desert water”.
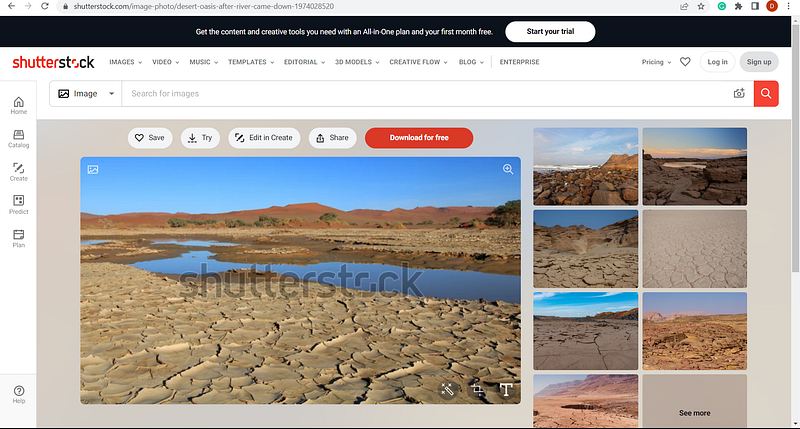
2. Select an image and download the photograph
This can mean downloading for free as long as such a download will allow you to share the photograph on another website and within your work.
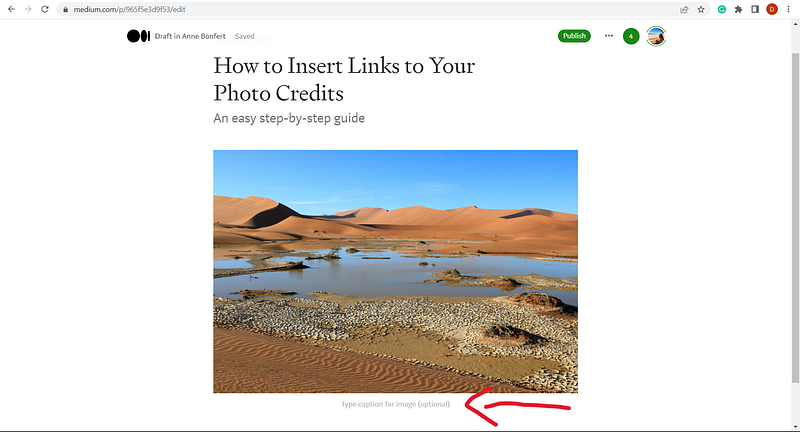
3. Include the image in your Medium article
Most people have figured out this part. Simply click on the plus sign and upload the wanted image.
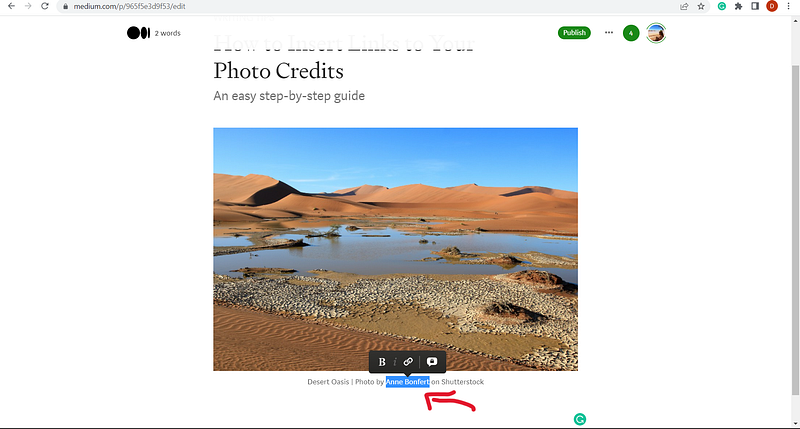
4. Click on “Type caption for image”
Here you type now the title of the picture, name the author and the page/website where you purchased the image from.
For example:
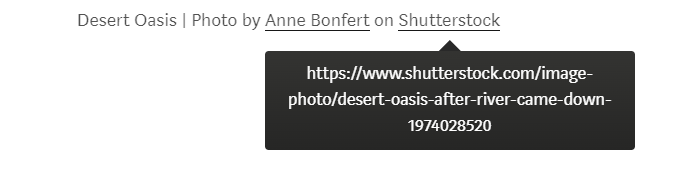
“Desert Oasis | Photo by Anne Bonfert on Shutterstock”
Now, this is where most people stop their image crediting process. But without a link referring to the page you are still not out of the lawsuit.
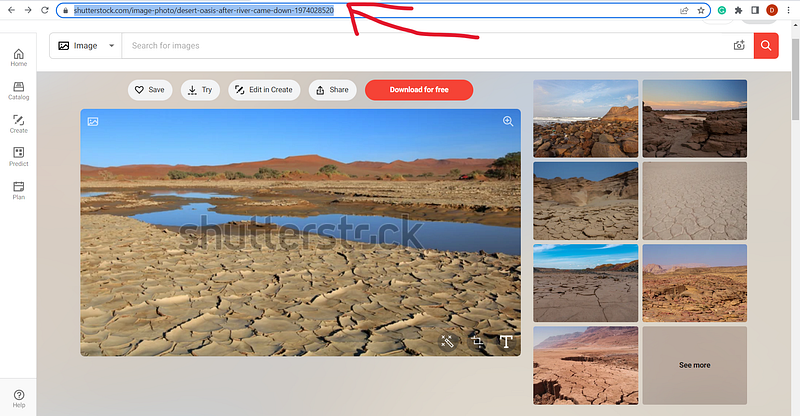
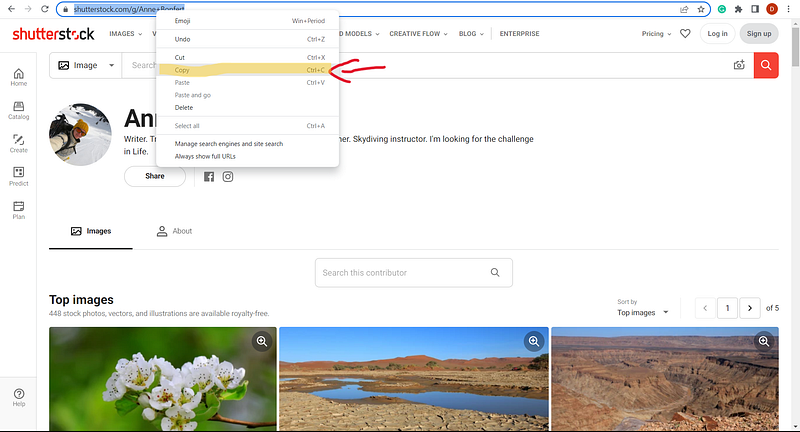
5. Copy the link from the image
In this step, you go back to the stock photo website and copy the link of the image. And this does not mean copying “shutterstock.com” but the exact link of the photograph.
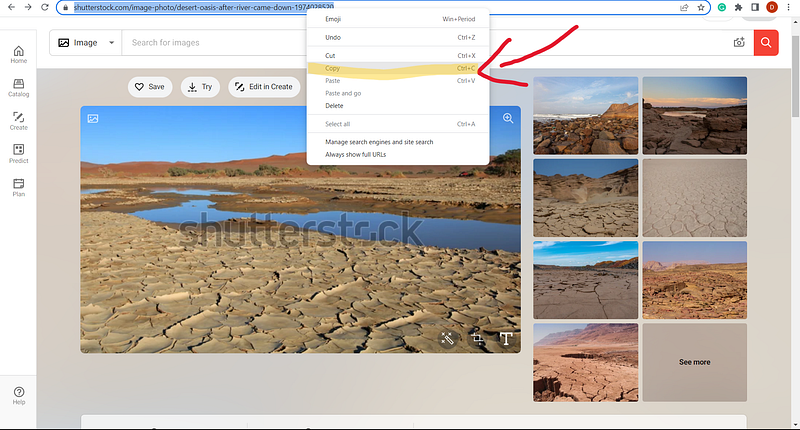
First, just click on the search bar. By doing so, the link will get marked. If not, simply go with the cursor across the link to mark all letters of it
Then either click CTRL and the button “C” at the same time or right-click with the cursor on the marked text and click on “copy”. Both options will allow you to copy the selected text.
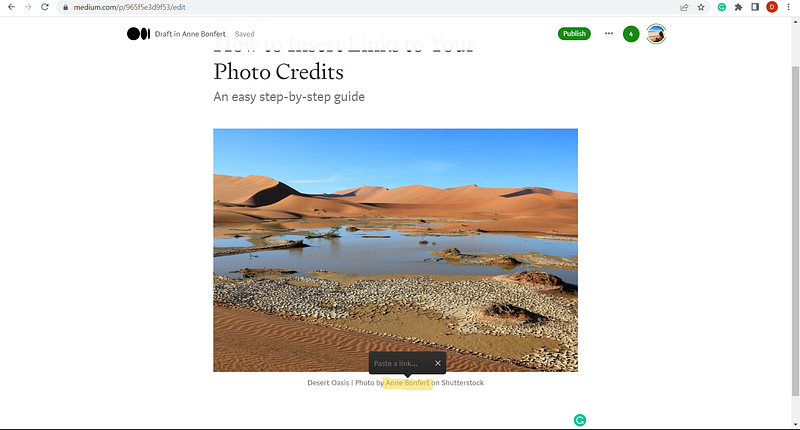
6. Insert the link
Now, you go back to your Medium article and mark the word “Shutterstock” which is where you would like to place the hyperlink. By selecting the word a small bar appears.
By clicking on the sign in the middle with the two chains in each other, another window opens where you can insert the copied link by pressing “CTRL” and “V”.
Or, you simply just mark the word and click “CTRL” and “V”.

Now, a line will appear underneath the word “Shutterstock” and if you move the cursor onto the word, the link will appear above/below the selected word.
Everyone can follow this link to go to the origin of the image.
7. Go to the photographer's page
In order to properly credit the image, you should also refer to the profile of the artist. This step is additional but recommended. You will repeat steps 5 and 6.
8. Copy the link
Go back to the search bar, click on the link and copy it. Just as in step 5.
9. Insert the link
Go back into your Medium article, select the name of the photographer and insert the link by using CTRL and V.
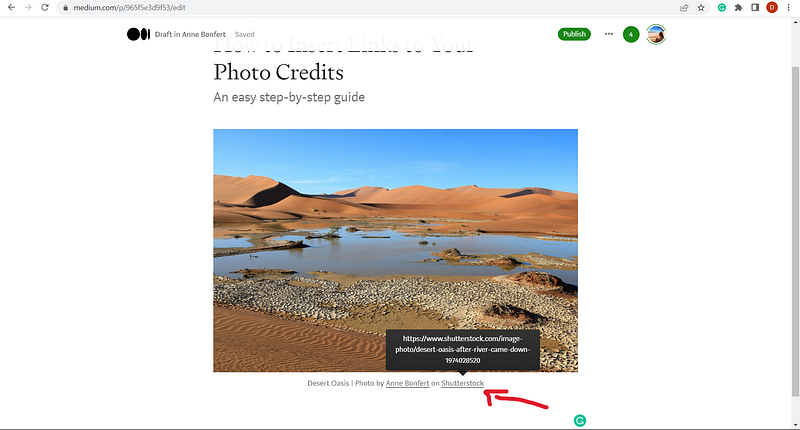
10. The image credit is now completed
As you can see below, your image credit is now completed including two links. One hyperlink is referring to the page of the photograph and the other one is to the creator of the image.
I hope this step-by-step guide did not only help you on learning how to include links in your image credits but also explained the importance of crediting your sources.
For more details about different kinds of image credits please check out our image policy:
If you have any other technical or editorial questions you’d like to have answered, please leave a comment below.
Your Globetrotter editor’s team
JoAnn Ryan | Adrienne Beaumont | Jillian Amatt | Anne Bonfert


