
How To Import A Bunch Of Addresses Into Google Maps
Gain Visibility To Your Reach With A Couple Of Clicks (for schools, religious facilities, carpool planning, deliveries, etc.)
I ran across a solution that was slick and easy, so I thought I would share it with others.
In brief, you will create a spreadsheet, save it as a .CSV file, and upload it to Google Maps.
Prior to this, I used Google My Places to plot vacation details. I see this as a great tool for schools and religious organizations to plot where the families live. It can help with marketing, carpools, or organizing deliveries.
Part 1: Prepare A List Of Addresses
You can use a variety of programs to create your address list. I will demonstrate using Google Sheets.
Things to note:
- Include “Name” and “Address” columns. Can you can have more because when you import, you can select the fields to include.
- Check your list for correct and complete addresses. Anything that is incorrect will be flagged by Google Maps to be corrected.
- You can use an existing spreadsheet or create a new one. Review Part 2: Step 8 to see the file types that Google Maps can import.
Step 1: Navigate to sheets.google.com.
Step 2: Under “Start a new spreadsheet”, click “Blank”.
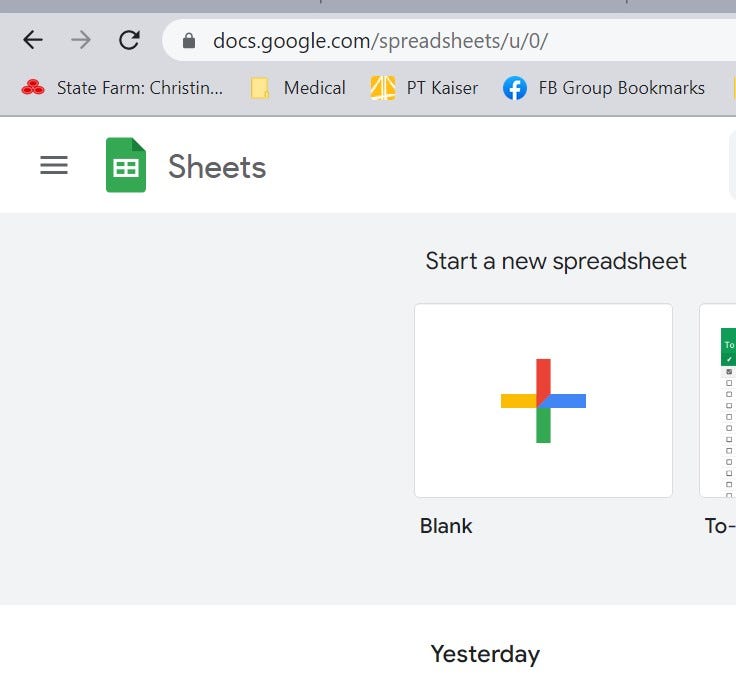
Step 3: Click on “Untitled Spreadsheet” to give your spreadsheet a name.

Step 4: In cell A1, put “Name”. In cell B1, put “Address”. Enter the full address in column B. Google Sheets automatically saves your work.
NOTE: If you want to separate your data into multiple groups, create a separate spreadsheet for each and give them names to clearly delineate the group.
Part 2: Add The Addresses To A Map
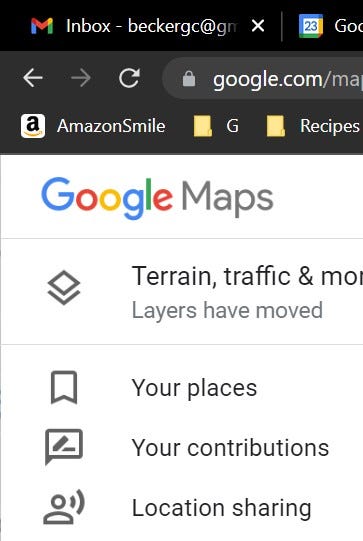
Step 1: Go to Google Maps (google.com/maps).
Step 2: In the upper left corner, click the three parallel lines. A menu will appear on the left side of the screen.

Step 3: Click on “Your Places”.
Step 4: Click on the “Maps” tab.
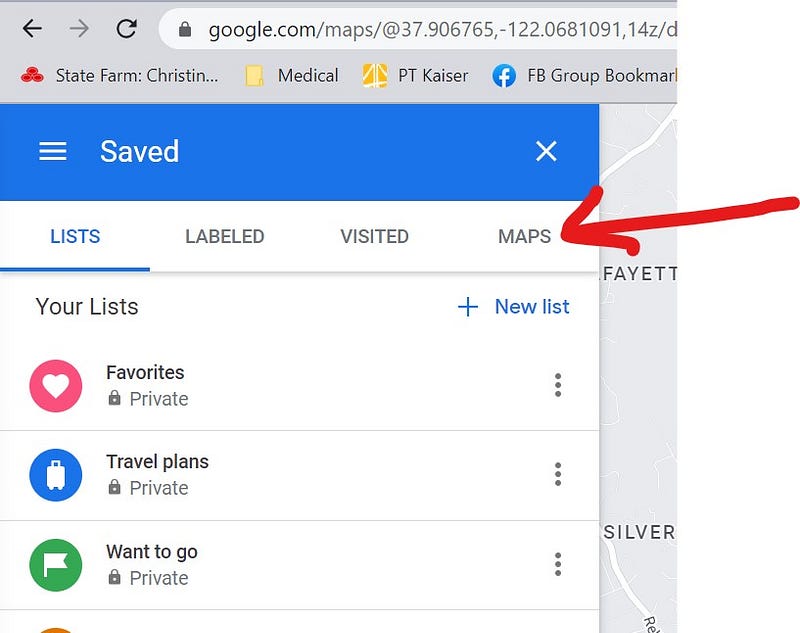
Step 5: At the bottom, click on “Create Map”.

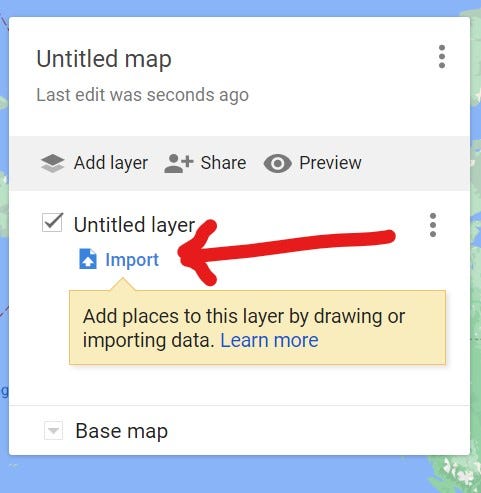
Step 6: At the top, where it says “Untitled map”, click on it to change the name.
Step 7: Click on the word “Import”.
NOTE: If you want to group the addresses and turn a set on or off when viewing the map, utilize Layers. Here you see one layer, currently untitled. To split the list up into different groups, create a spreadsheet for each group and import them separately to different layers.
Step 8: Locate your spreadsheet. Google Maps accepts the following file types. You can click “Select A File From Your Device” and navigate to your file or drag the file over. Hit “Select” when you are done.
Google Sheets (by clicking the Google Drive tab at the top)
Comma-Separate File (.CSV)
Microsoft Excel Spreadsheet (.XLSX)
Keyhole Markup Language (.KML)
GPS Exchange Format (.GPX)

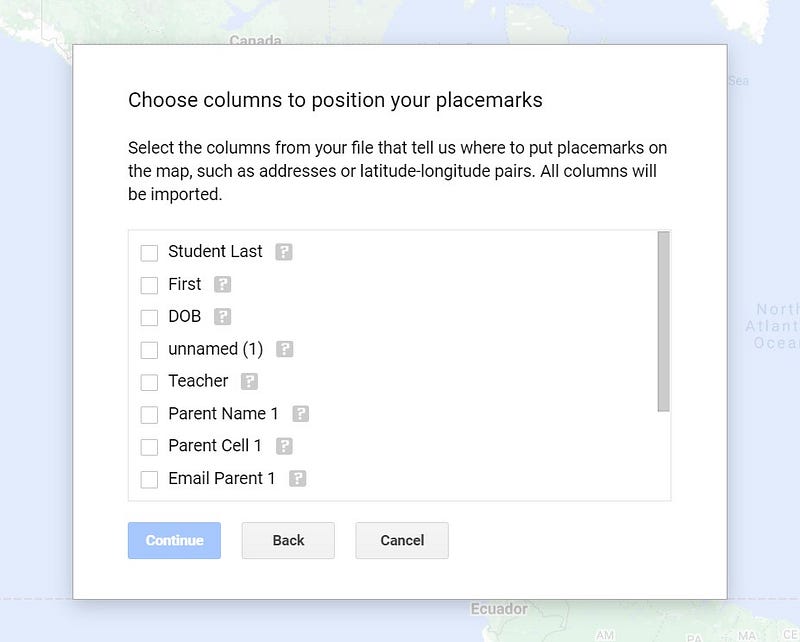
Step 9: Click the check box to the left of the fields that you want to include. Most likely a name and an address. Google will flag any addresses that are incomplete or incorrect. It will show you the data table so you can clean it up.
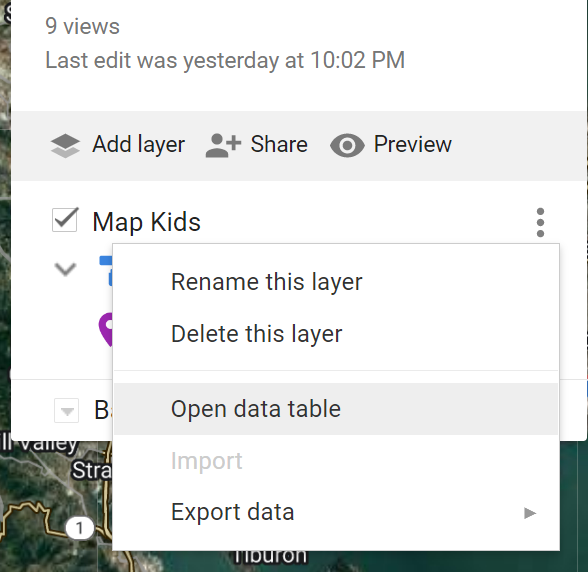
NOTE: Here is another way to find the data table. If you bring up the map, go down the list to the layer you want and click the three dots to the right of the layer name. A menu will appear, click on “Open data table”.
Step 10: After fixing the data, Google will display all the addresses on a map. Each address will appear as a tear drop on the map. If you click the tear drop, you will see the data (name, address, etc). You can change the color of the drops and some other features as well.


