
How To Host a React Static Website on Azure
A step by step guide with an example project

There are a number of ways you can build a website with React such as Java with React, NodeJS with React, NGINX serving React, etc. For the single-page applications, all you need to do is to load the initial index.html. Once you load the index.html the React library kicks in and do the rest of the job like loading components, calling API calls, etc. What if there are no backend calls and you want to build a static website with React?
Azure CDN with blob storage is one of the options which provides low cost and highly reliable static website hosting solution. These static sites have only CCS, HTML, JS files, fonts, etc. In this post, we can see how we can build a static website with React and host that on Azure.
- Example Project
- Prerequisites
- Host Static Website With Azure Blob Storage
- Deliver With Azure CDN
- Uploading With Azure CLI
- Summary
- Conclusion
Example Project
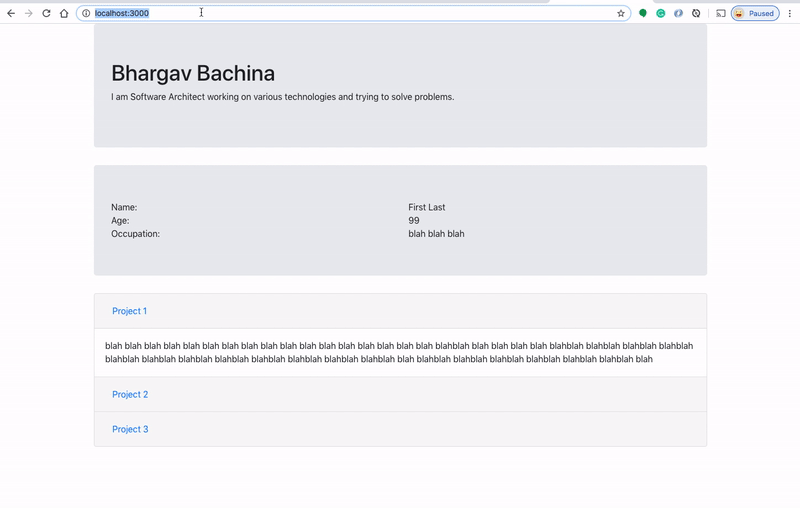
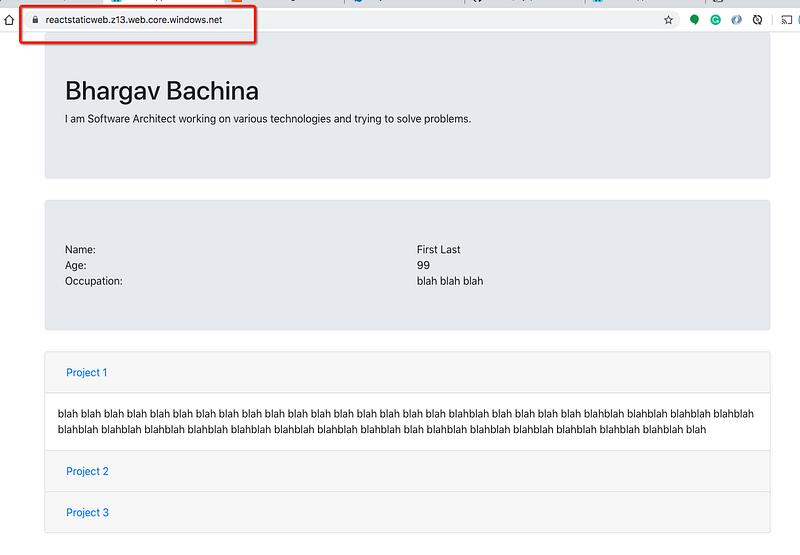
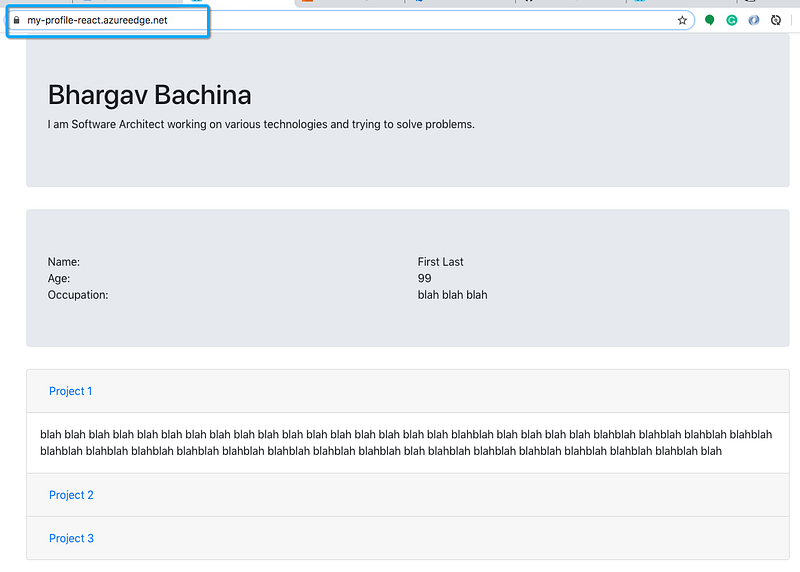
Here is an example project which we can put in the Azure blob storage for static website hosting. This is a simple profile page with a header and some sections.
// clone the project
git clone https://github.com/bbachi/my-profile-react.git
// install dependencies and start the project
npm install
npm startYou can clone the project and run it on your machine. Here is the demonstration when you run it on your localhost and the port 3000.
Prerequisites
You should be familiar with React and how React builds stuff. If you are not familiar with React check out this link or go to their official website here.
Once you install the necessary components and run the above project on your local machine. It’s time to create Microsoft Azure Account checkout this link
- Microsoft Azure Account
- Create a subscription
- Create a Storage Account
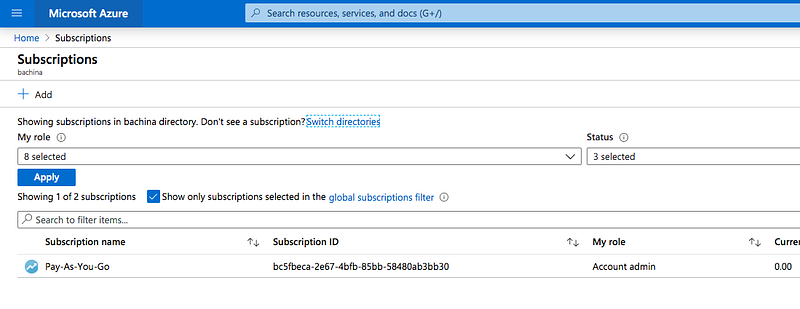
You can see the below dashboard once you create your account.

Create a subscription
You need to create a subscription that’s how It serves as a single billing unit for Azure resources in that services used in Azure are billed to a subscription
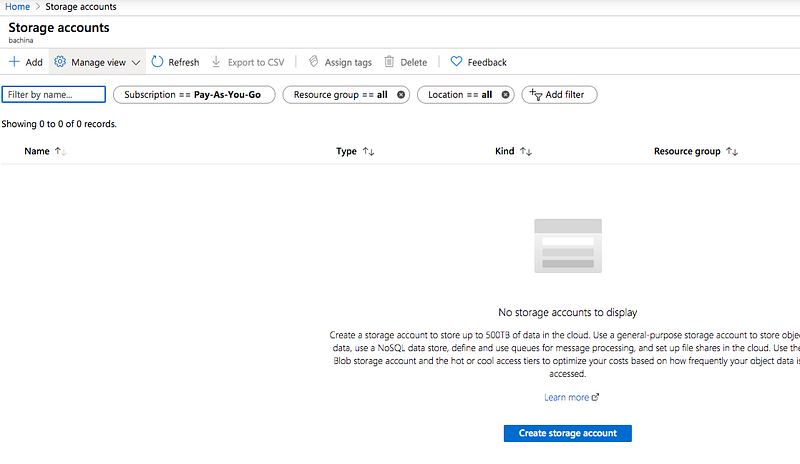
Create a Storage Account
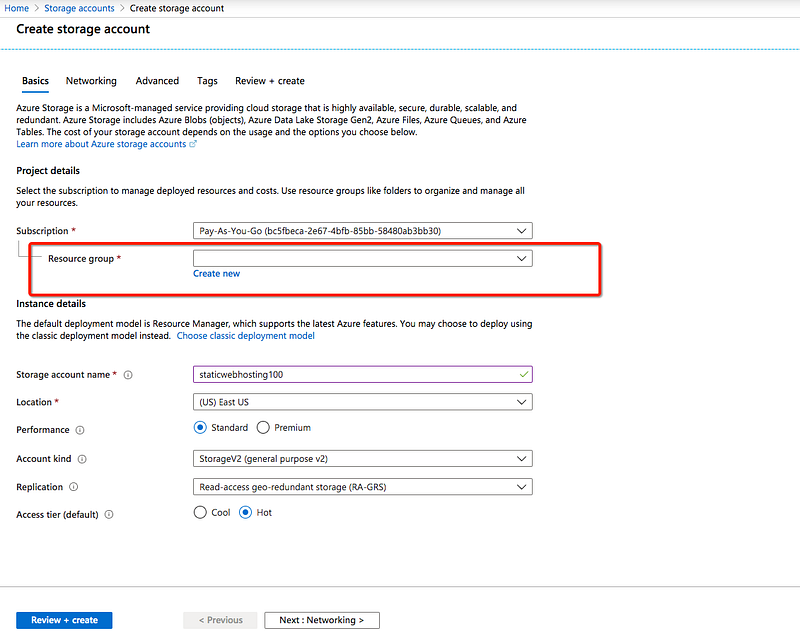
An Azure storage account contains all of your Azure Storage data objects: blobs, files, queues, tables, and disks. The storage account provides a unique namespace for your Azure Storage data that is accessible from anywhere in the world over HTTP or HTTPS. Let’s create a storage account under this subscription.
If you don’t have resource groups under subscription you need to create one. Resource groups are the ones that groups all your resources under the subscription. You can create multiple resource groups.
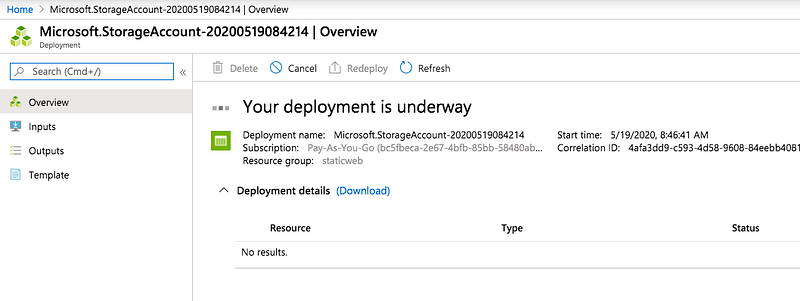
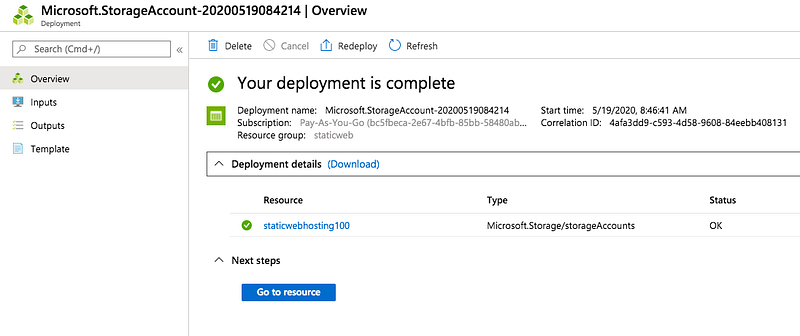
Once you review and create you can see the following screens.
Host Static Website With Azure Blob Storage
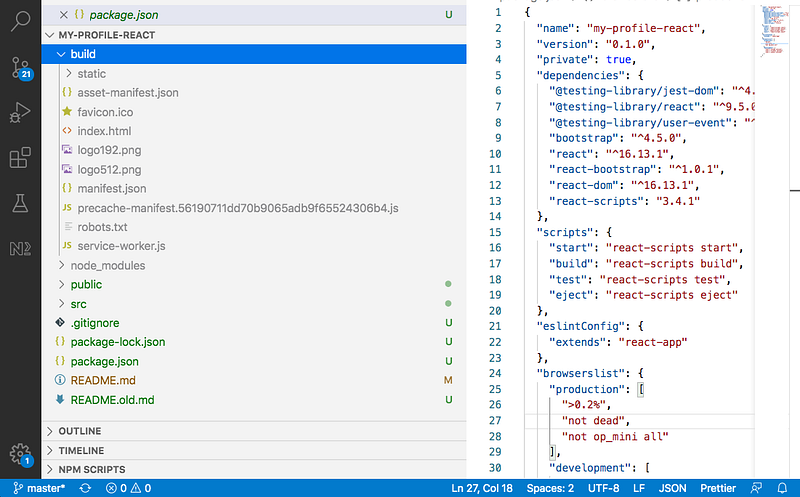
Now we have a subscription, resource groups, and storage accounts created on our Azure account. It’s time to build our app with this command npm run build. When you do that all the built assets can be found in the build folder.
Now, go to your storage account on Azure and click on the static website on the left navigation and give the required index and error pages.

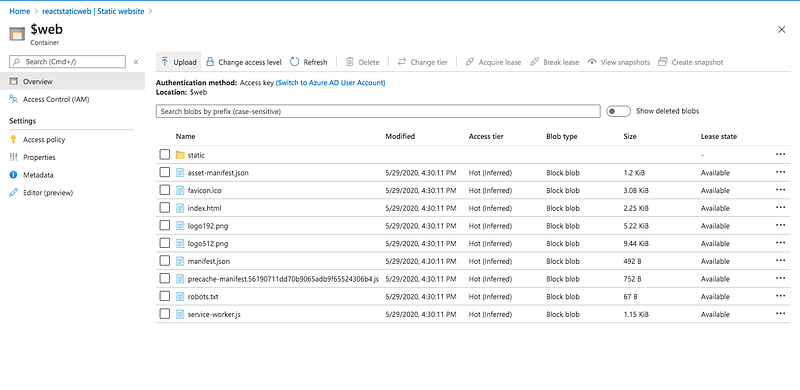
Once you enabled Azure creates we container called $web in which you can upload all your build files as below and it creates the primary endpoint as well.
Copy the primary endpoint and hit it in the browser once the upload is complete.
If you want to create a folder and upload it into that folder you can do that by selecting advanced and name the folder. I named it my-profile here.
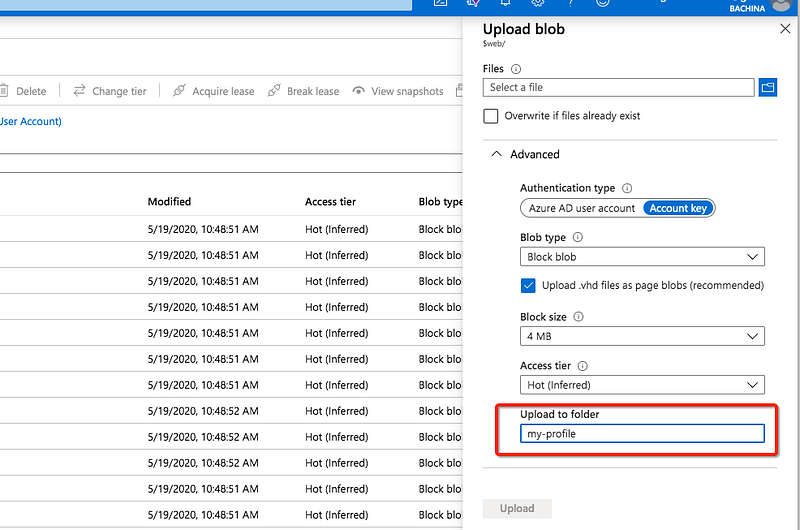
In this case, you have to change the context path on the React app as well to my-profile
Deliver With Azure CDN
You can enable Azure Content Delivery Network (CDN) to cache content from a static website that is hosted in an Azure storage account that provides consistent low latencies to your website from anywhere in the world.
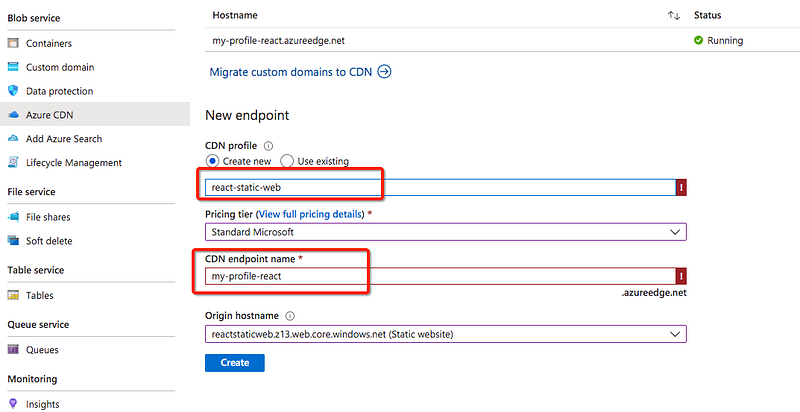
Let’s select an Azure CDN under blob service and give CDN endpoint name and you need to select your Azure blob storage URL as origin hostname. Make sure you remove protocol identifier https and trailing slash at the end.
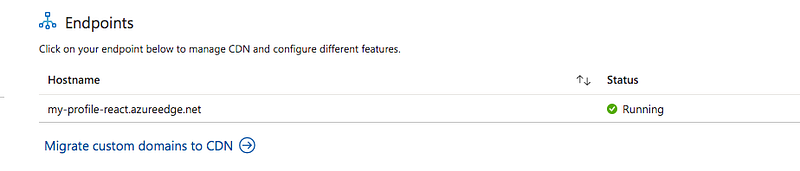
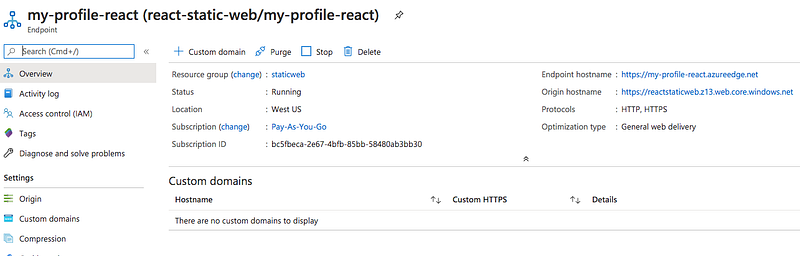
If it’s successful you can see newly created endpoints under the Endpoints section.
You can see all the details about this endpoint when you click on it such as the resource group, location, subscription, endpoint, origin, etc.
After creating a CDN endpoint, it will not immediately be available for use, as it takes time for the registration to propagate through the CDN. You might get this following error page.
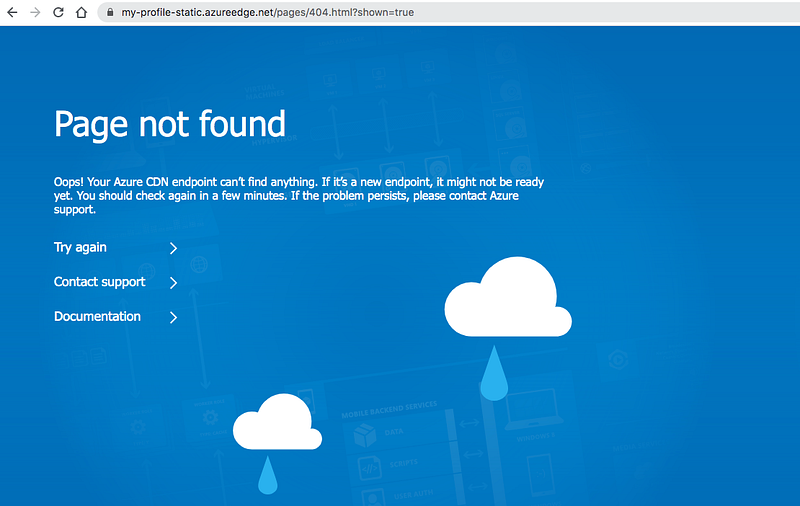
Make sure you go through this troubleshooting page. If you set up everything correct wait for 10 minutes or so, it will start working.
Uploading With Azure CLI
We have done everything manually. We can actually do the same thing with Azure CLI commands Let’s see how we can do that.
Step1: The first step would be logging in with Azure CLI. This configures the CLI with the user account. It will open the browser and takes your credentials and gives you a JSON response.
az loginStep2: Let’s create a subscription or set the subscription that you are using for the next commands.
// list subscriptions
az account list --output table
// ses the subscription
az account set --subscription bc5fbeca-2e67-4bfb-85bb-58480ab3bb30Step3: Create a resource group
az group create --name staticwebhosting --location westcentralusStep4: Let’s create a storage account with resource group name staticwebhosting and location eastus
az storage account create \
--name staticweb100 \
--resource-group staticwebhosting \
--location eastus \
--sku Standard_ZRS \
--encryption-services blob
Step5: Enable static web hosting on that storage account
az storage blob service-properties update \
--account-name staticweb100 \
--static-website \
--404-document error.html \
--index-document index.html
Step6: Upload all the documents to the blob storage
az storage blob upload-batch -s ./dist/ -d \$web \
--account-name staticweb100
Step7: Create a CDN endpoint with the following command
az cdn endpoint create -g staticwebhosting \
-n endpointName \
--profile-name profileName \
--origin <endpoint of your blob service>
Summary
- Azure CDN with blob storage is one of the options which provides low cost and highly reliable static website hosting solution.
- You need to create an Azure account, subscription, resource groups, and storage account before you create static website hosting.
- You need to create a subscription that’s how It serves as a single billing unit for Azure resources.
- An Azure storage account contains all of your Azure Storage data objects: blobs, files, queues, tables, and disks.
- Resource groups are the ones that groups all your resources under the subscription.
- You can just upload all the built files to the $web container that storage account created for you when you enable a static website.
- You can upload all the files into a folder as well. In that case, you have to build the app with that particular context path.
- You can set up an Azure CDN endpoint for your static website on the Azure blob storage.
- After creating a CDN endpoint, it will not immediately be available for use, as it takes time for the registration to propagate through the CDN.
- Here is the troubleshooting page if something goes wrong.
- You can map to a custom domain as well if you have one.
Conclusion
Static website hosting on the Azure is pretty straight forward. Try this if you are building static web apps.


