
How To Host a Next.js Static Website With GCP Cloud Storage
A step by step guide with an example project

Next.js is the React framework for static websites, the JAMstack, Production, Desktop, Lightweight Apps, Pre-rendered apps Mobile Web, etc. There are so many advantages using Next.js for your react application such as Pre-Rendering made easier, Exporting a static website with a single command, including CSS in JS code, very less configuration, fully extensible, and optimized for smaller builds, etc. You can get more information on their website here.
There are a number of ways you can build a website with Next.js such as Java with Next.js, NodeJS with Next.js, NGINX serving Next.js, etc. For the single-page applications, all you need to do is to load the initial index.html. Once you load the index.html the Next.js framework kicks in and do the rest of the job like loading components, calling API calls, etc. What if there are no backend calls and you want to build a static website with Next.js?
GCP Cloud Storage is a globally unified, scalable, and highly durable object storage for developers and enterprises. We can configure a Cloud Storage bucket to host a static website for a domain you own. The index.html from the Vue UI can be placed in the bucket along with all the related HTML, CSS, and JavaScript files.
- Why This Approach
- Example Project
- Prerequisites
- Create a Bucket With Public Access
- Build the Next.js project
- Upload and Test
- Next Steps
- Summary
- Conclusion
Why This Approach
GCP Cloud Storage static web hosting gives you the ability to serve an entire website directly from it. You should consider this approach when
- There is a lot of dynamic logic on the client-side instead of on the server-side.
- There are microservices in your project and you need to call those with CORS enabled.
- Your website is simple such as Profile page
- Ideal for caching of read-mostly websites
- With Cloud CDN, You can distribute the content globally with less latency and improve the performance significantly.
Example Project
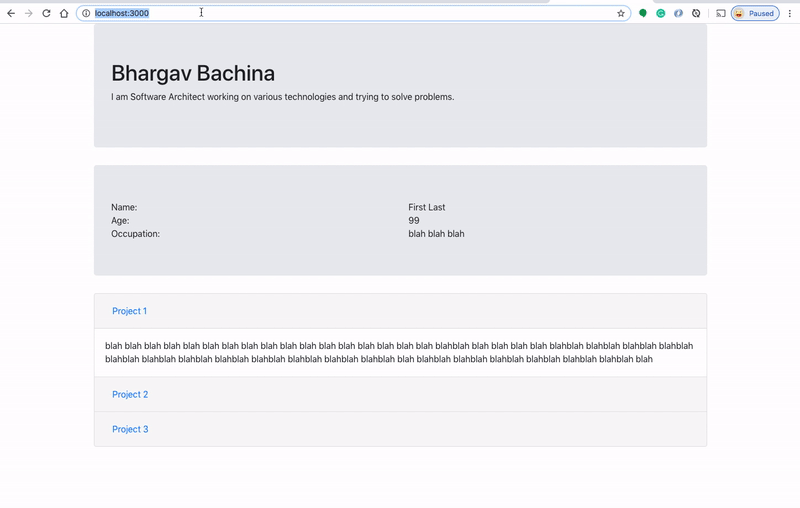
Here is an example project which we can put in the GCP cloud storage for static website hosting. This is a simple profile page with a header and some sections.
// clone the project
git clone https://github.com/bbachi/my-profile-nextjs.git
// install dependencies and start the project
npm install
npm run dev// build the project
npm run buildYou can clone the project and run it on your machine. Here is the demonstration when you run it on your localhost and the port 3000.
Prerequisites
You should be familiar with Next.js and how Next.js builds stuff. If you are not familiar with Next.js go to their official website here.
We need to create a Google Cloud Platform account from this URL. You can create an account and login to Cloud Console.
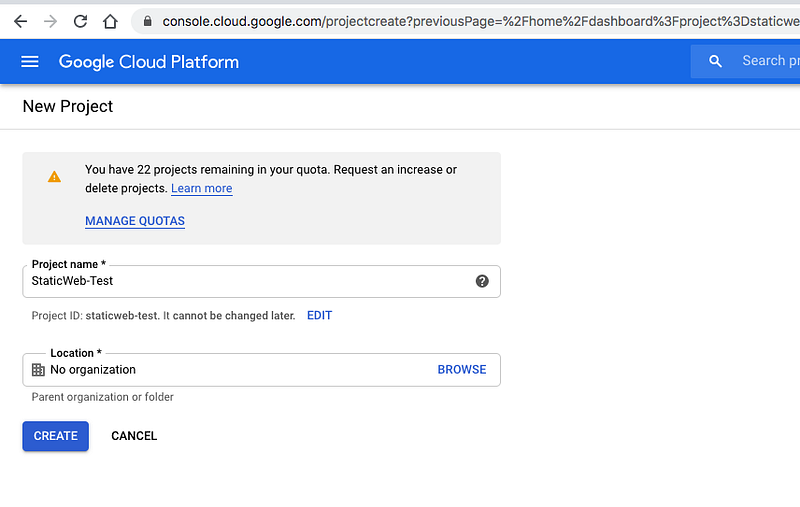
Create a project called StaticWeb-Test (You can name whatever you want).
Create a New Project
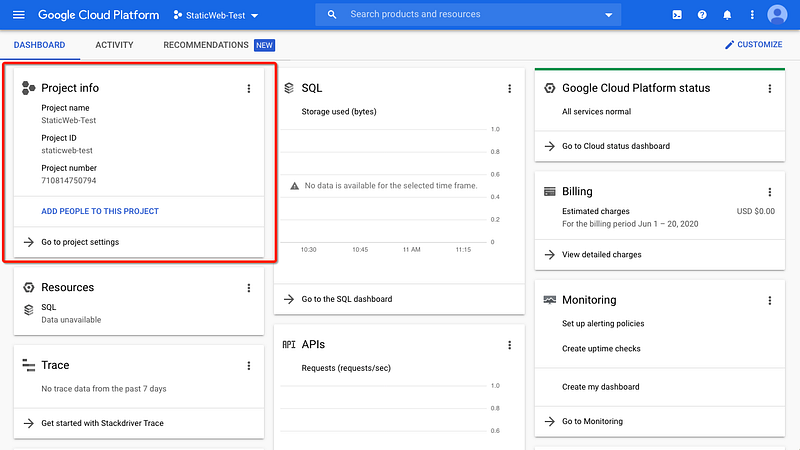
Once the project is created you can view the project dashboard like below. You can see all the resources that you create under this project.
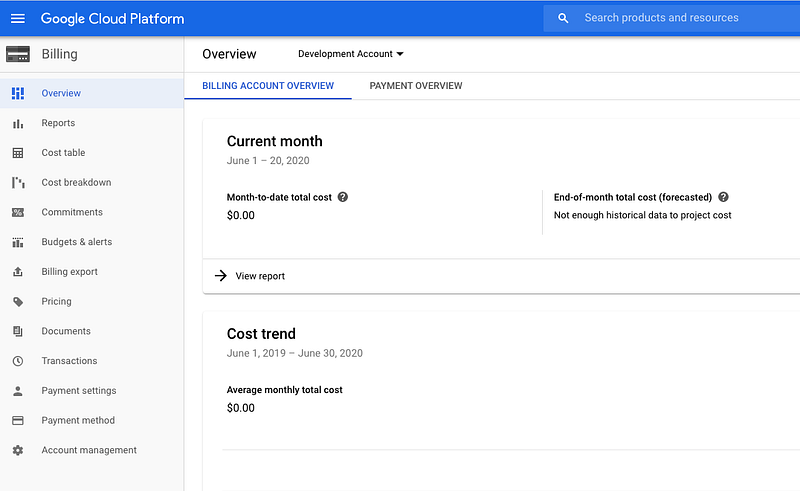
Create a Billing Account
You need to create a Billing Account by clicking on the Billing tab on the left navigation. For example, I created a Billing Account called Development Account
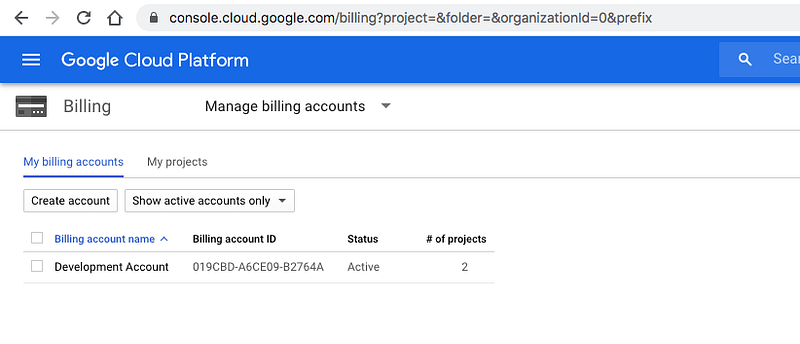
You can see all the details of the Billing Account on the overview page
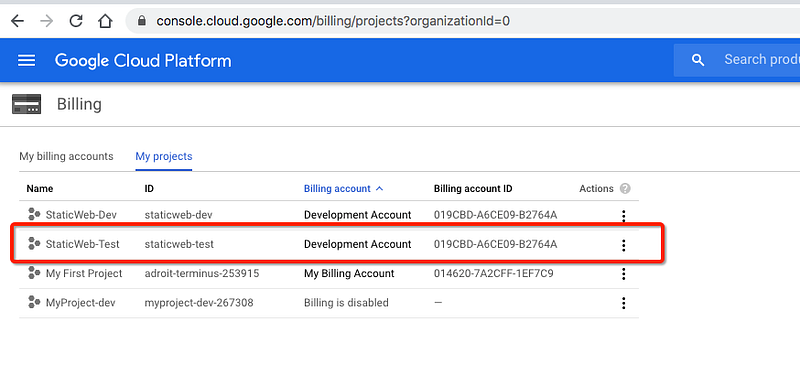
Link Billing Account With this project
We need to link this Billing Account called Development Account with this project as shown in the following figure. You can enable or disable billing at any time.
Create a Bucket With Public Access
The following are the series of steps that we need to follow in order to create a static website with GCP cloud storage.
Create a bucket
Let’s create a bucket called staticvuejsweb and upload all the Vue code into the bucket.
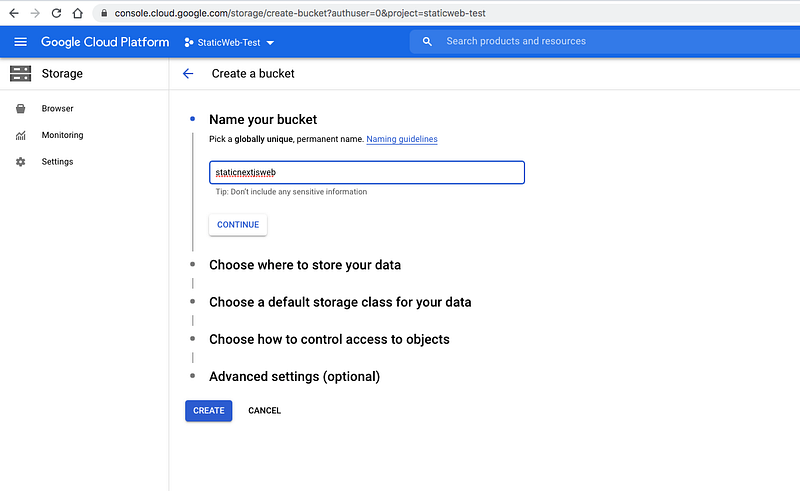
We need to select a location where you store the data. If you want high availability you can select Multi-region. We can choose the Region for this article.
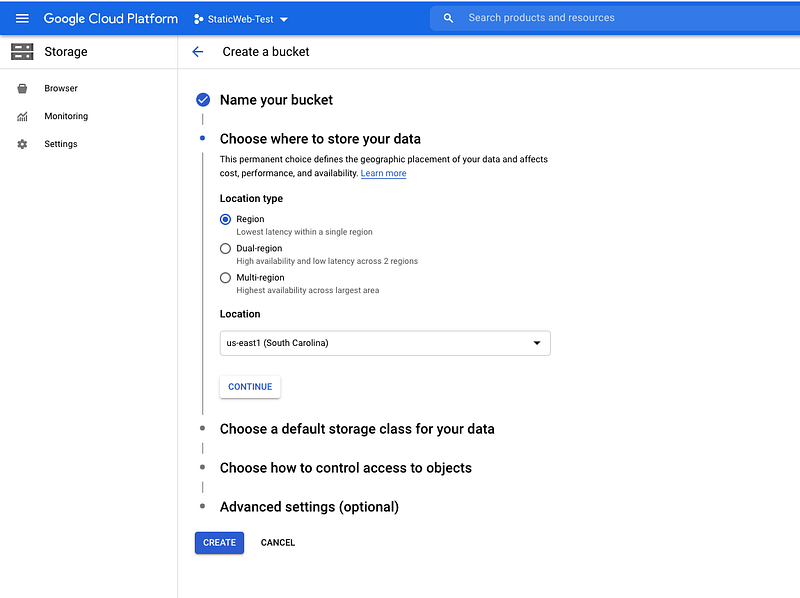
We have four kinds of storage classes: Standard, Nearline, Coldline, and Archive for different use cases. We will just select Standard for this use case.
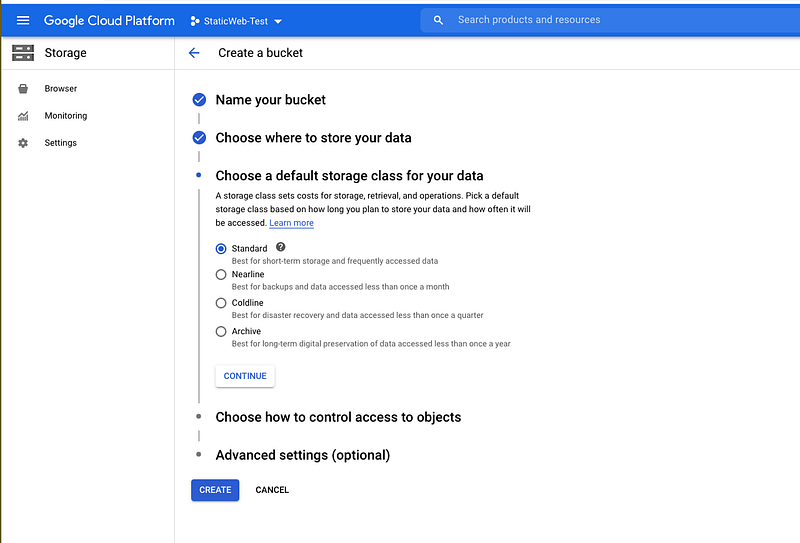
We need to select Access Control for our bucket. It is either Fine-grained or Uniform. To make individual objects in your bucket publicly accessible, you need to switch your bucket’s Access control mode to Fine-grained. Generally, making all files in your bucket publicly accessible is easier and faster.

Finally, we hit the button Create to create the bucket.
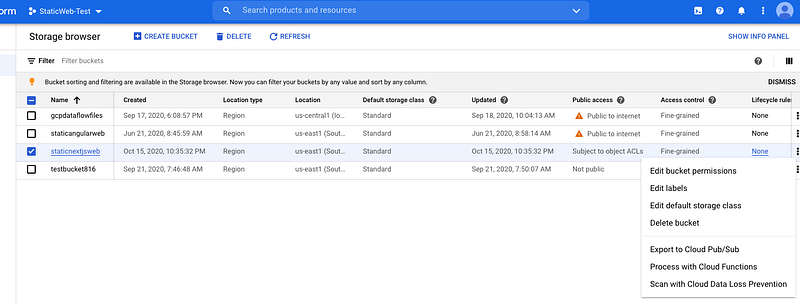
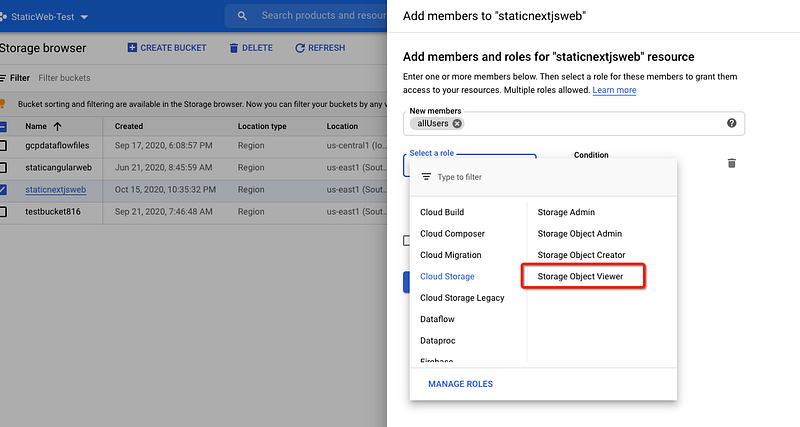
Make it Public
We have created a bucket and it’s time to make it public. Let’s click on the overflow button and click on Edit bucket permissions.
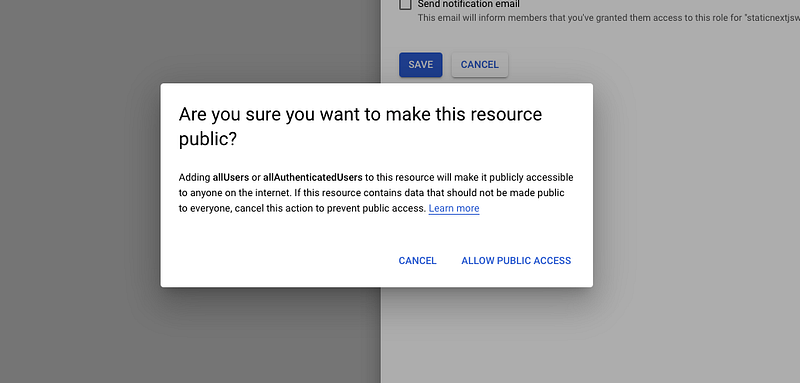
We need to add a member called allUsers with the role Storage Object Viewer and Allow Public Access to make it public.
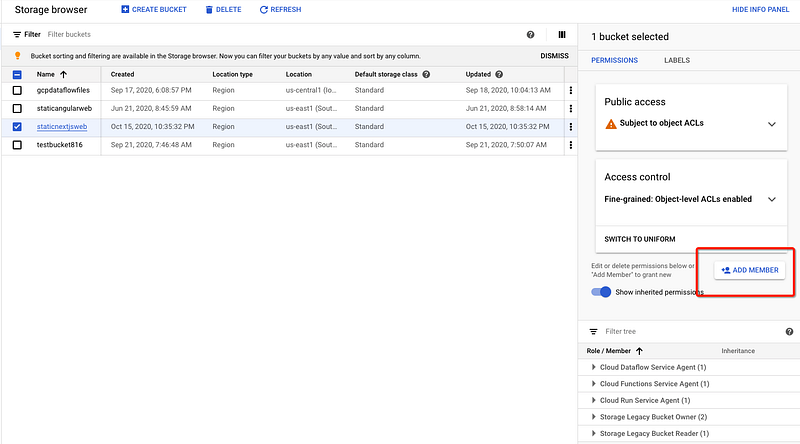
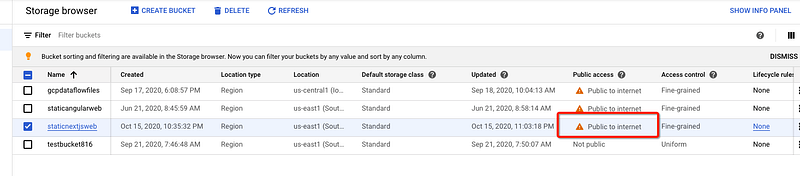
After you have done the above steps you can actually see the Public access status as Public to internet
Build the Next.js project
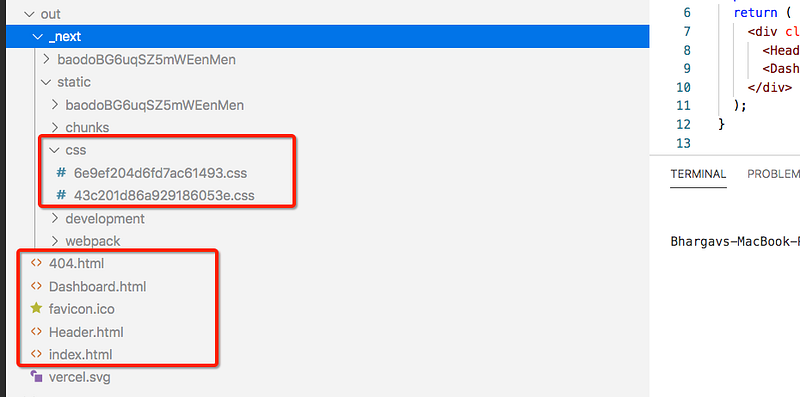
It’s time to build our app with this command npm run build. When you do that all the built assets can be found in the out folder. You have to run the following command.
next build && next export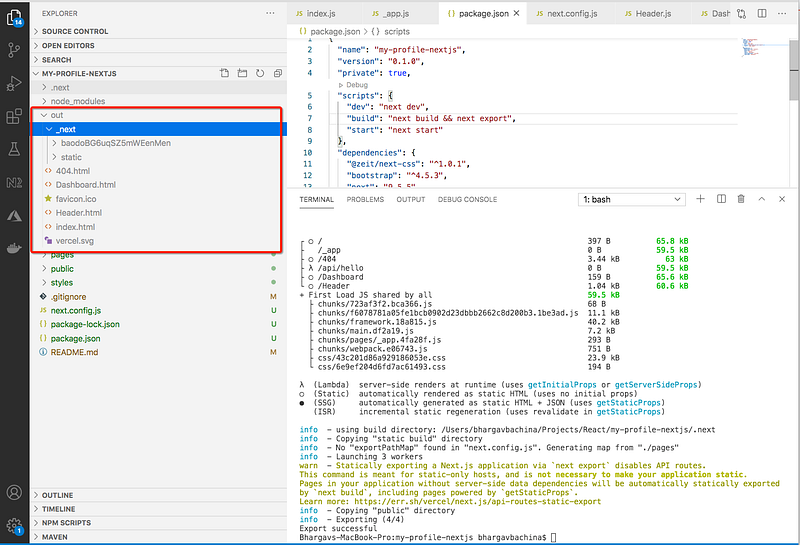
You just need to upload css folder and the root files.
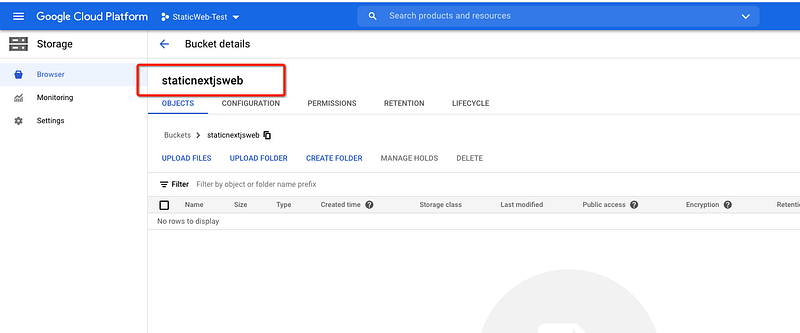
Upload and Test
All the files should be uploaded into the bucket as below.
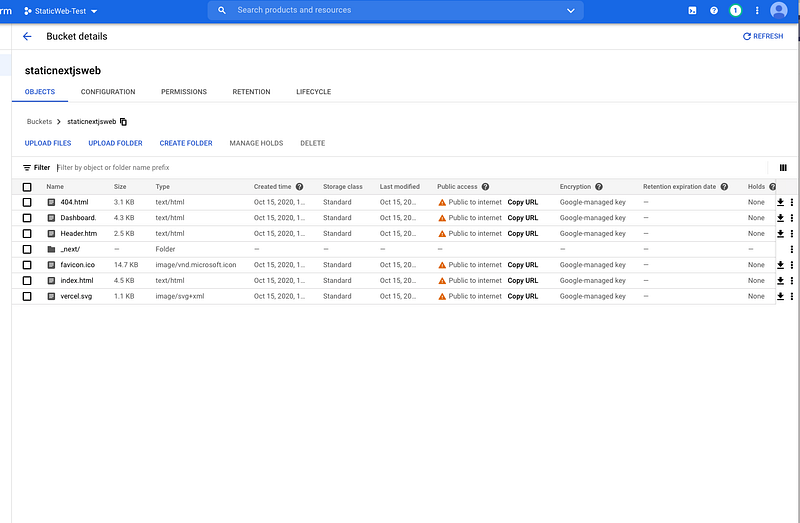
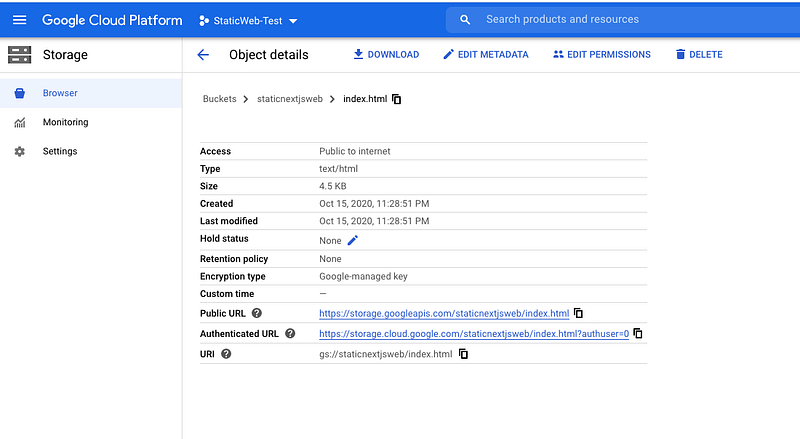
Since we have all the objects with public access. Let’s copy the link of the index.html https://storage.googleapis.com/staticnextjsweb/index.html
Next Steps
- You can clean up all the resources and buckets once you test it out
- You can do all these steps with Google Cloud CLI as well. Here is the link about it. You can go ahead download and install it.
- If you have a domain name and you need to create a bucket name with the same name. For example, if your domain name is example.com you have to create a bucket name
www.example.com - You can set index file and error pages with the following command with the help of CLI
gsutil web set -m index.html -e 404.html gs://www.example.com- To serve your website through HTTPS, you need an SSL certificate. This section shows you how to add your bucket to a load balancer’s backend and how to add a new Google-managed SSL certificate to the load balancer’s front end.
- Go through this post for completing all the steps such as load balancing, SSL certificates, etc.
- Here are some of the tips hosting a static website on GCP.
- You can set up with Cloud CDN in front of the Cloud Storage to distribute the content globally with less latency.
Summary
- There are a number of ways you can build a website with Next.js such as Java with Next.js, NodeJS with Next.js, NGINX serving Vue, etc.
- GCP Cloud Storage is a globally unified, scalable, and highly durable object storage for developers and enterprises.
- The index.html from the Next.js UI can be placed in the bucket along with all the related HTML, CSS, and JavaScript files.
- You need to create a GCP account, project, and enable a billing account on the project as prerequisites.
- You can create the static website with the help of Console, Google Cloud CLI, SDK, and REST API.
- You should build a Next.js UI with the relative path as same as the bucket name.
Conclusion
GCP cloud storage is one of the options for static website hosting and we can even plugin API with Cloud Functions to get any API data or dynamic data. We will see those in future posts.