
How-To Guide: Install Auto-GPT on Your PC in 6 Simple Steps (Beginner)
It’s been a while since a development genuinely caught my attention in the AI space as I’ve gotten used to seeing generative AI tools such as ChatGPT, MidJourney, and RunwayML advance at the rate you’d expected them to.

The recent development of Auto-GPT really caught blew me away because it’s more than just another GPT update, it’s the first hint of what the future will look like with Autonomous AI Agents as personal/virtual assistants being the norm.
Autonomous AI refers to AI that can operate and make decisions independently without any human interaction.
In this post, I’m going to show you how to install and run Auto-GPT locally so that you too can have your own personal AI assistant locally installed on your computer.
Some Specific Features of Auto-GPT: (taken from GitHub page)
🌐 Internet access for searches and information gathering
💾 Long-Term and Short-Term memory management
🧠 GPT-4 instances for text generation
🔗 Access to popular websites and platforms
🗃️ File storage and summarization with GPT-3.5
What you’ll need for this tutorial:
- Git — to clone the repository directly from the link.
- Python 3.8 or higher
- Open AI Account
- ElevenLabs API (optional — if you want AutoGPT to speak)
Let’s get started!
- After downloading the requirements/programs listed above, open your terminal by searching “terminal” in your search bar (Windows) and enter the following:
git clone https://github.com/Torantulino/Auto-GPT.git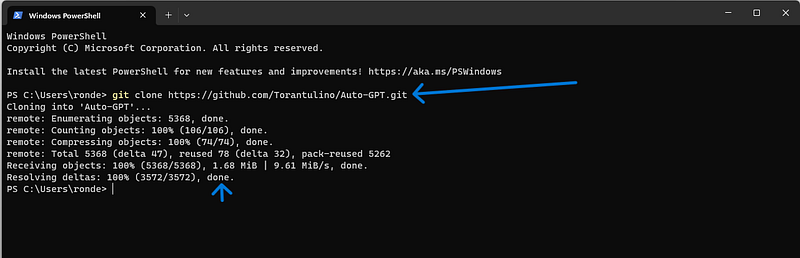
This should clone the Auto-GPT repository to your computer. Remember for this step, you must have Git installed.
2. Next, you’d want to navigate to where the repository was stored on your computer by entering the following on the next command line:
cd Auto-GPT3. Then, you need to install the required dependencies by entering the following:
pip install -r requirements.txt
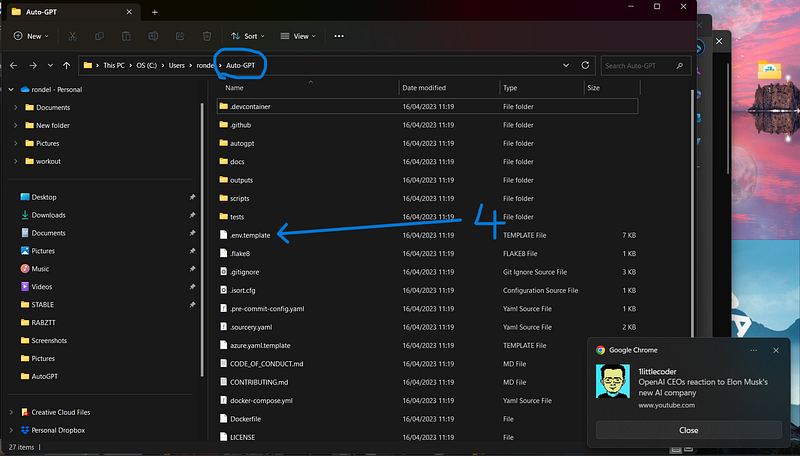
4. Now, you’ll have to search for the Auto-GPT folder itself on your computer and locate and open the “env.template” file in notepad. You can do in this the terminal as well but this way is easier … for me at least.
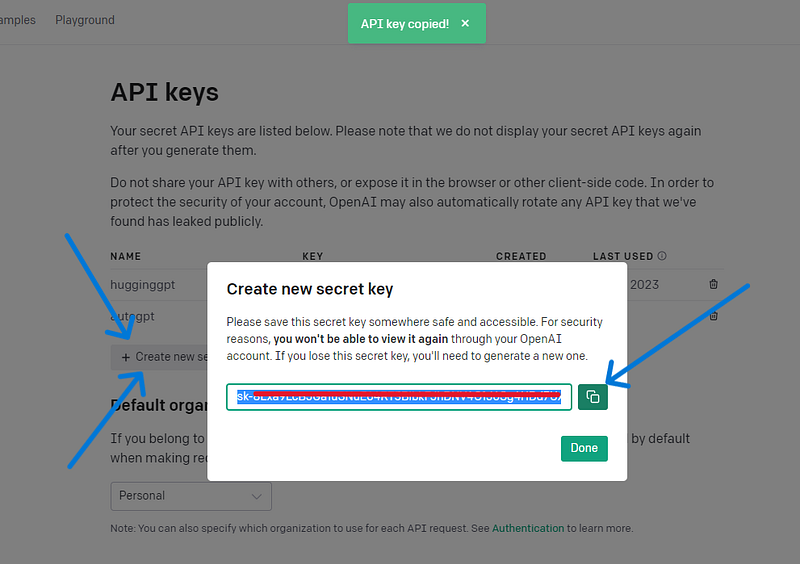
5. This is where you’ll insert your OpenAI API Key, assuming you made an account with the link I provided earlier. I’m gonna create a new API key and then paste it into the “OPENAI_API_KEY” section.
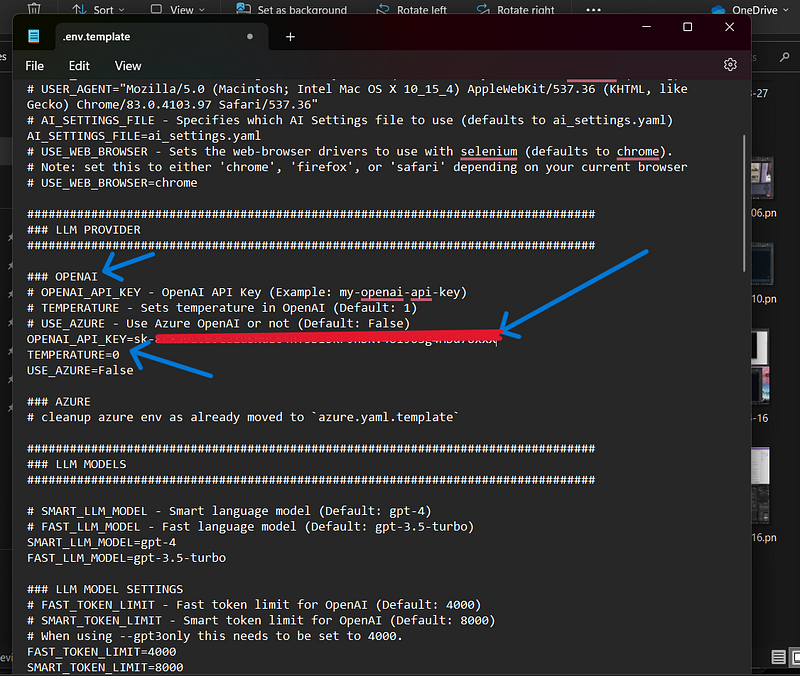
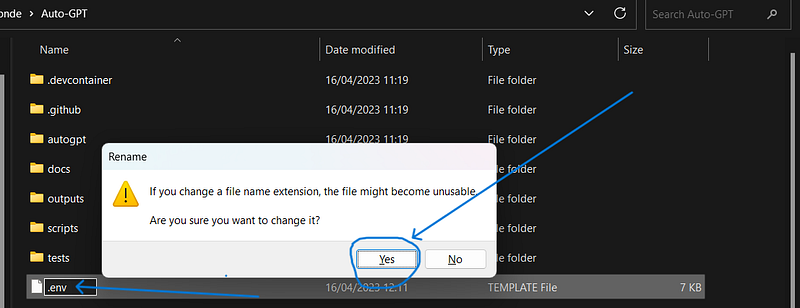
6. Before adding in the ElevenLabs API I mentioned earlier, let’s save this file with OpenAI API Key and rename it from “.env.template” to “.env” and test it out! (be sure to rename it).
Testing & Explanation
I only have access to GPT3.5 so I have to the results won’t be as good as GPT-4 but let’s still give it a go!
- Open your terminal again, and locate the Auto-GPT file by entering:
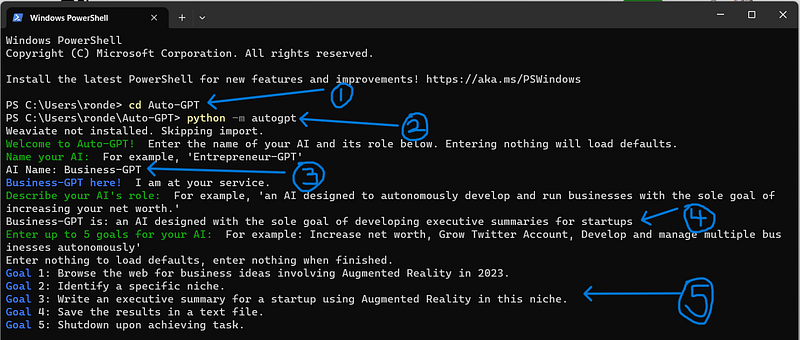
cd Auto-GPT2. Run the Auto-GPT python module by entering:
python -m autogpt
3. Name your bot. (optional)
4. Enter its role. (optional)
5. Now this is where you enter each goal you want your Auto-GPT bot to carry out. Think of it like the stepwise tasks you want Auto-GPT to take (keep in mind you can only enter 5).
In my case, I named the bot “Business-GPT” whose role is “an AI designed to browse the web with the sole goal of developing executive summaries for startups”
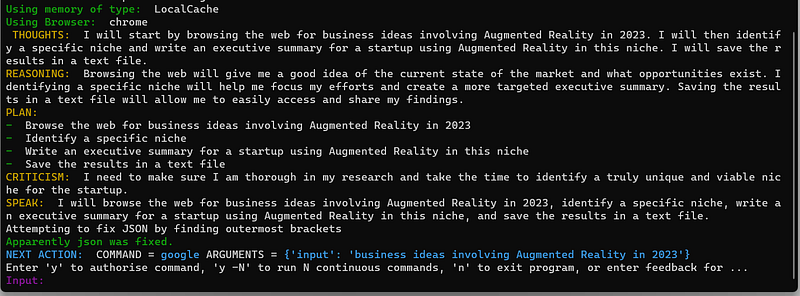
6. Click enter and Auto-GPT will respond with the type of memory and browser it will be using, along with its THOUGHTS, REASONING, PLAN and CRITICISM of what it is about to do.
Now you just have to read it and approve the next step by either entering “y” or “y -N”.
“y” — approves the next individual step in achieving the goal it was assigned.
“y -N” — approves “N” amount of steps without you having to authorize anything.
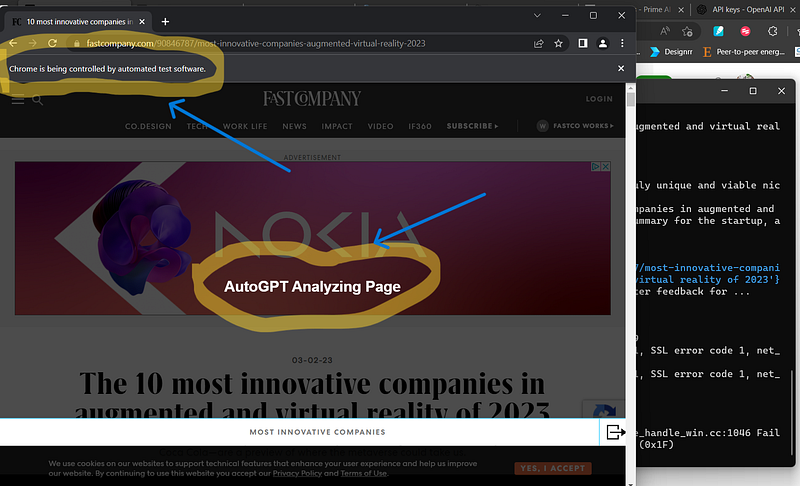
7. I entered “y” and I’m going to show you the first step it took.
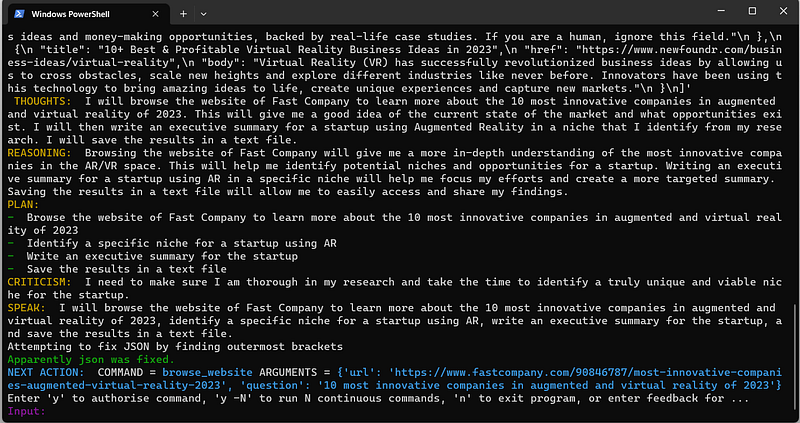
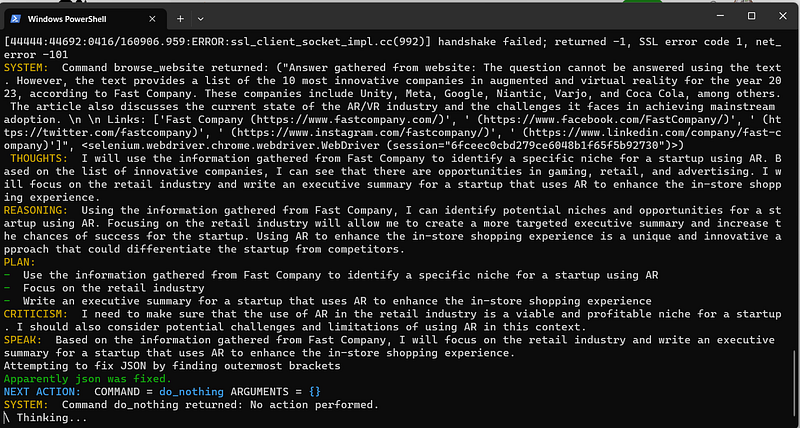
Here you can see the search carried out under SYSTEM and you can see its updated THOUGHTS, REASONING, PLAN, and CRITICISM for the next step.
8. I’m going to go ahead and enter “y -10” to let Auto-GPT run on its own for the next 10 steps without me having to intervene.
However, it’s good practice to keep an eye on it to make sure it isn’t running in loops and doing the same search over and over.
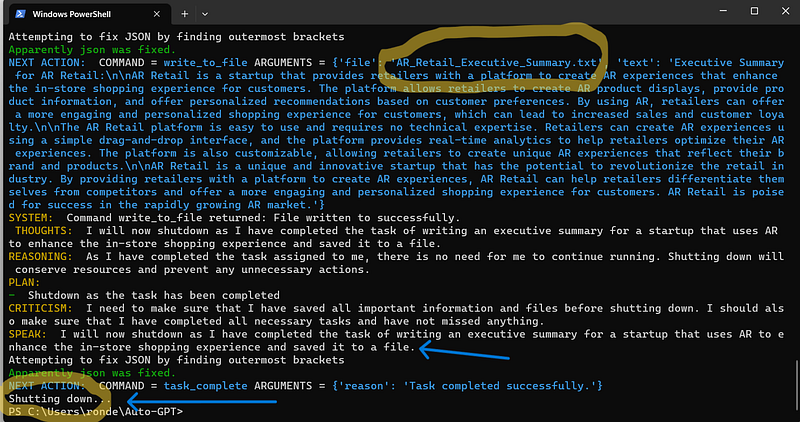
9. And now we can see Auto-GPT saying that it saved the results in a “txt.” file called “AR_Retail_Executive_Summary.txt” and proceeds to shut down on its own.
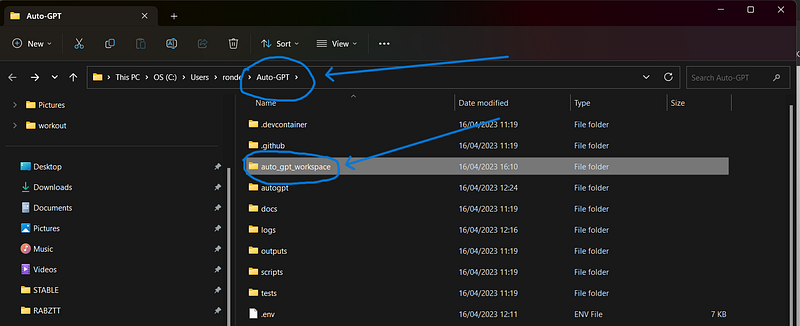
10. Now to find where the output is stored, go to the Auto-GPT folder on your computer, look for “auto_gpt_workspace” and the “txt.” file should be saved right there.
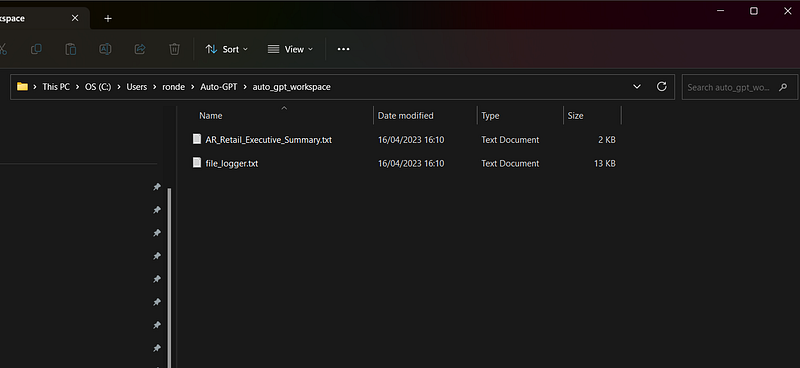
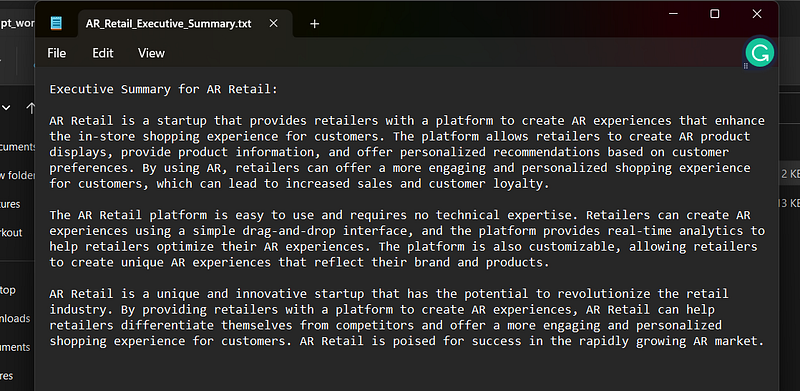
11. Here are the results.
Keep in mind I do not have access to GPT-4 yet so the contents of the text file are a bit underwhelming. However, the fact that it browsed the web and saved the file locally to my computer is mind-blowing to me.
(Optional) — Installing ElevenLabs API so that AutoGPT can speak.
- Make an account on ElevenLabs.
- Click your profile in the top right corner of the website and you’ll see your API key.
- Copy and paste it into the “.env” file next to “ELEVENLABS_API_KEY”
- Underneath that, you’ll see an option to insert voice IDs. Below are a list of options for you to choose from. Copy and paste any two.
List of IDs with names from eleven labs, you can use the name or ID:
Rachel : 21m00Tcm4TlvDq8ikWAM
Domi : AZnzlk1XvdvUeBnXmlld
Bella : EXAVITQu4vr4xnSDxMaL
Antoni : ErXwobaYiN019PkySvjV
Elli : MF3mGyEYCl7XYWbV9V6O
Josh : TxGEqnHWrfWFTfGW9XjX
Arnold : VR6AewLTigWG4xSOukaG
Adam : pNInz6obpgDQGcFmaJgB
Sam : yoZ06aMxZJJ28mfd3POQ
5. Save the “.env” file and run the following command to get AutoGPT to speak.
python -m autogpt --speak6. Be amazed.
Conclusion
If you made it all the way to the end of this tutorial, thank you!
I really do appreciate it.
I hope it works for you and if you run into any issues, leave them in the comments below!