
How-to form submissions with Flask and AJAX
Submitting and validating forms according to the latest HTML5 standards and security measures without reloading the webpage
At some point you’re going to want to make your web-app dynamic by allowing users to provide input that gets processed in a safe and correct way. This means you’ll be dealing with forms and form-submission, all the while keeping the information transfer safe and secure.
In this story I’ll try to show you how to send user input from the front-end (HTML) to the backend (Flask) using asynchronous javascript execution (AJAX), i.e. without reloading the webpage. This information transfer is protected from malicious attacks with a CSRF token. I’ve also included a few gimmicks such as HTML5 form validation and user feedback.
AJAX is great for dynamically loading content on the same webpage without reloading it and with this as your guide you can make it safe and secure and provide user feedback along the way.
The tech stack that we’ll go through is:
- Form with Bootstrap (HTML) and Materialize (CSS) frameworks
- Javascript and jQuery: AJAX form submission with FormData objects
- HTML5 and JS form-validation
- POST requests on a Flask route: both catching the response and returning
- CSRF protection with Flask-WTF
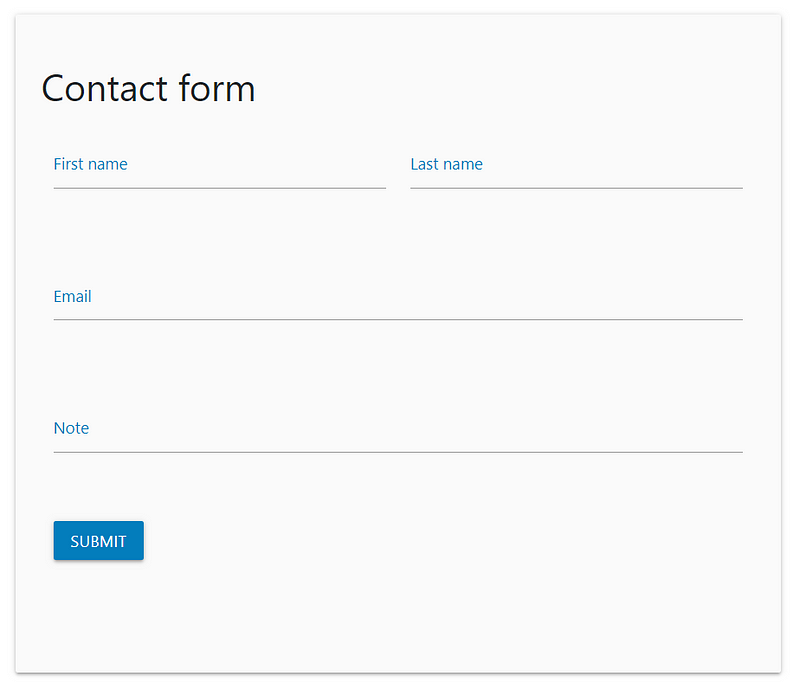
In this story we’ll build a simple contact form, but this architecture can be expanded for more elaborate forms, file-uploads, or any other HTTP request imaginable. Let’s dive right in, starting front (HTML) to back (Flask).
Front-end HTML
This is a simple HTML form, which directs to the /contact route in the Flask backend with a POST request. You might also notice on line 2 there is a hidden input type containing our CSRF token, which proves indispensable for protecting the form submission from malicious attacks.
The well-known Bootstrap framework is used to horizontally divide content on the webpage and an additional Materialize framework for styling implemented. This means that all of the styling of the different class names, such as input-field col s6, validate, helper-text, waves-effect and waves-light have meaning, because they are defined in the Bootstrap and Materialize frameworks. Note that a space in between the class="<element1> <element2>" indicates that multiple classes are being called. Last it is important to note that the submit button found on line 31 has an id="contact-form-button", which is how we’ll bind an event in jQuery to this form. The last div element with id="form-response" will show a pre-loader when sending the request back and forth from the front-end to the back-end and vice-versa.
Links for the dependencies are in the <head></head> tag and the scripts are in between the {%block scripts %}{% endblock %}, which is a beautiful way in Flask to divide where what content would be. A general heuristic is to have one base.html that contains HTML code that is necessary for every other HTML page, such as the header, navbar and footer, but also included links and scripts. You can then extend this base.html on every other HTML page by preceding the HTML page with {% extends "base.html" %} as is also done in our example contact page.
A general heuristic is to have one base.html that contains HTML code that is necessary for every other HTML page.
It is also important to note that there is a specific order in which these scripts have to be loaded for them to work correctly. I believe the order is (1) jQuery (2) Popper (3) Bootstrap.
Javascript files and jQuery methods
We’re using Javascript files to be able to use jQuery’s AJAX method. AJAX makes it possible to send POST request to our Flask route /contact without having to reload the entire HTTP webpage. This will be the core of this story and the most difficult part to explain. First we need to catch whenever the user clicks the submit button on our form, which we’ll do by using its id attribute and some jQuery.
jQuery is a wrapper for Javascript, essentially making it more user-friendly and can be used in .js files intertwined with Javascript code. A relevant difference between jQuery selectors $('#theID') and JS selectors document.getElementById('theID') is that with jQuery the normal properties and methods are not available, but a different set of methods specific for jQuery are: $('#theID').get(0) or $('#theID')[0]. This difference is important and explained in more detail here.
$('#contact-form-button').click() catches whenever the user clicks on the submit button of our form. we then set some variables and create our FormData object. A FormData object compiles a set of key/value pairs to send via the proposed method to the url. These come from the HTML form and are defined on line 1 of our contact.html in the action (/user) and method (POST) attribute of the form.
As you can see the click event also calls the function getContactFormData, which is defined below it and uses a JS DOM selector getElementById, because we need the internal properties: the keys input fields id's and values text that the user typed to fill our FormData object and send this information to the Flask route /contact. Using FormData objects is an easy way to automatically encapsulate all the information that the user filled out in the form.
Form validation
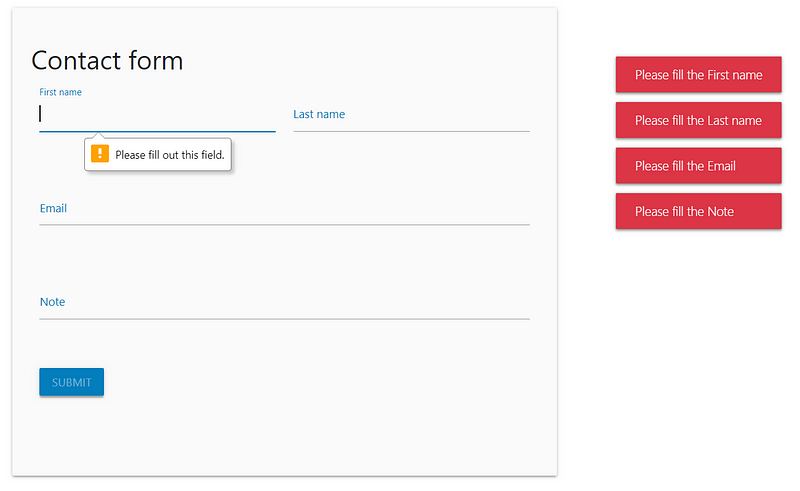
Before we can actually send the AJAX request, we’re going to do some form validation, both via HTML5 and JS. The message indicating Please fill out this field. preceded by a yellow exclamation mark is an example of the HTML5 form validation and the messages (toasts) on the right are the JS form validation.
form[0].checkValidity() checks whether all the required form fields are filled out and our own function isFormDataEmpty checks whether the FormData object is non-empty. Because we’re using a CSRF-token, this gets included in the FormData, hence why in line 44 we’re skipping the csrf_token key of the FormData. isFormDataEmpty returns true if all key-value pairs are empty and false if at least one is non-empty. If either condition in line 4 is not met, we’re going to have to show some errors.
HTML5 form validation is only enabled by the default submit event of a form, which would also reload the entire webpage. We want to prevent this using preventDefault(), line 5, but we do want the form to be validated by HTML5. This is why the preventDefault() is only called after the validity of the form was confirmed in line 4. This way, if the form is not valid, the default submit event is not prevented, and the HTML5 form validation can be shown to the user.
HTML5 form validation is only enabled by the default submit event of a form, which would also reload the entire webpage.
lines 12 until 20 will create a method .label for each of the form fields that have a label, for instance line 6 for the First name and line 11 for the Last Name in our html.form. This method can then be called on all the items that have an invalid class. This invalid class is appended to each form field that was invalidly filled out by the user (for instance, it was required, but not filled out or it had a pattern requirement that was not met) when calling the form[0].checkValidity() in line 4.
We can then show an error message, a toast, via the Materialize framework that shows which form field was invalid, by asking the user to please fill out the <label of class invalid input field>. In our contact form all of the form fields are required, but none were filled out, hence why there are four error messages. If something else went wrong, we can show the general error message:
M.toast({html: "Another error occured, please try again.", classes: 'bg-danger text-white'});The M.toast() takes multiple arguments including the html, which is the text to return but also classes, that are then again defined in Materialize and Bootstrap: the class bg-danger gives the red background and the class text-white, makes (eh) the text white.
AJAX request
This is where the magic will happen: sending user input via form submission without reloading the webpage and losing all the filled out information! At this point it is good to notice that so far our flow through the different JS functions has been:
(1) catching the click event -> (2) send_form() with modular_ajax (a function) as an argument -> (3) calling inner_ajax()
inner_ajax() in this case is the modular_ajax() that was sent as an argument in send_form() as the 4th argument.
url is /contact, the Flask route where the information should go, with type POST and the formData object as data. FormData objects should not be processed (processData) and are already converted, so no contentType is needed. The flow of the AJAX function is as follows:
beforeSend:executed before sending the AJAX request. In this case we want to show a Materialize indeterminate pre-loader indicating that we’re processing the request.complete:once the AJAX function has completed its action: we want to remove the pre-loader.success:if there was a response, takesdataas an argument. In this case we want to check whether the response is empty (for instance'') with!$.trim(data.feedback).error:if there was no response, takesxhr(XMLHttpRequest) as an argument, an object that contains all the metadata of the request (such as the errors, which we’re displaying in the browser console)..done()when the entire.ajax({})function finished executing. We’re always giving feedback to the user, indicating whether the AJAX request was successful or not with thetoast_error_msgand the color of the message in thetoast_category.
the success: function takes data as an argument, which contains the feedback, and the category, but it can also contain another element <results> that contains data that you would want to show in the HTML form. for instance in the <div id="form-response"></div>, html.form line 35 with the following code $('#form-response').html(data.results) in between line 22–24, ajax.js. The names feedback and category are defined in our Flask backend, which is where we also fill these keys with content.
We will now look at the Flask route that receives the AJAX request and where we can do something with the elements that the user filled out, such as save it in a database or send an email.
Flask route
In our Flask app, there’s a route /contact that takes GET requests (for viewing the contact form) and POST request when the user filled out the contact form. The request comes in via the request.form and its keys are the id="" of our form input elements of the contact.html. So the key of request.form for the First name input field of our contact form is id="first-name", contact.html line 7 and is accessed via request.form['first-name'], app.py line 18.
In this case we’re sending an e-mail with the content that the user filled our in our contact form using flask-mail. We always return feedback to the user, whether the mail was sent or not. the resp, line 30 is a dictionary containing the feedback (text) and category (color) keys that were extracted in the ajax.js, line 23-24. We need to convert this dictionary to a JSON array with jsonify() and then send that response object using Flask’s make_response. That’s it! We’re sending user input form our front-end to our back-end using an AJAX request and catching that request in our Flask route /contact.
Next up we’re going to look into protecting the front-end to back-end information transfer from malicious attacks.
CSRF protection using Flask-WTF
Cross-Site Request Forgery is a type of attack that occurs when a malicious web site, email, blog, instant message, or program causes a user’s web browser to perform an unwanted action on a trusted site when the user is authenticated. For most submission forms users need to be logged in or authenticated (such as updating database values, or changing passwords). However, if the user is authenticated by the site, the site cannot distinguish anymore between a legitimate request or forged request. The reason for this is that all authentication credentials, such as the session variables, are already included in the request. Therefore, another identifier is needed that is set up by the backend app and sent along with every request and validated by the backend app again: the so-called X-CRSFToken header.
In order to protect the information transfer from Cross-Site Request Forgery, we’ve appended a <input type="hidden" name="csrf_token" value="{{ csrf_token() }}"/> in our form.html, line 2. The {{ csrf_token() }} is a Jinja2 syntax expression that is understood by the render_template(), app.py line 35. This string token is generated in the csrf_token(), a method of Flask-WTF. Flask-WTF is a Flask wrapper for the popular WTForms. They have a very good documentation of this CSRF protection process here.
We need to add this code above to the setup for each AJAX request using $.ajaxSetup({}). We only need to use $.ajaxSetup({}) once, as it will initialize and run this code for every AJAX request. In the$.ajaxSetup({}) we append the csrf_token to each request in the XMLHttpRequest headers "X-CSRFToken". This is how browsers understand that the request is coming from our app and not any other website. This is then validated using Flask-WTF in our app with the following code in our app.py.
from flask_wtf.csrf import CSRFProtect

csrf = CSRFProtect(app)
Conclusion
In this story I showed you how to build a simple contact form using Bootstrap HTML and Materialize CSS frameworks, how to bind jQuery events to the submit buttons, validate the form with HTML5 and JS, send AJAX request with a FormData object, catch the request in a Flask route and return a response to the AJAX all while having it protected from CSRF.
AJAX is great for dynamically loading content on the same webpage without reloading it and with this, as your guide you can make it safe and secure and provide user feedback along the way. Don’t hesitate to ask me a question or comment on this story.
Disclaimer: as pointed out by Redditors, this story uses a clutter of both jQuery selectors $('#theID').get(0) or $('#theID')[0] and JS selectors document.getElementById('theID'), that return the same. While I did not realize, it is possible to dynamically load content via simple XMLHttpRequest or the fetch() API, removing jQuery’s dependency. Upcoming Bootstrap5 is supposedly replacing jQuery with native (vanilla) JS, making it a good start to do the same. Either way it is preferred to stick with one approach throughout: jQuery or vanilla JS.


