
A Data Science Tutorial
How to extract facial expressions, head pose, and gaze from any Youtube video
A tutorial using Google Colab & OpenFace to extract facial features from Youtube videos without installing a single program on your laptop.
How people feel, their thoughts, and their interests can be studied and analyzed by investigating people’s facial expressions, head pose, and gaze information. There are numerous companies and computer vision algorithms that help extract these facial features from face videos including Emotient and Affectiva (comparison of their algorithms here, here), but very few companies provide these services for free and most companies require users to purchase a subscription or pay per minutes of the video.
In this post, I share a free, easy-to-use, and robust alternative to paid services for facial feature extraction using OpenFace, a state of the art tool for facial action unit recognition, gaze estimation, facial landmark detection, and head pose estimation. Here I share instructions on how to use a Google Colab Jupyter notebook that allows you to setup OpenFace and extract facial features from any Youtube video without having to install a single package on your laptop.
Here is the link to the notebook!
1. Setup
You don’t need to install anything on your laptop, but you still need to install the OpenFace package on your Colab instance. Unfortunately, this part can take a while (~40 minutes) which is the perfect amount of time for you to binge watch some Youtube videos to figure out which one you want to extract facial features from. Oh, and you’ll probably need to have a Google account.
2. Find a Youtube video to analyze.
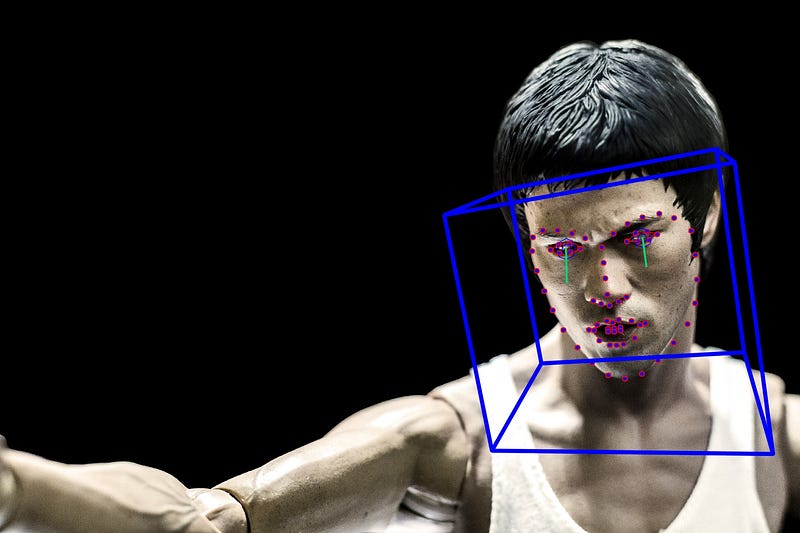
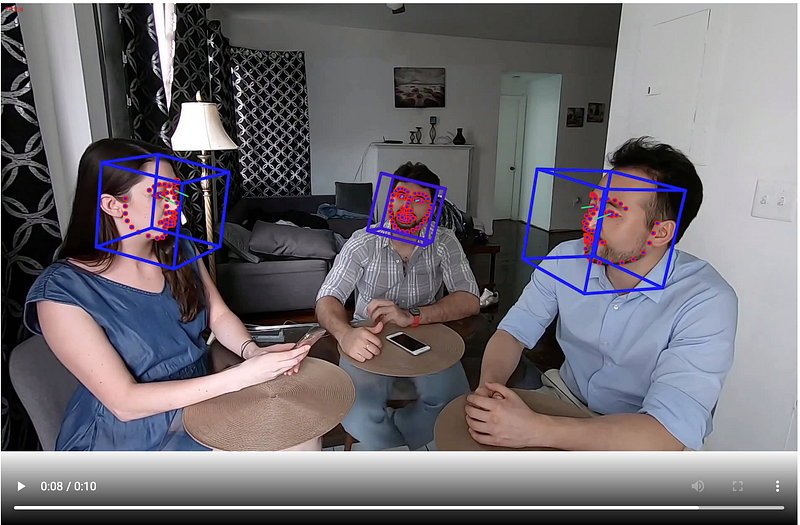
Find a Youtube video you’d like to analyze. It could be a video with the face of one person or it could be faces of multiple individuals. Just be careful to avoid videos that have too small of a face which gives most algorithms a hard time to finding the face. In this tutorial, we will extract facial features from a short skit I did with my colleagues to pitch an app idea, TasteSpace, for Pioneer.app. The following code will show you the video of interest.
The next few lines of code download the video and trim the first few seconds (10 seconds) of the video. This is just to save processing time so feel free remove the -t 10 flag on the fifth line if you want to process the whole video.
3. Process the video using OpenFace
Now we will use FaceLandmarkVidMulti which can extract facial features from multiple faces simultaneously.
If you only have 1 face at a time in your video, then you could use FeatureExtraction instead or FaceLandmarkImg if you’d like to extract features from an image. Click here to see the full list of command line functions and their arguments and parameters.
4. Visualize the results!
You can visualize the results with the following code where you can inspect right from the notebook if the outputs make sense.
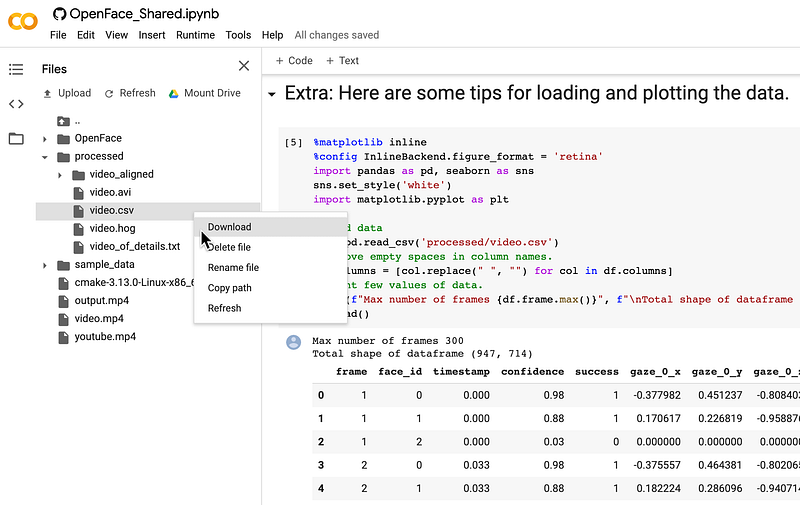
5. Download the outputs.
You can now download the extracted facial features by opening the Files tab on the left menu of your Colab notebook and Download the file in the folder processed/videos.csv.
Conclusion
Hopefully, this was an interesting exercise on how you can use Google Colab and OpenFace to extract facial features from any Youtube video in a few minutes (after installation). If you are interested in learning more about how to analyze the synchrony between individuals in this kind of facial expression data, feel free to check out my previous post on how to do just that.
Extra credit
If you are still reading this, you might be interested in getting more info on how to handle the outputs of OpenFace, here are some additional code to get you started.
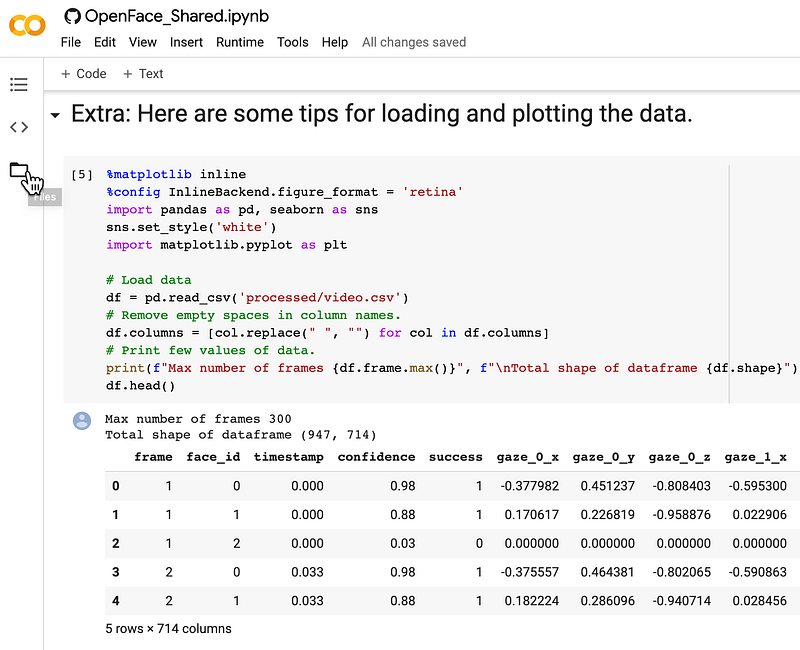
Loading the data
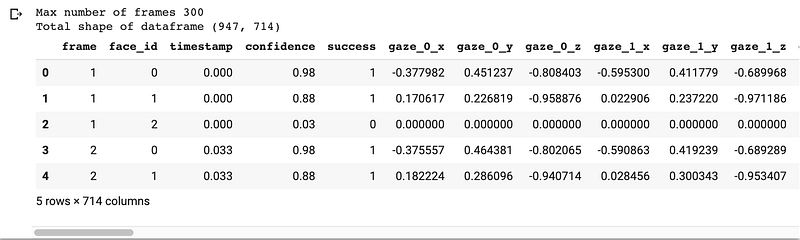
First, we’ll load the data into a Pandas dataframe, rename the columns to get rid of empty spaces, asses the shape of the dataframe, highest frame number of the data, and plot the head of the data.
Counting number of unique individuals from video
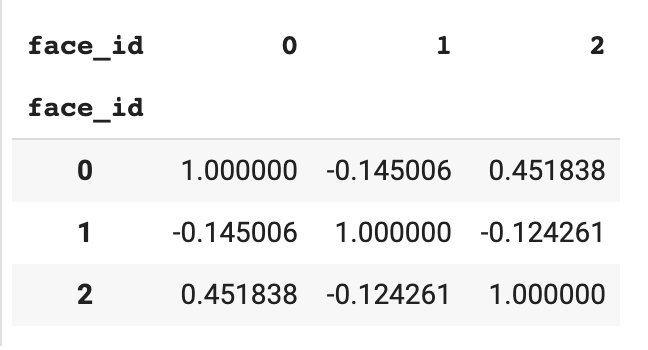
You might notice column face_id which attempts to differentiate between individuals in the video.

Looks like we get 4 unique faces instead of 3!
Average model confidence for detecting faces from the video
We can further assess what degree of confidence the algorithm had for detecting each face with the following function.

Visualize the location of faces from the video
We see that face_id==3 has the lowest confidence which is likely to be spurious faces that was detected. Let’s further check this by plotting the location of faces throughout the clip.
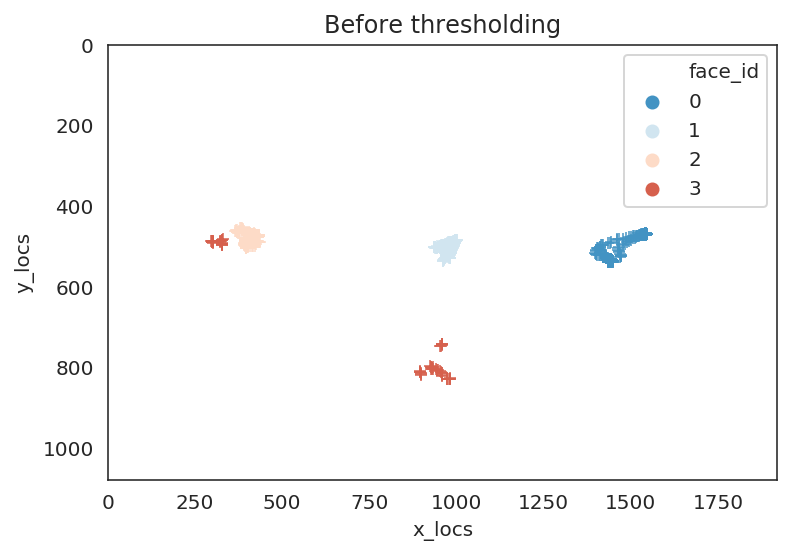
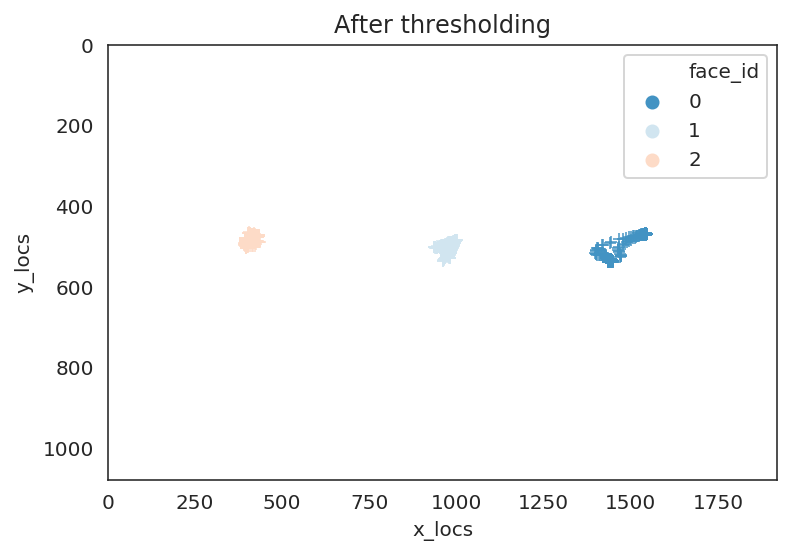
We can see that in the plot to the left that indeed the face with face_id==3 was somewhere where a face did not exist. We can threshold the outputs based on an arbitrary confidence level (here we used 80%) and we can see in the lefthand plot that we got rid of the spurious face.
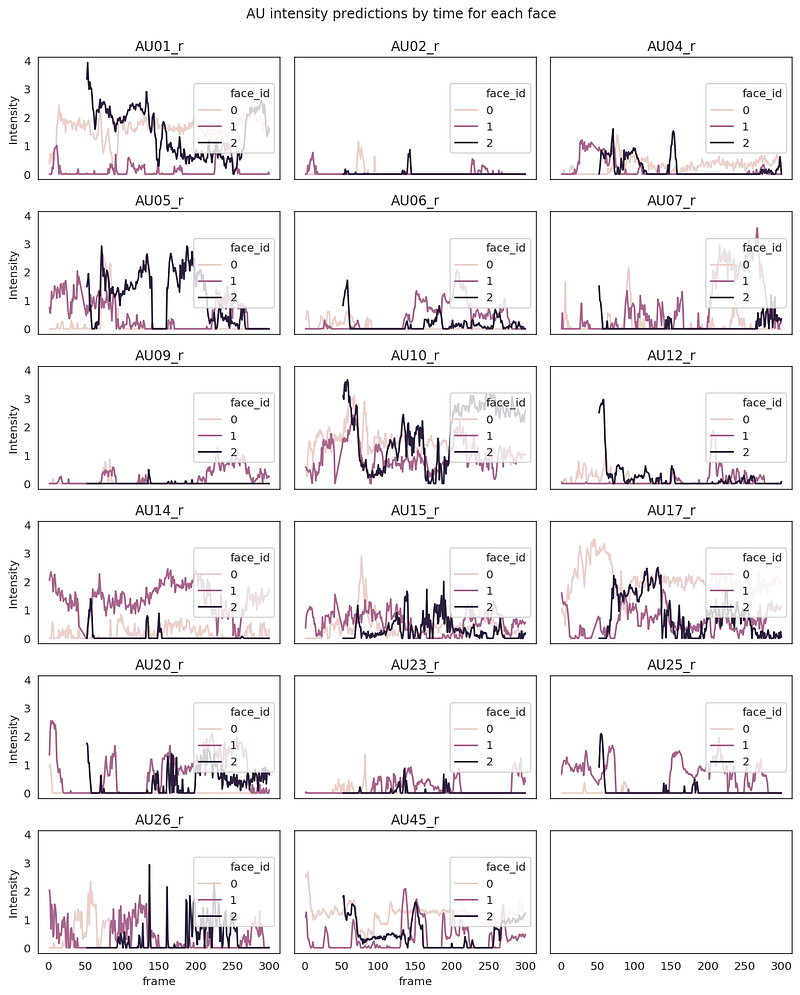
Analyze facial muscle movements over time
Now let’s plot what the trajectory of each action unit predictions look like over time for each face. Then we’ll print how similarly people were smiling (action unit 12) over time in the video.
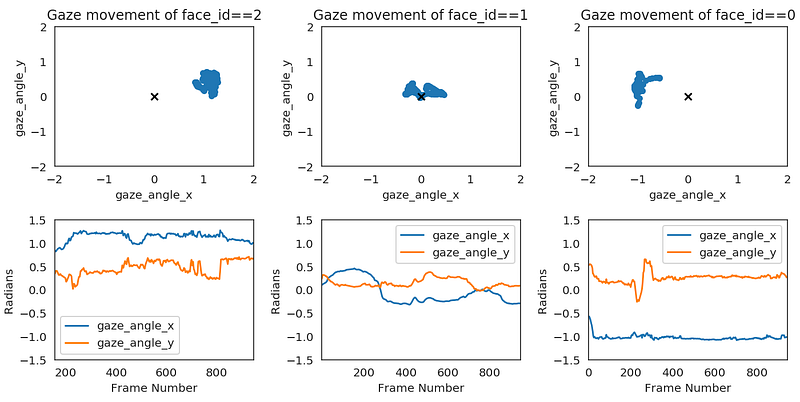
Analyze eye gaze over time
Lastly we can plot where each individual is looking at. This is probably not the best way to plot radians angles but you can still get a sense of where each face is looking. This passes the sanity check that the face on the left (face_id==2) looks mostly towards the right from the origin (0,0), face on the right (face_id==0) looks towards the left, and the face in the middle looks both ways.
If you’d like to learn more about the different outputs, I highly recommend reading more about what each output represents in the OpenFace wiki.


