
How to enable Mosquitto MQTT over WebSocket on Windows
WebSocket is one of the communication protocols which provides full duplex communication over a single TCP/IP connection. It uses HTTP as an initial connection establishment. The WebSocket enables communication from the web browser (client) to the server, in which you can send some data or real-time data to the client from the server or even bidirectional. At first, the client and the server interact with HTTP, then the connection upgrades to the WebSocket, providing full-duplex communication, unlike HTTP.
HTTP Protocol always uses long polling, but Websockets overcomes this problem. Because the HTTP protocol always sends the data on request/response, and the WebSockets allows the server to send the data to the web browser or the client, even without any request from the browser. So, 2-way client-server communication is possible with WebSockets.
In this tutorial, we will learn how to enable MQTT over WebSocket on your windows machine. I have used Mosquitto Broker in this tutorial; you can use any broker of your own, for example, a cloud-based MQTT like HiveMQ.
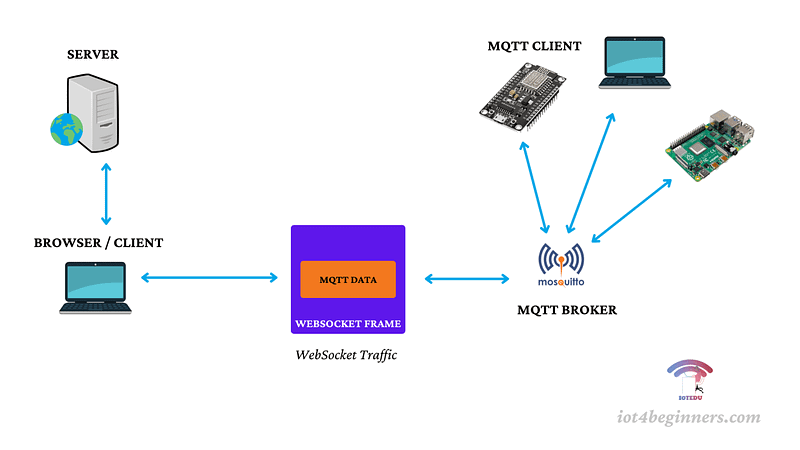
Now, these two powerful protocols (MQTT and WebSockets) come together to make tremendous possibilities for data transmission (or even control). The interesting thing is you don’t need to refresh your client side ( your web browser) or get polling for viewing your data.
The MQTT Broker places the MQTT data in the WebSocket framework and sends it to the web client. The web client unpacks the MQTT packet from the WebSocket and processes it as normal MQTT data. With the MQTT data in the Websocket frame, it is actually directly placed on the TCP/IP envelope.
WebSockets on Windows
Step 1: Install MQTT Broker on Windows
Firstly, refer to this article on how to install MQTT Mosquitto Broker on windows.
Step 2: Configure the mosquitto.conf file
You have to configure the mosquitto.conf file in your mosquitto folder. In my windows, I have set up my mosquitto.conf file in the C:\Program Files\mosquitto folder. Open the configuration file with Notepad++, and then add the following lines. Save your configuration file.
By default, Port 1883 is for the MQTT Service and,
Port 9001 is for the WebSockets
port 1883 listener 9001 protocol websockets socket_domain ipv4 allow_anonymous true
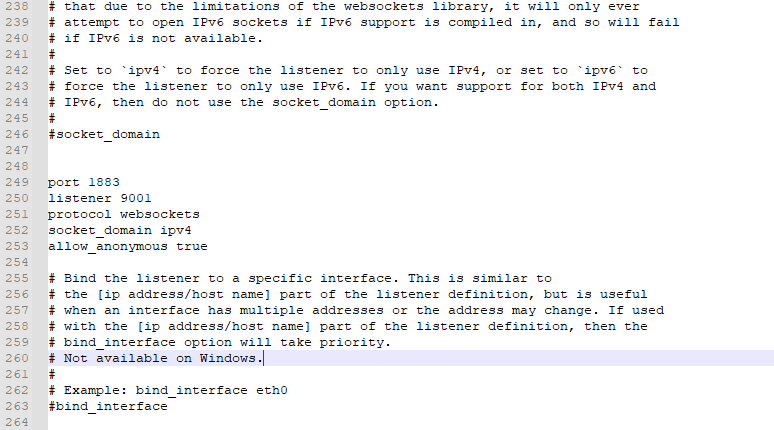
Important Note: Always check the version of mosquitto broker you are using, in this case I have used Version 2.0.14, so I needed the line, socket_domain ipv4. Somehow I have encountered problems when using the newest version of mosquitto broker, adding that line above worked out for me. By adding this, you are forcing the listener to use IPv4.
Step 3: Open two ports (1883 and 9001)
Now, you have to open the port 1883, and port 9001 on your windows machine. Basically, the ports are used to identify specific services in on your machine. For instance, the port for HTTP is 80, Netscape uses port 443 to secure the HTTP. By default, port 1883 is used by the MQTT.
To open the ports on your windows machine,
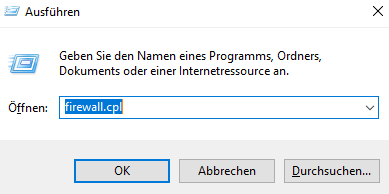
Press Windows + R, type firewall.cpl and click Ok.
Click on Advanced Settings < Inbound Rule < New Rule
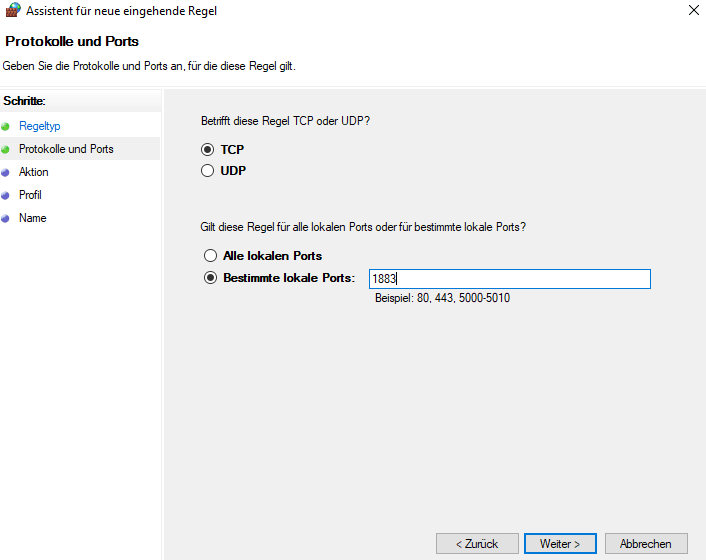
Now, to open a port, you have to select the Rule Type as Port.
Next, you have to select TCP or UDP Protocol; since you are opening an MQTT port, select TCP as your protocol. Also, give specific local points, as 1883 (for MQTT).
Under Action, select Allow Connection.
In the Profile section, ensure everything (Domain, Private and Public) is on check.
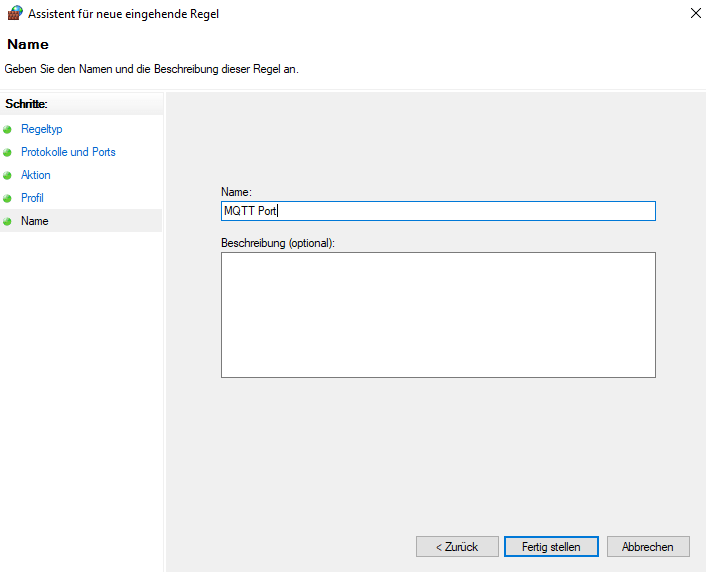
Under the section Name, give your port name. ( you can name anything here)
Click Finish.
Go to Inbound rules, now you can see the port you have created.

Repeat the same procedure to open port 9001 for the WebSockets. Follow every step except the port number as 9001 and with a different name.
To test the ports, open cmd prompt as administrator and run the following command,
netstat -a
You can see the port number and the status as listening. If you get this on the status, you successfully opened two ports.
Start Mosquitto Broker
After opening the ports, open Command Prompt as administrator. Run the following commands,
First, stop the MQTT Mosquitto broker,
net stop mosquitto
Then, start the mosquitto broker,
net start mosquitto
Now, you have successfully enabled MQTT over WebSocket on windows.