
How to Download Images from Google Photos using Python and Photos Library API
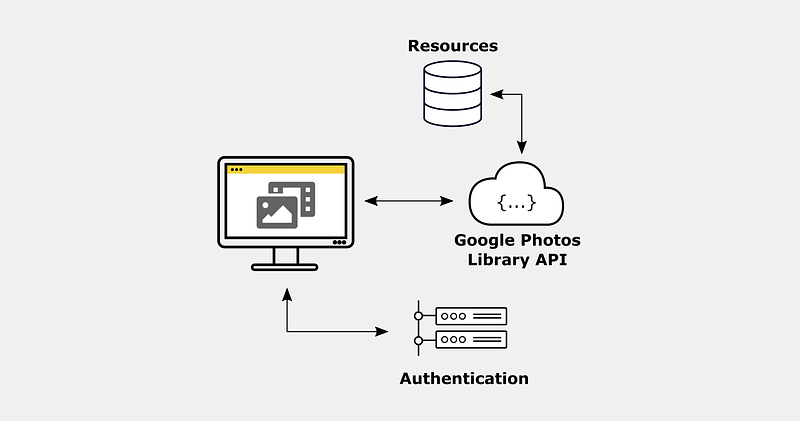
Using the Google Photos REST API you can download, upload and modify images stored in Google Photos.
Just as a quick refresher, REST is an architectural style for application programming interfaces that allows interaction with RESTful web services. [Red20]
A GET request allows retrieving database entries, POST requests to create new entries, PUT requests to update an entry and DELETE requests to delete one.
The following steps describe how to set up a simple project that lets you use Python to download images from Google Photos:
1. Open a terminal window and navigate to your working directory
2. Create the subfolder structure or clone the repo
git clone git@github.com:polzerdo55862/google-photos-api.githttps://github.com/polzerdo55862/google-photos-api.git
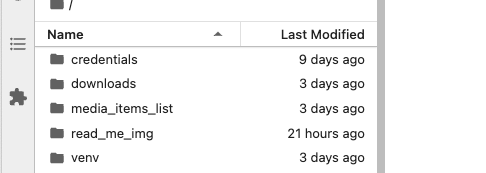
The repo contains the following subfolders:
- credentials: folder to store the credentials you need to authenticate your “Python App” to the Google Photos Library
- media_items_list: each time the script is run, it saves a .csv file with all Google Photos media items and corresponding metadata uploaded in the specified period
- downloads: stores downloaded images from Google Photos
3. Create a virtual environment and install required packages
python3 -m venv venv , activate it source ./venv/bin/activate and install requirements pip install -r requirements.txt
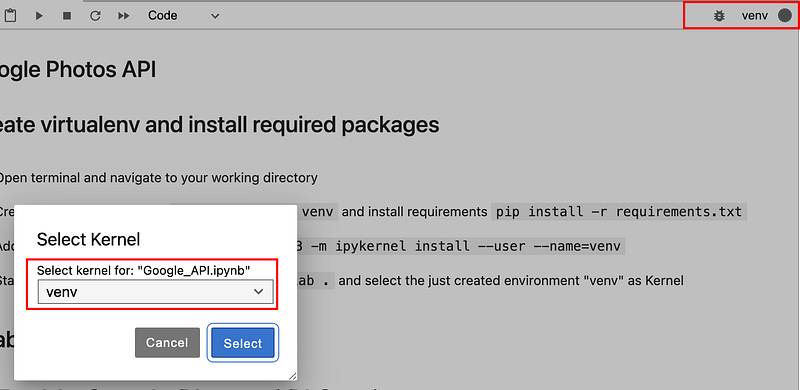
4. Add venv to Jupyter Notebook
Install ipykernel which provides the IPython kernel for Jupyter: pip install ipykernel and add your virtual environment to Jupyter: python -m ipykernel install --user --name=venv
You can check the installation by navigating to /Users/Library/Jupyter/kernels . There should be a new directory called venv. In the folder, you will find the kernel.json file, which defines the path for the Python installation you are using.
To uninstall a kernel that is no longer needed: jupyter kenelspec uninstall venv
5. Navigate to the folder and start jupyter notebook/lab
jupyter lab .
create a new jupyter notebook file (or open the existing one in the repo) and select the just created environment "venv" as Kernel
6. Enable Google Photos API Service
- Go to the Google API Console https://console.cloud.google.com/.
- From the menu bar, select a project or create a new project.
- To open the Google API Library , select
APIs & Services > Libraryfrom the navigation menu on the left - Search for
Google Photos Library API. Select the correct result and click “enable”. If its already enabled, click “manage” - Afterwards, it will forward you to the “Photos API/Service details” page (https://console.cloud.google.com/apis/credentials)
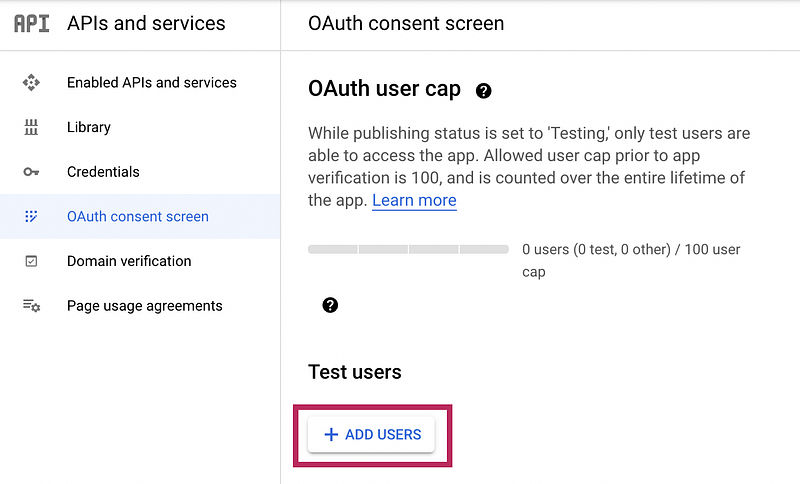
7. Configure “OAuth consent screen” [Sta21]
- On the left side of the Google Photos API Service page click on “OAuth consent screen” (below “Credentials”) and define the consent screen
- Add a Test user: specify the email of the google account you want to use for testing the API call
8. Create API/OAuth credentials
- On the left side of the Google Photos API Service page click on Credentials
- Click on “Create Credentials” and create an OAuth client ID
- As application type, I am choosing “Desktop app” and giving your client you want to use to call the API a name
- Download the JSON file to the created credentials, rename it to
client_secret.jsonand save it in the folder “credentials”
9. Use the Google Photo Library API for the first time:
The following section shows how to use OAuth Credentials for authentication with the Google Library API. The code section below covers the following steps:
- Create GooglePhotosApi object
google_photos_api = GooglePhotosApi()
2. The function run_local_server() checks if there is already a valid token stored in a .pickle file, if not, its running the OAuth 2.0 Authorization Flow using the client_secret.json file: cred = google_photos_api.run_local_server()
Calling the API for the first time (OAuth 2.0 Authorization Flow):
Google will ask you if you want to grant the App the required permissions defined in the scope:
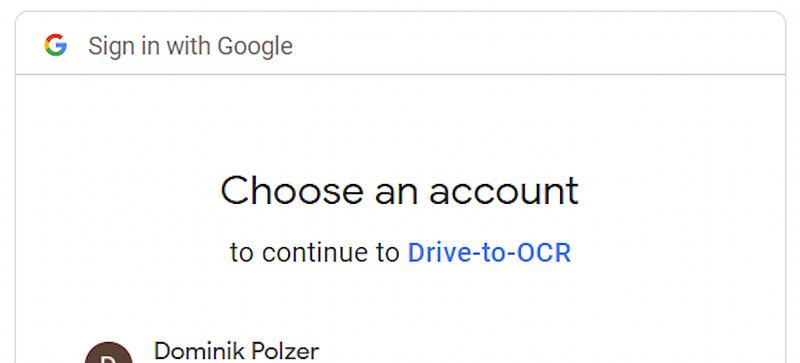
Since this is only a test app at the moment, Google will make you aware of that. Click “Continue” to proceed. Once you have granted the application the necessary permissions, a token_...pickle file is created, downloaded and stored in the folder /credentials/. This token file is used for future API requests.

10. Use Pythons requests module and the token file to retrieve data from Google Photos
The following function sends a post request to the Media API to get a list of all entries. Since the API return is limited to 100 items, the search is narrowed down to one day. Thus, this kind of call would only miss images if more than 100 images were created/uploaded in found one day.
Use the response of the API to write the results and required metadata into a data frame and return it:
11. Use the defined functions to download media items from Google Photos
a. Create a list with all files already downloaded to the /downloads/ folder
b. Define a list of all dates from start date to end date (today)
c. Execute the API call for all dates to get a list with all media items. API returns:
- id
- filename
- baseUrl: Base URLs within the Google Photos Library API allow you to access the bytes of the media items. They are valid for 60 minutes. (https://developers.google.com/photos/library/guides/access-media-items)
d. Compare the list of media items with files downloaded in /downloads/ folder with media items in Google Photos to download items not downloaded yet. You can now use the baseUrl and the python requests module to send a get request for each media item.
e. Save a list with all media items as .csv in /media_items_list/
Summary
The article describes how to download (and manipulate) Google Photos content using the Google Photos REST API with Python.
I mainly use the API to search images taken with my smartphone for text and features and push the extracted information to Notion.
References
[Sta21] Error 403: access_denied from Google authentication web API, 2021. URL https://stackoverflow.com/questions/65184355/error-403-access-denied-from-google-authentication-web-api-despite-google-acc
[Red20] RedHat: What is a REST API?, 2020. URL https://www.redhat.com/en/topics/api/what-is-a-rest-api


