
How To Do Calligraphy With A Brush Pen As A Beginner
The Basic Strokes Of Calligraphy
If you want to start Calligraphy because you want to write beautifully, become an artist or just because you think it’ll be fun than you have come to the right place.
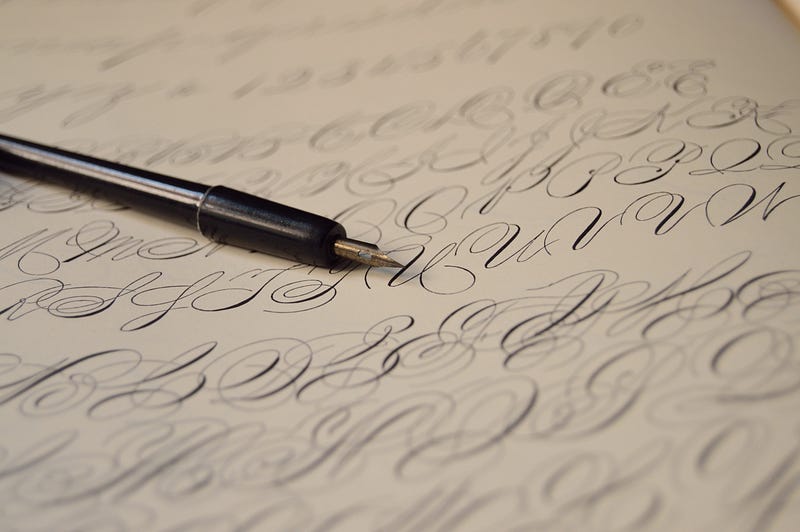
Calligraphy is basically art for writing beautifully. It can be done with Brush Pens, Ink Pens, Glass Pens, Watercolors and even with a simple pen or pencil. There are different ways in which you can write depending on your choice of writing tool. Today we’ll discuss the basics of calligraphy when you’re using brush pens. If you don’t have a brush pen you can use a simple pen or pencil. Even using pencil you can create beautiful calligraphy you just have to keep in mind the amount of pressure you apply while using it.
Before we get into it you first have to understand some basic strokes in calligraphy. I have used Tombow fudenosuke hard-tip brush pen because hard-tip pens provide better control over the movements as a beginner but you can do the same strokes with a pencil too if you don’t have a brush pen. You just have to understand when to apply more pressure and when not to as well as how to connect different strokes. I have shown the movements using arrows for better understanding.
Materials required :
- Smooth paper so your brush pens don’t ruin. Make sure paper you use has some guidelines (grid, dot, lines) so it’s easier to practice.
- Brush pens (I recommend Tombow fudenosuke hard-tip brush pen for the reason given above). You can also use a pencil.
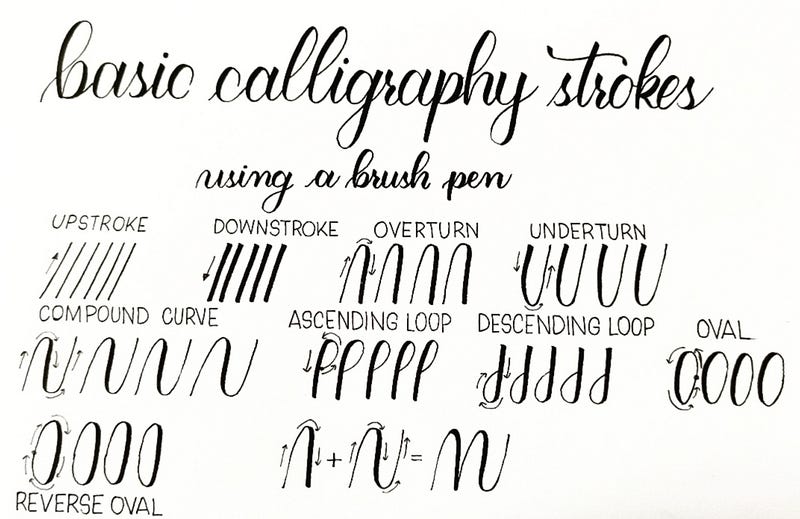
Here are some basic calligraphy strokes:
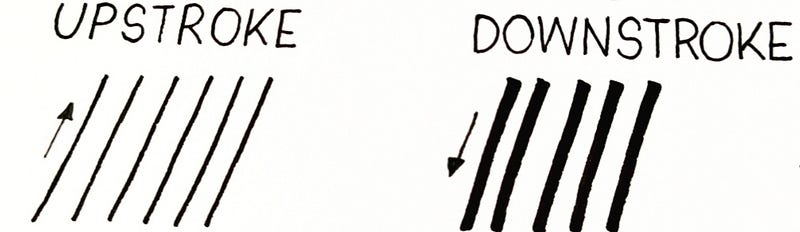
- UPSTROKE: As the name suggests, Upstrokes are when you go from bottom to top and these are thin lines. As the lines are thin in upstroke light pressure should be applied with the pen and also with a pencil.
- DOWNSTROKES: As with upstrokes, downstrokes are when you go from top to bottom and these are thick lines. For thick stokes apply medium to high pressure.
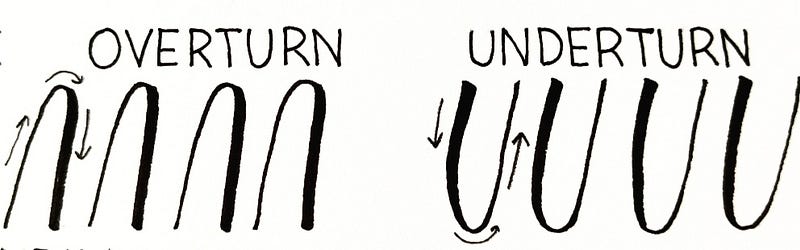
- OVERTURN: it’s a combination of upstroke and downstroke. You start from the bottom of your line, make a thin upstroke than when you reach the top of your line you go down making a thick downstroke.
- UNDERTURN: It’s opposite of overturn where we first do downstroke than an upstroke.
- COMPOUND CURVE: It’s a combination of Overturn and Underturn Strokes. You first make an Overturn stroke and at the end of that without lifting the pen move into an Underturn stroke.

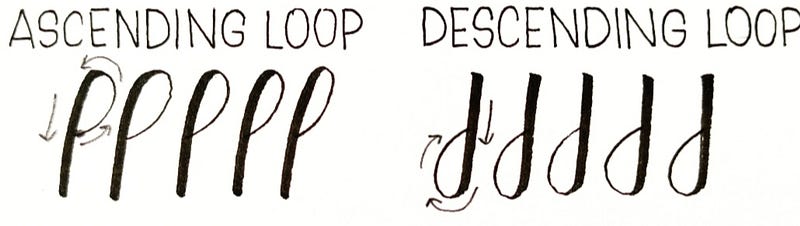
- ASCENDING LOOP: To make an Ascending Loop start at the middle of the line making a slightly curved upstroke and then turning to left go into a downstroke. It looks like an inverted ‘j’.
- DESCENDING LOOP: It’s opposite of Ascending Loop and looks like a ‘j’. Here we first make a thick downstroke making an underturn to left we go into thin upstoke that crosses our thick line finally making a small ‘j’.
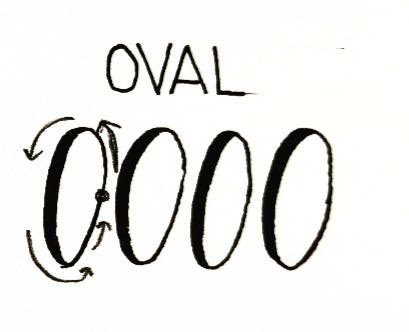
- Oval: It’s basically an ‘O’ as the name suggests. You start at the middle of the line than you do an upstroke moving to left making a downstroke than to right making an upstroke and completing the loop as shown in the figure.
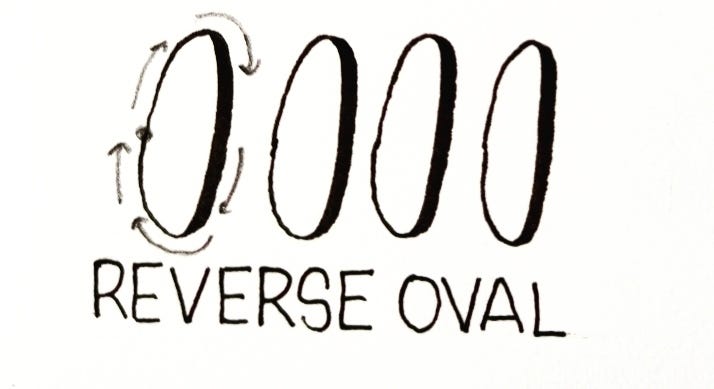
- REVERSE OVAL: it’s also an ‘o’ but as the name suggests it’s opposite of Oval. Here too we start with an upstroke from the middle of the line making a thin upstroke but we move towards the right make a downward then finally moving to left into an upstroke to complete our loop.
It seems like a lot but once you connect the theory with the figures and practice the movements it’ll be easy. So, practice a lot to get used to the movement of the pen.
Here’s a picture to quickly summarise the strokes.
Some important tips-
- Upstrokes are always thin and Downstrokes are always thick.
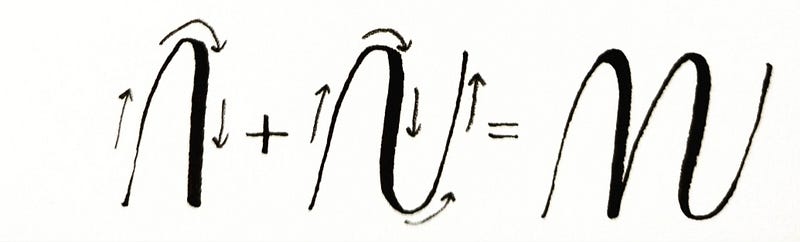
- Don’t lift your pen in between one stroke movement but you have to lift your pen when connecting two different strokes like an Overturn stroke combines with an Underturn makes alphabet ‘a’ so take a pause between both strokes for clear lines.
- There are many practice sheets available on the internet for basic strokes you can download them and trace over them if you find it difficult in the beginning.
- Watch videos on YouTube and Instagram about the basics of calligraphy it helps a ton.
- In beginning use paper that has lines instead of a blank paper as it makes it easier to practice strokes.
Finally, you know all the basic strokes now keep practising and you’ll master it in no time.
Thank you for reading. If you have any questions or suggestions please share in the comments below.
Have a good day!