
How To Develop and Build Angular App With .NET Core Backend
Learn How you develop and build with an example project

There are so many ways we can build Angular apps and ship them for production. One way is to build Angular with Nodejs, Java, or .NET and another way is to build the angular and serve that static content with NGINX web server. With .NET we have to deal with the server code as well, for example, you need to load the index.html page with .NET core
In this post, we will see the details and implementation with .NET Core. We will go through step by step with an example.
- Introduction
- Prerequisites
- Example Project
- How To Build and Develop The Project
- Interaction Between Angular and .NET API
- How To Build For Production
- Summary
- Conclusion
Introduction
Angular is a javascript framework for building web apps and it doesn’t load itself in the browser. We need some kind of mechanism that loads the index.html (single page) of Angular with all the dependencies(CSS and js files) in the browser. In this case, we are using the .NET IIS server as the webserver which loads Angular assets and accepts any API calls from the Angular app.

If you look at the above diagram all the web requests without the /api will go to Angular routing. All the paths that contain /api will be handled by the .NET IIS server.
Prerequisites
There are some prerequisites for this article. You need to have .NET Core installed on your laptop and how http works. If you want to practice and run this on your laptop you need to have these on your laptop.
You can check the .NET Core version with the following command once it is installed.
dotnet --versionExample Project
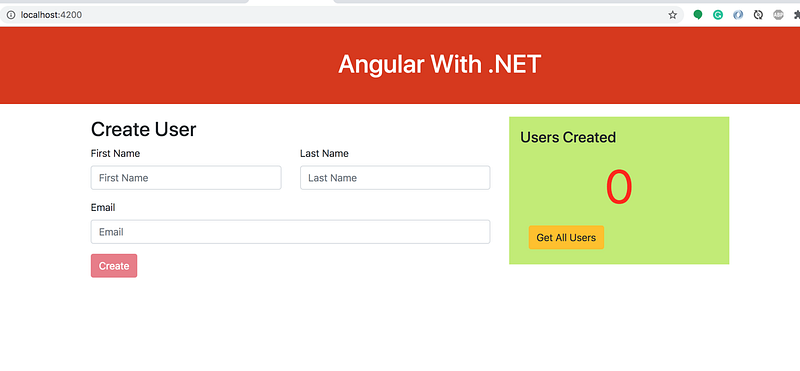
This is a simple project which demonstrates developing and running an Angular application with the .NET. We have a simple app in which we can add users, count, and display them at the side, and retrieve them whenever you want.
As you add users we are making an API call to the Java server to store them and get the same data from the server when we retrieve them. You can see network calls in the following video.

Here is a Github link to this project. You can clone it and run it on your machine.
// clone the project
git clone https://github.com/bbachi/angular-dotnet-example.git
// run the project
cd angular-dotnet-example
dotnet runHow To Build and Develop The Project
Usually, the way you develop and the way you build and run in production are completely different. Thatswhy, I would like to define two phases: The development phase and the production phase.
Once you have installed the .NET SDK on your machine, you can generate the whole project (Angular + .NET Core ) template with this command.
dotnet new angular -o <project name>
Angular App
Here is the generated template project. All the Angular code resides under the ClientApp folder. From Microsoft Docs, The project template creates an ASP.NET Core app and an Angular app. The ASP.NET Core app is intended to be used for data access, authorization, and other server-side concerns. The Angular app, residing in the ClientApp subdirectory, is intended to be used for all UI concerns.

Let’s implement the Angular App first. As long as NodeJS installed on your machine you can change the directory and you can run any ng commands.
If you look at the package.json from the generated Angular project .NET SDK creates an Angular template with version 8.
First, we need to create a Header component with the following commands or you can do it manually.
ng g c header
The next component we need to create is the User Form.
You can see the User Form as below after adding the above component.

We have a Display Board component to show the number of users created and also the button to fetch the users. Let’s create the below component files for the DisplayBoard.
The screen updates as below after adding these files and updates the App Component.
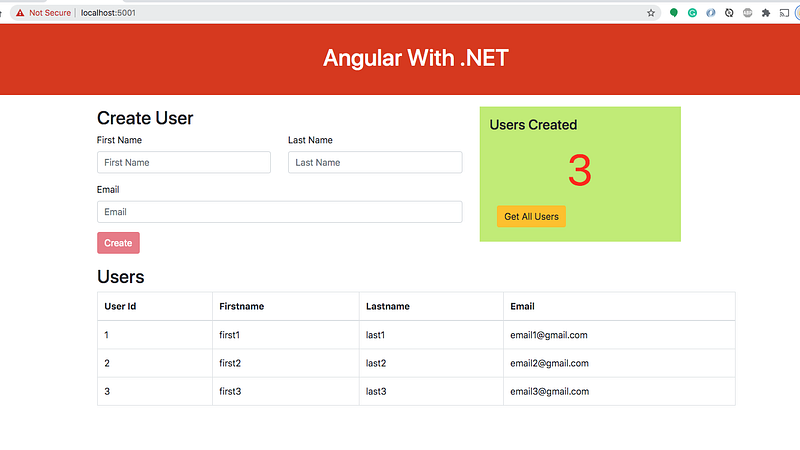
Finally, we need to add the Users table.
.NET Web API
We have built a UI layer with an Angular and let’s understand how to create a Web API with .NET Core. We need to create a user Class under angular_dotnet_example.Models namespace as below.
Here is a repository class that can store users in memory. We are not using any database for simplicity.
Here is a controller class that exposes two APIs. Routing is how Web API matches a URI to an action. Web API 2 supports a new type of routing, called attribute routing. As the name implies, attribute routing uses attributes to define routes. Attribute routing gives you more control over the URIs in your web API. For example, you can easily create URIs that describe hierarchies of resources.
The first thing we need for the Attribute Routing is that use MapControllers instead of conventional routing at line number 23 in the startup.cs file.
http://localhost:5000/api/users (Get Request)http://localhost:5000/api/user (Post Request)When you run this command dotnet run, you can access the APIs as below.

Interaction Between Angular and .NET API
When you run the command dotnet run,you can access the React App with the below URL
http://localhost:5000The APIs can be accessed on the same port with the context path /api.
http://localhost:5000/api/users (Get Request)http://localhost:5000/api/user (Post Request).NET provides this feature by default if you generate the template with this command as we did in this post.
dotnet new angular -o <project name>But, it’s good to understand what makes this possible to interact between Angular and API. If you look at line number 59, we are using the UseSpa method and we need to give the folder where the Angular resides.
spa.Options.SourcePath = "ClientApp";With this in place, you can access the app on ports 5000 (http) and 5001(https).
How To Build For Production
You can package the whole app for production with the following commands.
// build and publish
dotnet publish -c Release -o published
You can see the whole app packaged under the published folder. You need to understand that it is configured in the Startup.cs file is that all the built Angular code is under the folder ClientApp/dist.

You need to run this command to start the application.
dotnet published/angular-dotnet-example.dll


Summary
- There are so many ways we can build Angular apps and ship them for production.
- One way is to build Angular with Nodejs, Java, or .NET and another way is to build the angular and serve that static content with NGINX web server.
- Angular is a javascript framework for building web apps and it doesn’t load itself in the browser.
- We need some kind of mechanism that loads the index.html (single page) of Angular with all the dependencies(CSS and js files) in the browser.
- The project template creates an ASP.NET Core app and an Angular app. The ASP.NET Core app is intended to be used for data access, authorization, and other server-side concerns.
- The Angular app, residing in the ClientApp subdirectory, is intended to be used for all UI concerns.
Conclusion
This is one way of building and shipping Angular apps. This is really useful when you want to do server-side rendering or you need to do some processing. In future posts, I will discuss more on building for production and deploying strategies.


