
How to Deploy Your Plotly Dash App to Hugging Face Using Docker, It’s free!
Speed up your Deployment Process with this Step-by-Step tutorial

Do you want to deploy your Plotly Dash App? Yeah, then this article is for you.
You probably know the following situation. You create a great app and want to share it with your colleagues or clients. There are two options: You can show it to them locally or you can deploy your app. The second option is much more convenient. You only need to send a link to your colleagues and clients.
You can easily deploy a Dash App using Docker in a few steps. And the best is it’s free. No credit card is required! We show you how you can do it.
What are you waiting for? Let’s get started!
😎 Step-by-Step Tutorial
In this tutorial, we’ll demonstrate the procedure on an example app. We use a chatbot app we developed in our article “LangChain: Chat with Tesla’s Q2 Earnings Call on YouTube”. You can use this procedure for your Dash App too.
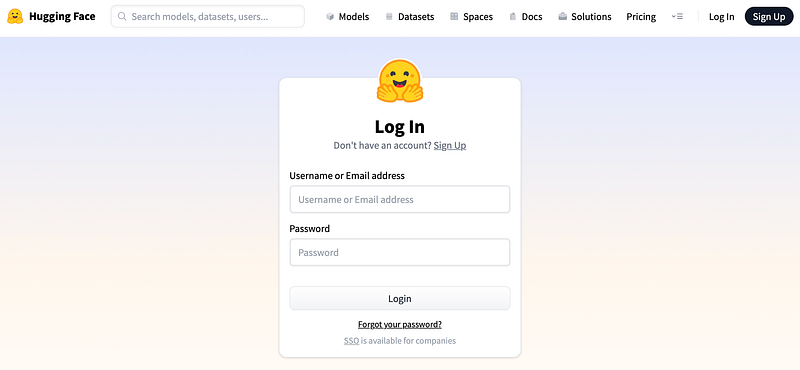
Log in to Hugging Face
Go to https://huggingface.co/login and log in with your credentials. If you do not have an account, create an account via Sign Up.
Create a new Space
Once you are logged in, go to Spaces and create a new Space.

Press the button “Create new Space” (marked red). Then, the following menu opens.
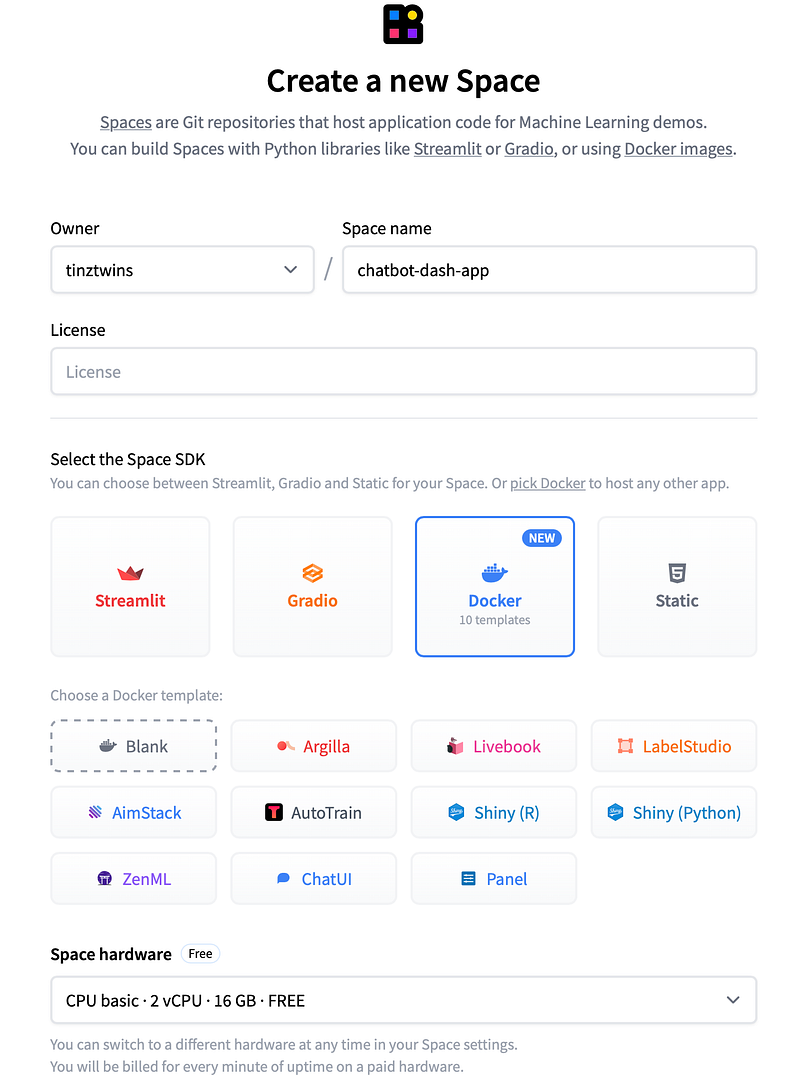
Spaces are Git Repositories. You can use different Space SDKs, like Streamlit, Gradio, Docker, or Static. Dash is not on the list. But that’s not a problem. We select Docker.
HuggingSpace offers different Docker templates that you can use for apps like Shiny or Panel. We choose Blank because Hugging Face currently does not have a Docker template for Dash Apps. We’ll create our own Dockerfile for Dash later. In the next step, we select the Space hardware. For demo apps, the free tier is enough therefore we choose “CPU basic 2 vCPU 16 GB FREE”.
In addition, you can choose between public and private. We choose public. Private repos have some limitations. We discuss that at the end of the article.
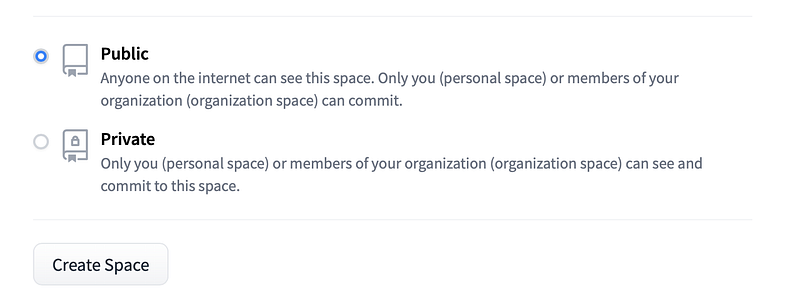
Then, press the “Create Space” button.
Clone repo
Great! Now, we are ready to clone the project.
git clone [URL of the project]Then, you need to enter your credentials. Enter your username and your password. As a password, you need to enter a READ token.
Cloning into 'chatbot-dash-app'...
Username for 'https://huggingface.co': tinztwins
Password for 'https://[email protected]':
You can find the tokens under Profile (click on your user icon on the top right) -> Settings -> Access Tokens. Copy a READ token and use it as the password.
Create the App
First, we go to the cloned repo folder. There, we store the app files. You can find the whole code base of our example app on Hugging Face. Now, we show you some tips, you should consider when you deploy a Dash App using Docker. Our app has the following project structure:
.
├── chatbot
│   └── index.py
│   └── other files
├── Dockerfile
└── requirements.txt
index.py
Every Dash App has a file with an entry point. In small Dash Apps, you only use one file, mostly called app.py. In our example, the entry point is the index.py file. We use Gunicorn for the Docker deployment. Here, it is essential to define server = app.server. That sets the server for the app using Docker. Here’s the code snippet:
# ...

server = app.server

# ...
requirements.txt
In this file, we define the dependencies for the app. You can find the whole file on Hugging Face.
Dockerfile
First, we create a user and a virtual environment. A virtual environment (env) helps to keep control over the Python dependencies. A virtual env does not slow down the Dash App. In addition, we are less likely to encounter strange bugs over time (e.g. changes at the operating system level). In the last line, we define the entry point of the app. The host must be 0.0.0.0 so that the Dash App is accessible. Furthermore, we must set the Port to 7860. That’s the default port for Hugging Face Spaces apps.
Here’s an example Dockerfile:
FROM python:3.10

# Create non-root group and user
RUN addgroup --system shared1 \
    && adduser --system --home /var/cache/shared1 --ingroup shared1 --uid 1001 dashuser

USER dashuser

WORKDIR /usr/share/shared1/

COPY requirements.txt /usr/share/shared1/

# Elegantly activating a venv in Dockerfile: https://pythonspeed.com/articles/activate-virtualenv-dockerfile/
ENV VIRTUAL_ENV=/usr/share/shared1/venv
RUN python3 -m venv $VIRTUAL_ENV
ENV PATH="$VIRTUAL_ENV/bin:$PATH"

# Install requirements
RUN pip install --trusted-host pypi.python.org -r requirements.txt

COPY /chatbot/ /usr/share/shared1/chatbot/

WORKDIR /usr/share/shared1/chatbot/

# set enviroment variables
# This prevent Python from writing out pyc files
ENV PYTHONDONTWRITEBYTECODE=1

# This keeps Python from buffering stdin/stdout
ENV PYTHONUNBUFFERED=1

EXPOSE 7860

ENTRYPOINT ["gunicorn", "index:server", "-b", "0.0.0.0:7860", "--workers=1"]
Commit and Push the App
Alright. We are ready to push the app to Hugging Face. Here, you should note the following. First, you need to create a WRITE token in your Hugging Face Account. You find the tokens under Profile (click on your user icon on the top right) -> Settings -> Access Tokens. Create a WRITE token and add it to the .git/config file. The .git/config file is in the repo folder. It’s a hidden file. You probably need to show the hidden files first. Under MacOS, you can use the following: Press “Shift, Command and .” at the same time.
.git/config code snippet:
# ...

[remote "origin"]
        url = https://[Your username]:[Your WRITE Token]@huggingface.co/spaces/

# ...
Insert your username and the WRITE token at the marked point and delete the square brackets as well.
You can commit and push the code to Hugging Face with the following terminal commands:
git add *
git commit "Commit Message"
git push
After you push your code, the Docker container is built automatically.
If everything works well, you can access your app. The URL has the following schema: https://[your username]-[repository name].hf.space/
URL of our Chatbot: https://tinztwins-chatbot-dash-app.hf.space/
🧐 Limitations of Hugging Face Spaces Deployment
We played around with Hugging Face Spaces and found some limitations. You can create private and public repos. Private repos are meaningful if nobody should access your repo files. But private repos have limitations! Private repos may not currently work in Safari or iOS. On MacOS, you can’t open the app in Safari. You get a 404 error. You have to use another browser, like Chrome or Firefox. On iOS, the only workaround currently is to turn off cross-site tracking prevention.
🎬 Conclusion
In this article, we have demonstrated how to deploy a Plotly Dash App using Docker on Hugging Face Spaces. First, you create a new Space on Hugging Face with a blank Docker Template. A space is nothing else than a git repository where you can store your code. In addition, you learned what a Dockerfile for a Dash App can look like. Finally, we went into the limitations of Hugging Face Spaces.
What app are you working on right now? Write it in the comments.
👉🏽 Join our free weekly Magic AI newsletter for the latest AI updates!
Subscribe for free to get notified when we publish a new story:
Learn more about us on our About page. Don’t forget to follow us on X. Thanks so much for reading. If you liked this article, feel free to share it. Have a great day!
Sign up for a Medium membership using our link to read unlimited Medium stories.


