
How to customise your own Obsidian theme with CSS in 3 steps
Are you trying to get the best theme for Obsidian note-taking app but not fully happy with all the themes you tried?
Way easier than trying all of the themes, you can simply create your own by applying customised CSS with the help of the DevTool in 3 simple steps.
Step 1 — Make sure you checked “Apply CSS snippet” in settings
First and foremost, we need to enable custom CSS in Obsidian for the app to read your code and overwrite its default style. To enable custom CSS, simply click on Settings at the bottom right of your page in Obsidian to prompt up the Settings page. Once you are in the Settings page, click on Appearance and next to it, check the “Apply CSS snippet at (directory)” option arrowed in red below.
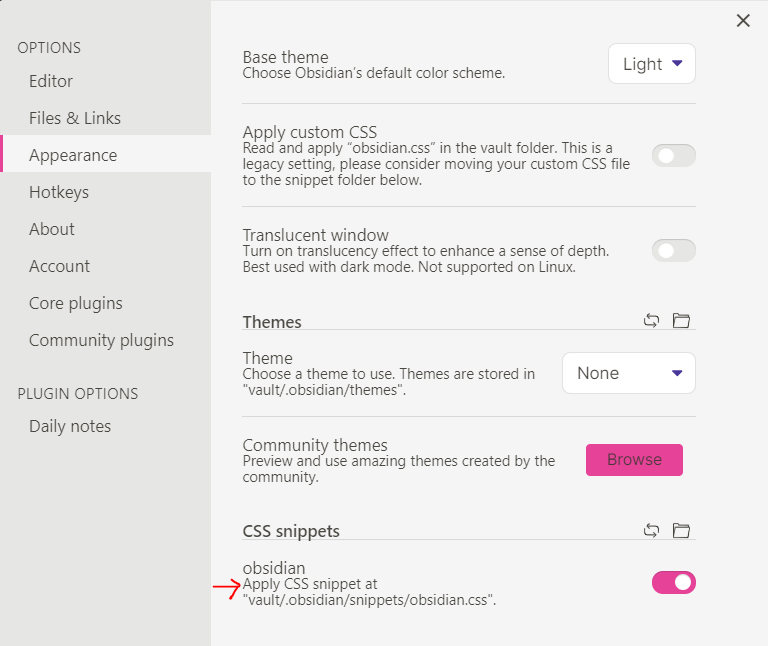
Checking this option basically points Obsidian to the CSS file in your vault’s root directory so that it can read and apply your custom CSS code. But of course, you don’t have any CSS file (let alone code) yet — so let’s get to step 2!
Step 2 — Create a new “obsidian.css” file in your snippets folder
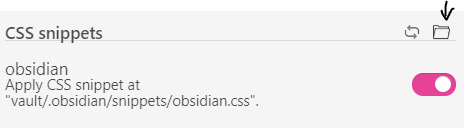
You can open your snippets folder by clicking on the folder icon next to “CSS snippets” via the Settings page.
The snippets folder actually already exists in your vault’s .obsidian folder, but it is not visible in Obsidian because adding a “.” in front of any file or folder makes it hidden. Therefore, we will have to open it with explorer and write our CSS code in a CSS file using notepad instead of Obsidian.
When you are in the snippets folder, create a new Text Document “Text Document.txt” and rename it to “obsidian.css” and enter. Windows will prompt a file extension warning but fret-not —simply click “yes” to proceed and save the new CSS file.
Now that you have your obsidian.css file in the snippets folder, you can start customising.
Step 3 — Customise CSS code using Obsidian’s DevTool and copy-paste modified code into your “obsidian.css” file to save the modifications
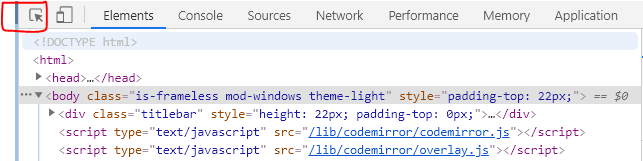
You can open Obsidian’s developer tool (short for DevTool) like in chrome by pressing CTRL + SHIFT + I. The DevTool gives users access to the codes of the page such as CSS, javascript and HTML, so that users can inspect it.
In our case, we will use the DevTool to modify CSS code real-time to create custom Obsidian theme. Just note that any changes made here will not save when you exit Obsidian and eventually we will need to export all modified code into our obsidian.css file to save the changes.
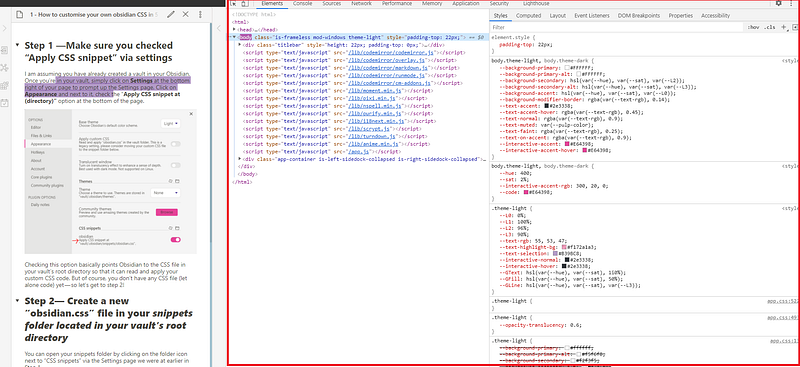
Here is how the DevTool looks like:
Once you’re in the DevTool, we are going to want to focus only on 3 main things:
The select element in page to inspect it’s CSS code function
In DevTool, you can click on the cursor icon (shown in the red box below) to select any element such as headers, body, font, scrollbars, etc., in your Obsidian page to view its CSS code.
When clicked-on, the cursor icon will turn blue meaning you can now click on any element in your Obsidian page to inspect and modify its CSS code. In the example below, I clicked on the paragraph element (box 2) that led me to the CSS code in the CSS panel (box 4).
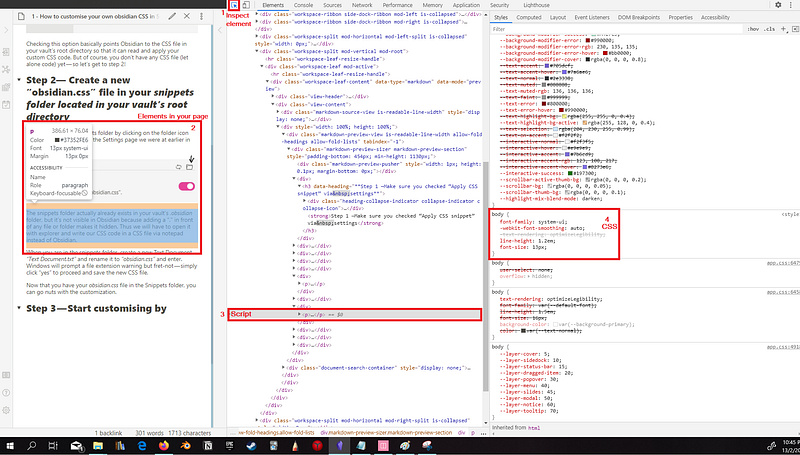
Modify CSS code in the CSS panel to view real-time modifications
Once you are viewing the CSS code of a particular element you want to modify, you can play around with the values of the property to change it’s style or add-on new values. You can modify font-sizes, background colour, highlighter’s colour, width/height of your scrollbars, paddings of your body texts, layouts, etc. easily by using the select element function and modifying its code in the CSS panel.
If you are interested to understand deeper the syntax and build complicated styles, you can use Mozilla’s CSS reference index to get more information.
Copy-paste edited CSS code into your .obsidian CSS file
Once you are happy with the style of your Obsidian, simply copy-paste the modified CSS code from the DevTool into your obsidian.css file and save as per below:
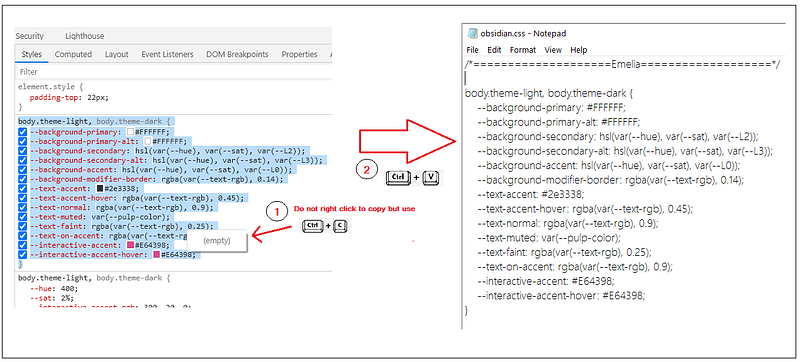
Since you have enabled the “Apply CSS snippet” option, Obsidian will automatically overwrite its default style with your custom CSS code when you relaunch it in the future.
Enjoy! :)


