
How to Create Numbered Subheadings in Microsoft Word
I had to do this today, and it was not obvious

Sometimes, you’re certain that there should be a way to do something in Microsoft Word. You can’t have been the first person to want this particular function! But the help is not helpful, and you’re left frustrated and confused.
This morning, I got an email from my brother, asking for help. As the writer in the family, I’m the default expert on all things Microsoft Word.
He was trying to fill out a document with numbered subheadings. Something like this:

Doing this from scratch is easy
Now, if you’re creating a document from scratch in Microsoft Word, this is trivially easy.
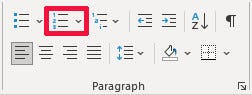
You start formatting an ordered list, by typing “1.0 First Topic” and clicking the ordered list button.
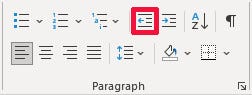
You press enter, then click the indent button. Microsoft Word will automatically indent your next line, and number it 1.1.
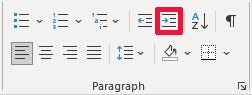
When you’re ready to go back to the main level (2.0), press enter, then click the outdent button. Microsoft Word will format it.
You continue indenting and outdenting to create lists using the main heading numbers (1.0, 2.0, 3.0, etc.) and subheading numbers (x.1, x.2, x.3, etc.).
Retrofitting a document, not so easy
My brother’s problem was that he was attempting to use a “template” that had been created by his office. Whoever created the template had made an ordered list with the official main headings. But the subheadings were all text.
That meant, if my brother wanted to add additional line items under a heading, he had to manually number each line. If he then inserted or deleted a line, he had to manually renumber everything that came after it. If his line item went on for more than one line, he had to manually adjust the tabs and hanging indents to make everything line up.
This was a great annoyance to him. Especially since he knew there should be a way to get Microsoft Word to do all that heavy lifting for him.
He was right. But the way to do it isn’t obvious.
Method 1 — You get lucky
If you’re lucky, whoever set up your document did so in a way that Microsoft Word can take into account. All you have to do in this case is move your cursor to each subheading line in turn, and press the Ordered List Button.
My brother was not lucky.
Method 2 — You are not lucky
The document you are working on may have gone through enough iterations that Microsoft Word can no longer figure out what the intent was. For example, a mix of spaces and manual tabs were used instead of indents. As a result, Word does not know what level of hierarchy you are on.
As in Method 1, you will move your cursor to each subheading in turn, and press the Ordered List Button. However, the automatic numbering will be incorrect. For example, Word might number your first subheading 1.1, then number the second subheading 1.2 (instead of 2.1).
To fix the subheading numbering, right click on the number you want to change. Select the option “Set Numbering Value”.
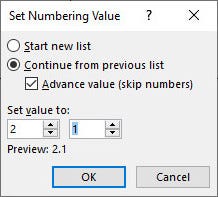
In the pop-up dialog box, select the “Continue from previous list” radio button. Below that, check the “Advance value” tick box. Then manually adjust the numbers displayed and click OK.
It takes a little longer, but once you save your document with the new numbering system, it will stay numbered correctly. In the future, if you add, insert, or delete a subheading, the other numbers will recalculate.
Conclusion
You shouldn’t have to manually enter list numbers or monkey around with tabs to get things to display correctly in Microsoft Word.
When creating a list from scratch, you can easily create main headings and subheadings by using the indent and outdent buttons.
If you need to retrofit an existing text list into an automatically numbered list, the “Set Numbering Value” dialog box lets you specify exactly how you want it to be numbered.
Ready to have a better tomorrow?
I’ve created a guide to help you increase your confidence and improve your life. If you follow these tips, you will level up your life very quickly!


