
PIECES OF A SCALABLE IOS APP ARCHITECTURE
Dev/Staging/Prod Configs in Xcode
Using .xcconfig and config.plist files for different environments

In a project, one often develops in different environments. For example, all server requests are to go against the Dev server during development, later for testing against the Staging server and at the end against the Prod server.
Or different test scenarios can be used — e.g., only mocked requests during development and the database should be filled on each app start with prepared test data. For that, you don’t want to change the code all the time. 😫
Use configuration files to easily exchange environment-dependent data.
This can be done in different ways.
By the way, thank you Quentin Fasquel for pushing me to a better solution with your reply! 😊👍
Incidentally, this is an article from the “Pieces of a scalable iOS app architecture” series.
The Old, Deprecated Way
This approach uses different project targets to copy the appropriate config file to the bundle. It works, but there are some drawbacks, which will be covered later on. So, if you’re not interested in knowing how to not do configurations then please move on to the section titled “New Recommended Approach”. 😉
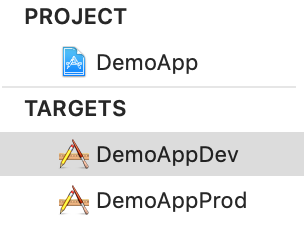
For this approach, you need to create a couple of targets: a Dev target (Development) for normal development, debugging and testing and a Prod target (Production), which is needed only to build the final app when going live.
Using multiple targets has the advantage of allowing you to use a different bundle identifier for the Dev builds than for Prod builds because there are then two info.plist files.
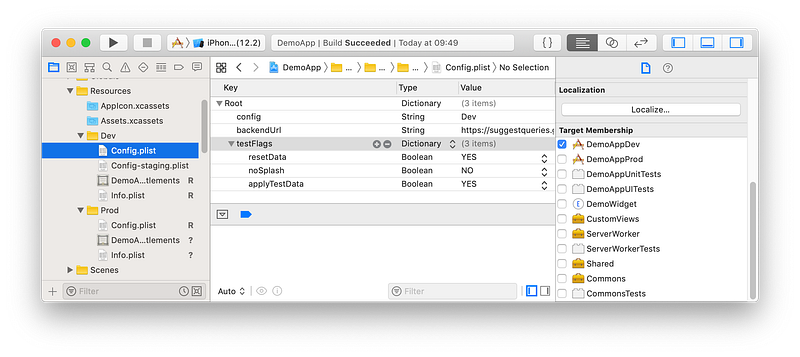
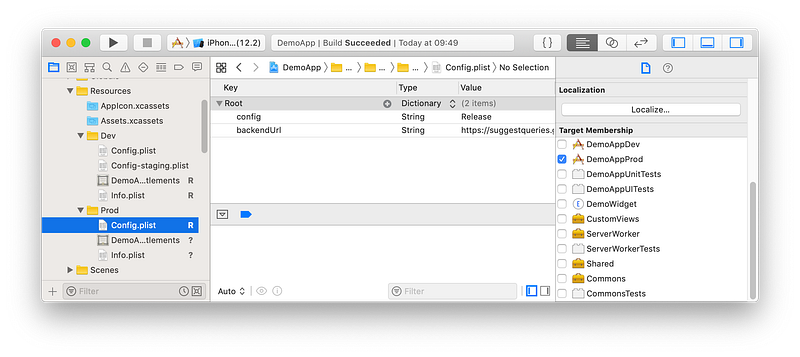
Then you can also create two config files. One is only included with the Dev target and the other with the Prod target. No code switch necessary for that! 😁
With a little bit of glue code to interpret command-line arguments, you can then simply switch through different configuration files within the same target, for example to load a dev or a staging config file for debugging.
However, creating a new target only for a different configuration has some drawbacks:
- The project’s
.pbxprojfile gets doubled in length, and bigger project files might slow down Xcode. - Merge conflicts within the project file now need to be solved at more locations.
- One may forget to add new files to both destinations.
In my opinion, the last point is especially an issue because without CI the problem occurs late. Then it’s tedious to look through all the files to find the forgotten check mark. 😔
A Better Approach
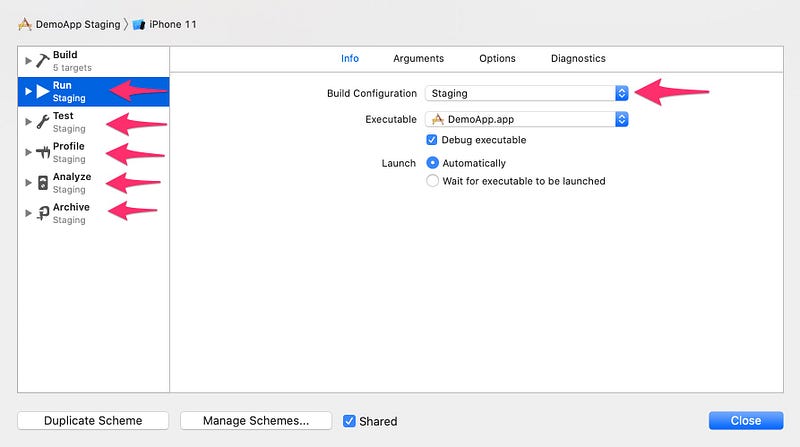
As Piotr Gorzelany explains in his article “iOS project best practices and tools”, you can use project-level configurations. You then have to edit the scheme to choose in the Run — Info tab of the Build Configuration to either Debug, Release or Staging.
Depending on the selected configuration, another part of the Configuration.plist file is loaded. The problem is all data for all configurations must be in one file. This means the whole file is delivered into a production build and may possibly contain sensitive development data. 😨
It’d be better if only the data that are needed are delivered. And it’d also be better to have a solution where it’s not necessary to modify the scheme all the time. 😩
The New, Recommended Approach
This approach relies on .xcconfig files, schemes and Config.plist files for each configuration.
Set up the configurations
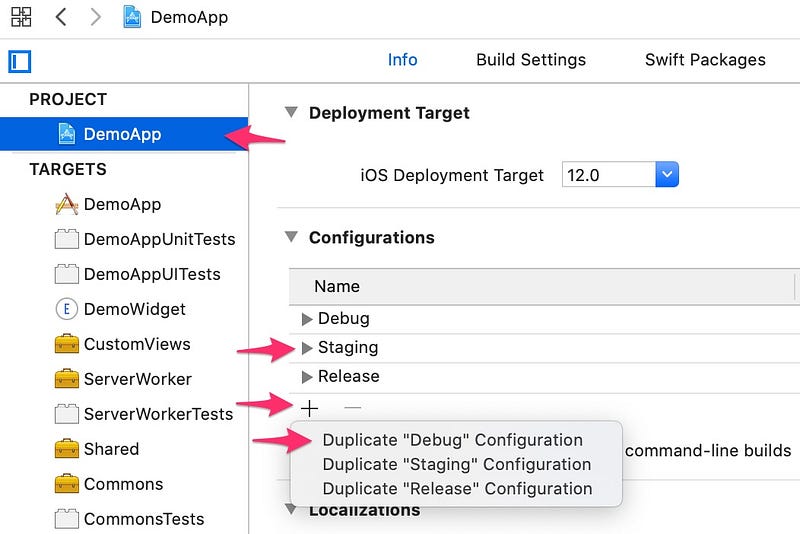
In the project settings under Info — Configurations, add a new configuration using the plus button. You should choose “Debug” as the basis for the duplication and “Staging”, for example, as a name.
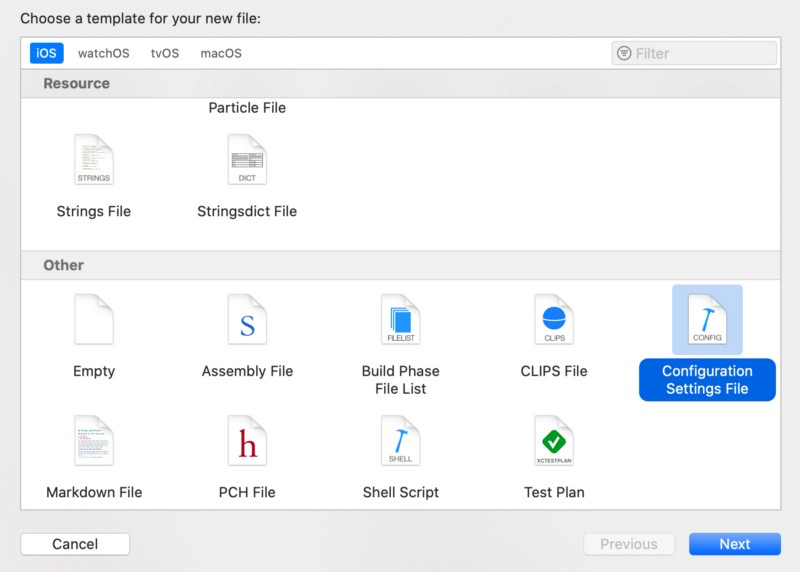
Via File — New — File… — Configuration Settings File you add three .xcconfig files. These are named “Development.xcconfig”, “Staging.xcconfig”, and “Production.xcconfig”.
And while you’re at it, you can also create three “Config.plist” files for the three configurations. These files can all even have the same name if you save them in their respective directories.

However, these files shouldn’t be added to the target — otherwise, it wouldn’t be clear which of them is now in the bundle and which will be overwritten. More on that later.
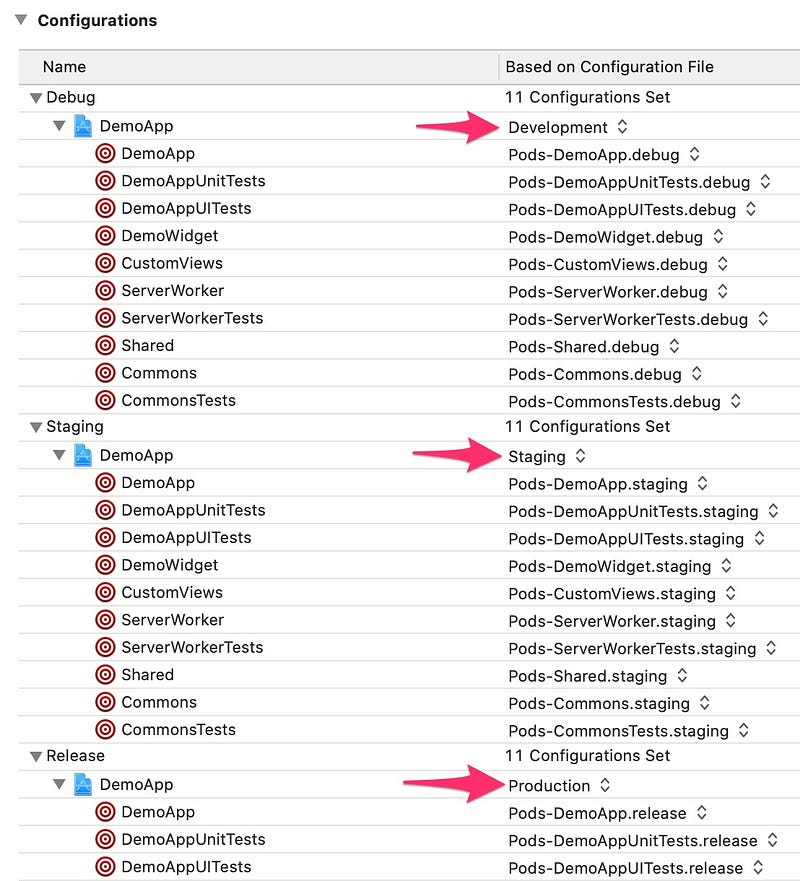
So the .xcconfig files are also used by the Configurations, you have to assign them as the base. To do this, you can expand the respective configuration in the project settings and select the appropriate base for the respective configuration.
In the “debug” configuration that would be, for example, “Development”. This should also be done for “staging” and “release” to map on “Staging” and “Production”.
If you have problems with CocoaPods, you may need to delete the “Pods” directory and the “Podfile.lock” file and reinstall via pod install. Now, the project should build again. 😅
Using .xcconfig files
The .xcconfig files are now integrated and used, but they are still empty. 😙
They can be used to enter Info.plist entries, build settings and user-defined settings. For example, you could enter the following in Development.xcconfig:
XCC_BUNDLE_NAME = Demo D
XCC_CONFIG_PATH = Development/Config.plist
This creates two variables that you can then use in the build phase and in the Info.plist. The variable names are arbitrary, but you should pay attention to possible collisions. That’s why I prefix them with XCC for XCodeConfig.
In Info.plist, enter the value ${XCC_BUNDLE_NAME} under “Bundle name”. The app icon on the device henceforth bears the name “Demo D”. If you add appropriate entries in the other configuration files — e.g., “Demo S” for staging and “Demo” for the production release, you can see immediately which build is currently on the device. 😌
The second variable should be used in a separate script in the build phase. To do this, create a new script entry in the project settings under build phase by using the plus button and the entry “New Run Script Phase”. The new entry can be named, for example, “Copy Config” and contain a simple cp command that just copies the appropriate Config.plist into the Generated directory.
Make sure the new “Copy Config” script entry is somewhere after “Dependencies” / “[CP] Check Pods Manifest.lock” and before “Compile Sources”.
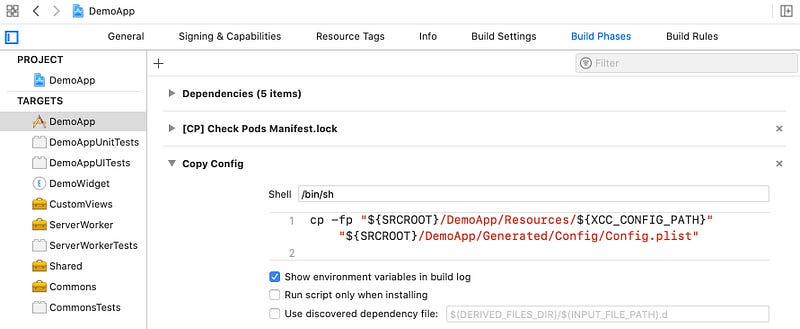
Note that here the variable defined in the config is used with ${XCC_CONFIG_PATH}. Via the config, one determines which plist should be copied.
Under Output Files, you should possibly also enter the target file in order to ensure the next phase begins only if the file was actually copied.

Now only the Config.plist in the Generated directory has to be integrated into the target because this should then be copied into the bundle.

Depending on the selected configuration, the corresponding Config.plist will be copied to the Generated directory during the build phase and then into the app’s bundle.
Schemes for configuration switching
In order to select the respective configuration, one doesn’t want to constantly adapt the scheme. It’s better to create a scheme for each configuration and then simply switch between the schemes.
Via Product — Scheme — Manage Schemes…, you can create new schemes. Here you always choose the same target but name the scheme according to the configuration.
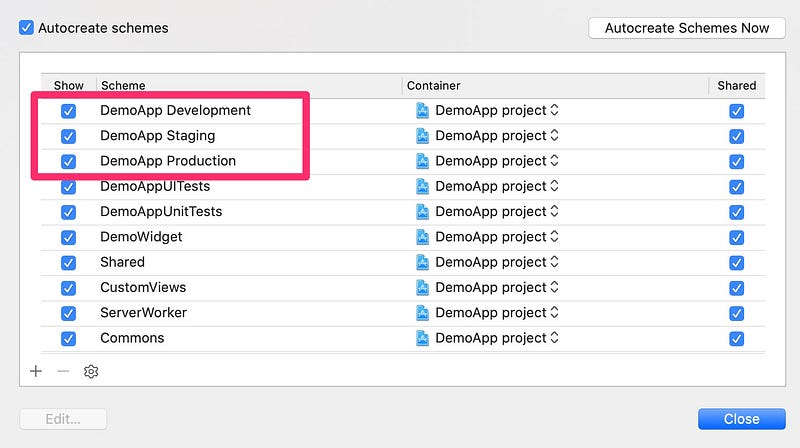
For each scheme, you have to select the respective configuration under “Build Configuration”. So, for the staging scheme, select the stage build configuration.
If you have configured the schemes for all configurations, you can now easily switch between them and always use the corresponding configuration. 😀

Decoding config files
Now that you have the appropriate configuration started via the scheme and the correct Config.plist in the app’s bundle, you should also make use of it. 😋
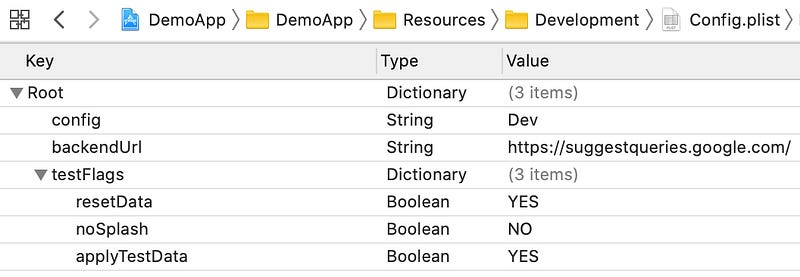
The contents of the Config.plist file can be easily decoded with a PropertyListDecoder in a Decodable struct. In the DemoApp project, you can find the the ConfigLoader in the Shared framework to map the Config.plist to the Configuration struct.
As you can see, the Configuration struct declares testFlags as optional, so they don’t have to be included in a Production version. Only the necessary data is in the Production build. 😘
However, the Development and Staging environment cannot only use different BaseURLs, but also different TestFlags — for example, to use mocked server requests during development.
The Configurations are type-safe thanks to the struct and can be easily used in code when provided by the dependencies.
Compile-Time Thoughts
The Config.plist is currently being loaded at runtime. With a corrupted config file, this can cause the app to crash due to the thrown exception. 😅
If you start loading the config file early after the app launches, it’ll crash as soon as you start the app for testing. That’s good enough in my opinion, because the config shouldn’t be faulty. And even if it is, then you should get a notice about it relatively quickly after each launch and be forced to resolve it.
Is it not possible to catch the error at compile time? With a code generator such as SwiftGen, for example, you could convert the plist file to Swift code in the build phase and then have type-safe calls and no runtime crashes. 🧐
However, this approach has some problems:
- The current SwiftGen template resolves nested levels with string dictionaries — i.e., the testFlags would be resolved via string keys and that wouldn’t be type-safe anymore:
configuration.testFlags[“noSplash"] - You could adapt the stencil template, but this isn’t so easy, with maintenance work required and possibly even changing the SwiftGen generator code. Here you have to ask yourself if it’s really worth it.
- Depending on the configuration, the testFlags are converted into code or not — i.e., in Development, the constant
static let testFlags: [String: Any]is created but not in Deployment — not even as Optional. This will have corresponding compiler errors at Release. Fixing these will most likely result in unclean workarounds. 😓
That’s why I think the approach to load the config at runtime is better, provided the loading happens right after app start. A small UITest on the CI server should be able to quickly and automatically detect the possible configuration file corruption use-case. So there’s no need to maintain SwiftGen. 😁


