
How to Build Your Writer’s Portfolio on Google Sites for Free
An addition to your marketing arsenal

It’s not the best content that wins. It’s the best promoted content that wins.” — Andy Crestodina
Why bother to create a portfolio?
Would you go for a job interview without a Curriculum vitae? If yes, then you don’t need to build one and can jump back from this article.
But If you are smart, professional, and want to increase the chances of getting hired, then you need a robust CV to convince them.
A portfolio is nothing less than that. A place where you display who you are and showcase your best work on the Internet.
Benefits of creating a free portfolio:
- Increase the reach and introduce your work to new audiences.
- Keeps your online presence managed
- Helps you earn clients for your skill
- You host it on Google. Trustworthy and dependable
If you need an example to look for — here’s mine
How to craft a free portfolio on Google sites
Here’s a step-by-step guide
Step 1
To get the ball rolling, you must have a Gmail account. Who doesn’t have these days? If not, create one.
Step 2
Visit Google Sites. You will be introduced to a blank site and several templates to work on.
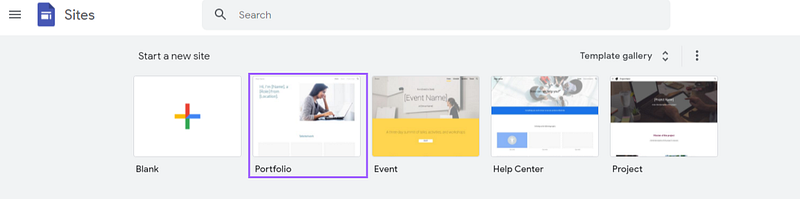
Don’t choose a blank site, if you are not sure how you will place the contents inside. You can choose the Portfolio template as I did.
Step 3
They will provide you with plenty of options to customize your portfolio page. On the right-hand side, you are given different tools to add, edit, and embed blog posts, YouTube videos, images, and much more.
As a Google product, it supports every content format.
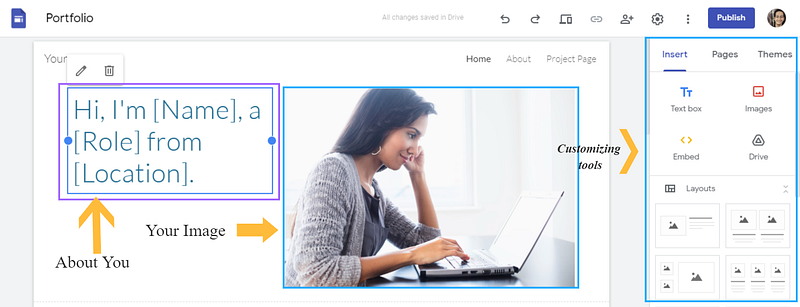
Start by deleting sections you don’t need instantly. Simplify the template. Insert your image in place of the one given and write a sentence or two introducing yourself.
Step 4
To delete the unnecessary sections, simply select them and choose the garbage icon popping out.
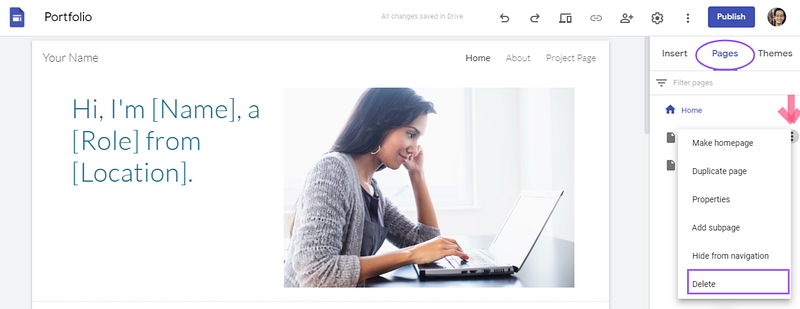
To remove the about and project pages from the top right corner, select the pages section on the right-hand side and click on the 3 dots for the page you want to delete. A drop-down menu will show up and choose delete.
Step 5
To insert a text box, click on the Text box icon in the Insert menu on your right. You can also add links to your texts. When you write something, a pop-up will showcase, providing you options like font size, font name, bold, italicize, alignment, links, underlying, and much more.

Adding images is yet another simple task. Click on the Images tab in the insert menu to your right. You will have two options to choose from, either upload it from your computer or Google Drive. You can also add stock images.
Opt for copyright-free images.
You can choose from multiple layouts to add content to the page. Experiment with the layouts and choose the best that fits your needs.
Below the layouts, you have a pool of tools to add content. Make sure you don’t fit everything inside a page. Add only those elements you feel will add value.
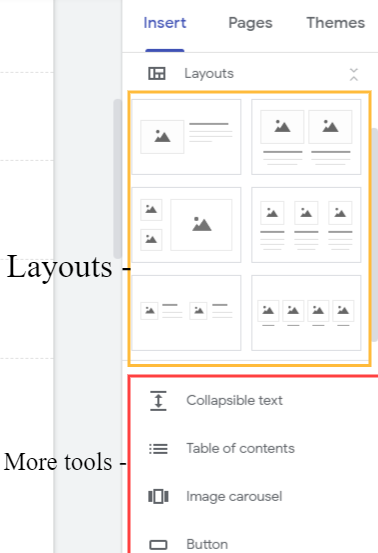
You are provided with options like collapsible text, table of contents, image carousel, divider, Google documents, etc.
Step 6
You can play around with themes. Google sites provide 6 themes to choose from. Again, try them all and see which fits the best with your content. I chose the Vision theme for myself.
Step 7
Start adding some examples of your work. This part is crucial. Add those examples which perfectly suit your work. Display your best belongings.
To insert your content, you can embed them easily with the Embed tool in the Insert menu at your right. With a simple click, a box will show up in which you can either place the link of your content or can also use embed code to do so.

In a frame, only 2 content pieces look clean horizontally. Adding any extra or deleting them will make your portfolio look vague.
Remember not all content pieces can be transferred with a link. For some of them, you either have to write manually or take a screenshot, edit it and then post.
If you look at my portfolio, the LinkedIn posts are not links. They are the screenshots of my post.
Step 8
Play with the header and footer of your portfolio. This isn’t necessary, but it adds a finishing look to it. You can access the header by scrolling to the top and clicking on Add header.
You are provided with 4 header types. Cover, large banner, Banner, and Title only.
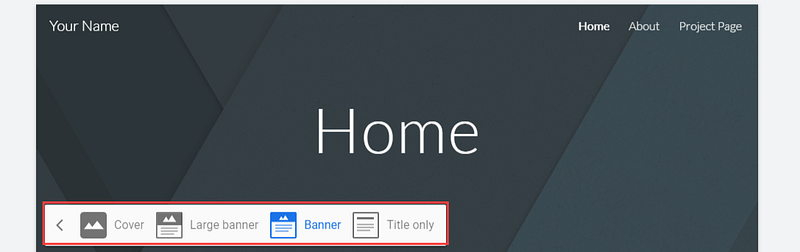
You can try them all. For the first three, you can choose different images to showcase as your header. For Title only header type, you can simply write “your name + writing portfolio” as I did.
At the footer, either you can display your navigation links or your contact credentials. I used my email for people to connect with me if they have any queries or for business opportunities.
The thing to remember about the footer is that it remains constant throughout the site. If you have multiple pages in your portfolio and you put in navigation links at your footer, it will be duplicated throughout the site.
Step 9
After you are done with your portfolio, you have several options to look for.
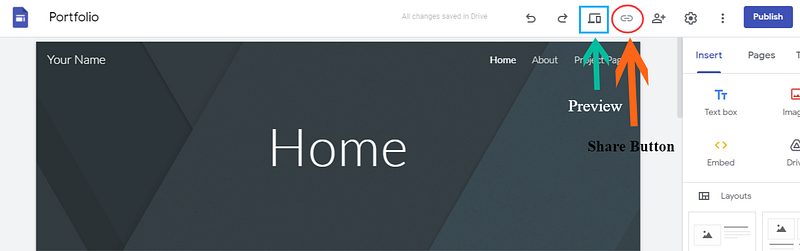
First is the preview icon on the top. You can use it to see how your portfolio will look when it goes live.
On the right of it, you have the share icon which will only activate after you publish your portfolio. You can use this to share your portfolio across other platforms.
When you hit publish, you will be asked to Insert your web address.
Simply put in your name, or a combination of your name and digits to give your portfolio a unique identity on the Internet. If the username is available, it will display a right tick.
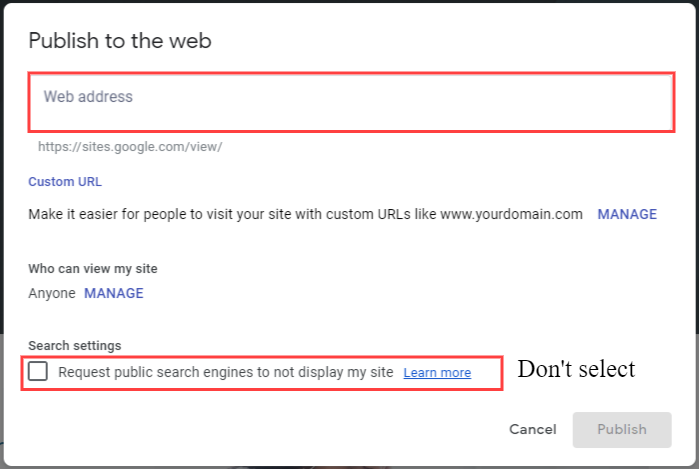
Don’t select the last box requesting search engines not to index your portfolio on Goggle.
Hit publish.
Congrats. You did it.
Last thoughts
The Internet has billions of content pieces today. To make yourself stand out from the competition, you need to do everything possible to market your work.
What’s better than promoting your best content on Google for free. You have nothing to lose and everything to gain.
For whom are you waiting? Build your portfolio right now.
Grab the 10 Powerful and Actionable Writing Tips eBook for free right in your inbox. Don’t miss out on the Bonus Tips + Tools at the end of the eBook.


