
How to Build a Solar Aquaponic System with Plastic Bottles
Grow fish and vegetables together in this cheap, efficient, portable DIY system
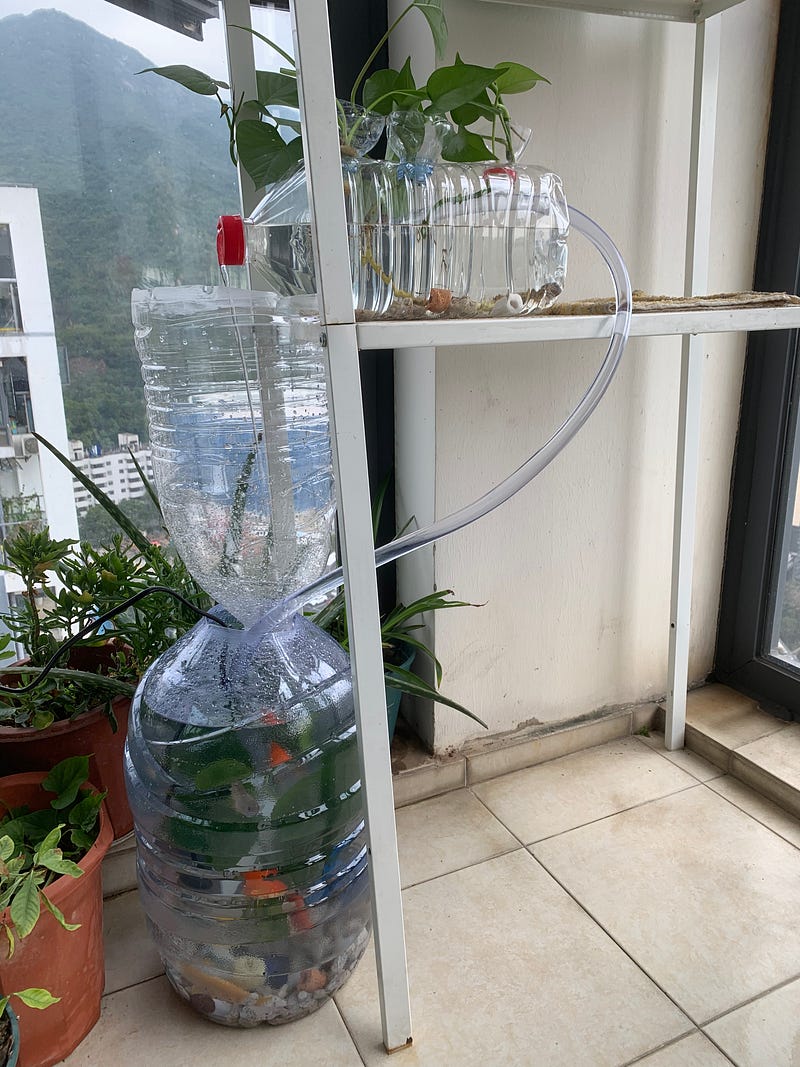
As the word aquaponics itself suggests, we grow plants and fish symbiotically together in an aquaponic system (Figure 1 & Video 1). In it, fish live in an aquarium and the hydroponic plants thrive in a grow bed. Water flows through the two containers with the help of a water pump. Once established, this system requires minimal input: sunlight, some water, backup power, and fish food. Fish discharge ammonia-rich urine and fecal matter into the water. Microscopic bacteria degrade the waste and convert the ammonia into nitrate. The plants use nitrate to grow. And the water is purified in the process. Finally, the waterfall brings more oxygen to the fish.
Aquaponics has many advantages. The amount of labor is cut down. It requires no fertilizer and produces no toxic run-off. The system is scalable and can be deployed indoors or outdoors. Under a well-controlled environment, interference by weeds or animals is also minimal. As a result, herbicides and pesticides are no longer needed. It has been reported that plants grow faster in aquaponics than in a traditional garden (here and here). Last but not least, a well-design aquarium is a beautiful artwork itself. And its Zen-like waterfall sound can be very soothing.
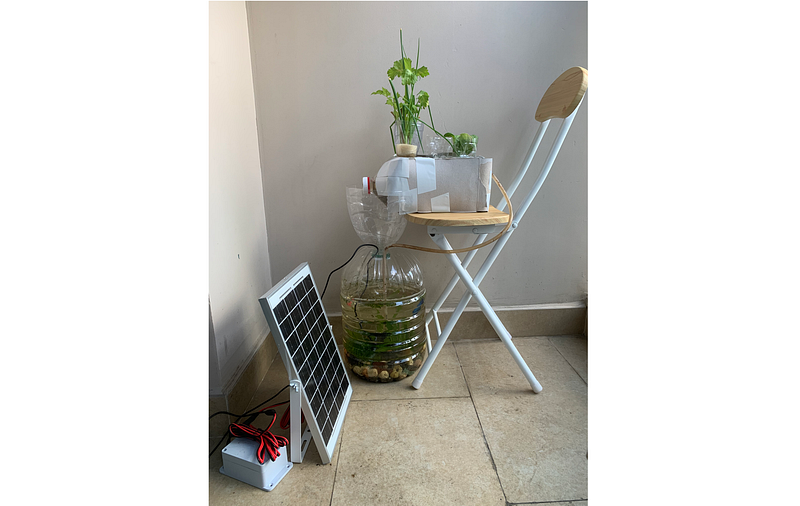
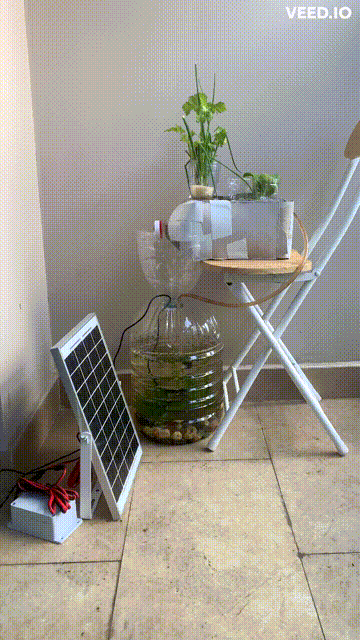
Two YouTube videos have inspired me to build my own aquaponics (Videos 2 and 3). Their designs are so simple that everybody can reproduce them. Because I am new to the idea, I built a small system as an experiment. I have even simplified the design so that I could construct it without a glue gun or other gadgets in Video 2. In addition, I have used solar energy to power a part of the system. The result is Figure 1 and Video 1. In this article, I would like to describe my project to you.
1. Architecture and material
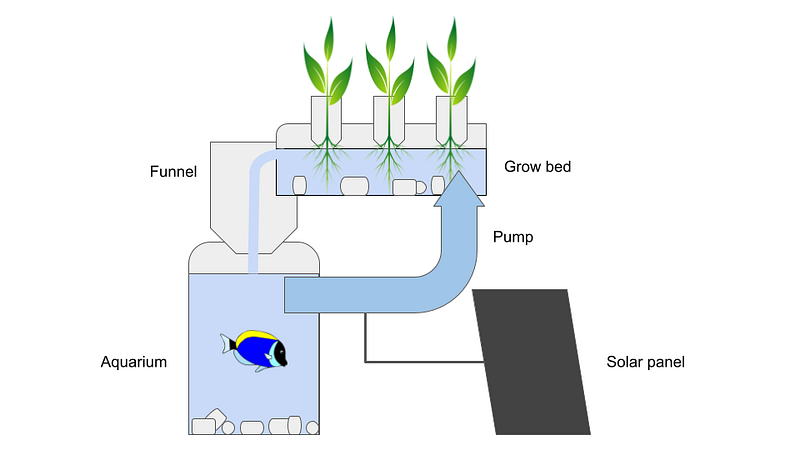
The system is simple and small. I adopted the Flood and Drain system. In it, the grow bed is a narrow trough — a square cylinder in my case. Nutrient-rich aquarium water flows through the grow bed. Plants are stabilized on the grow bed and their roots are immersed in the water (Figure 2). The following materials are used:
All the bottles listed above are used plastic bottles. Because the system stays outdoors most of the time, and it can be quite windy here, I chose a square cylinder bottle as the grow bed. The funnel acts as a windshield for the waterfall.
I bought the solar pump with filter and battery for $30. The 10-watt solar panel has an output voltage of 9 volts. But even when the weather was good, the panel could not power the pump for a whole day. So I switched to USB power every evening.
You can choose a wide variety of fish and plants in your setup. In my case, I bought a loricariid catfish to clear the algae, ten small zebrafish, and two Siamese fighting fish. It was my mistake to keep two Siamese fighting fish in one place because they kept fighting each other until one dropped out. As to the plants, I experimented with green onion, Apium, and Brassica rapa chinensis.
2. Component preparation
2.1 Aquarium
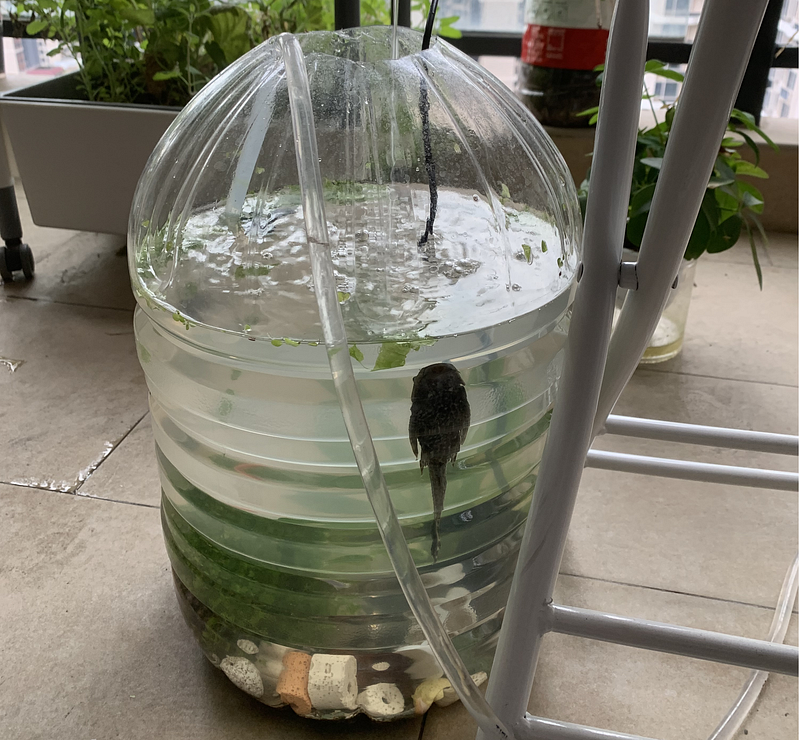
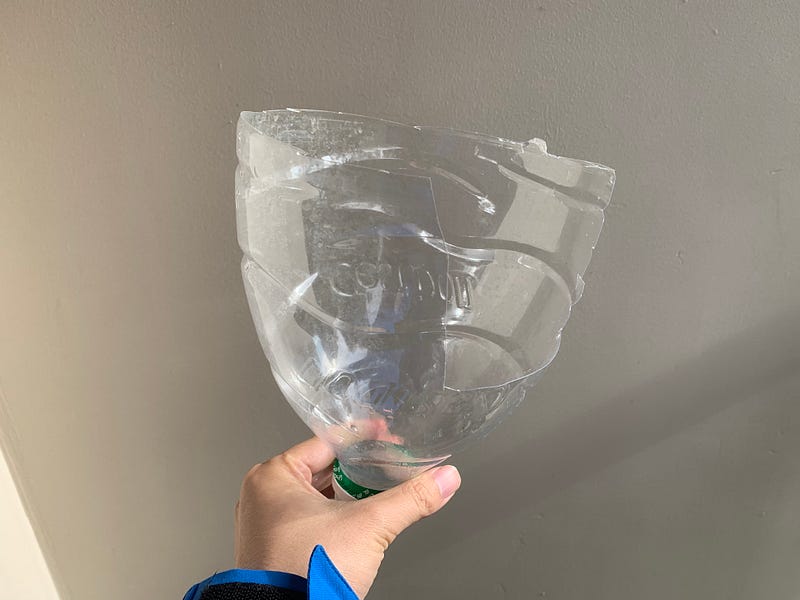
First, let’s make the aquarium. Cut off the tip of the 12L bottle. Because we need the dome structure to capture splash and evaporation, this opening should be just large enough for the funnel tip (Figure 3).
2.2 Funnel
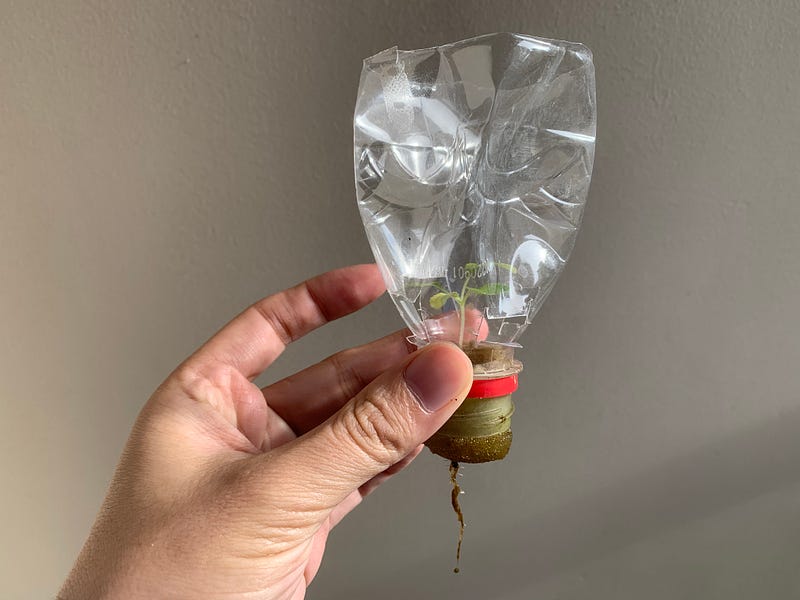
A funnel is necessary because the waterfall is not steady. So I cut open a 6L bottle and kept its dome. With some additional cuts, the funnel fits into my shelf nicely (Figure 4).
2.3 Grow bed
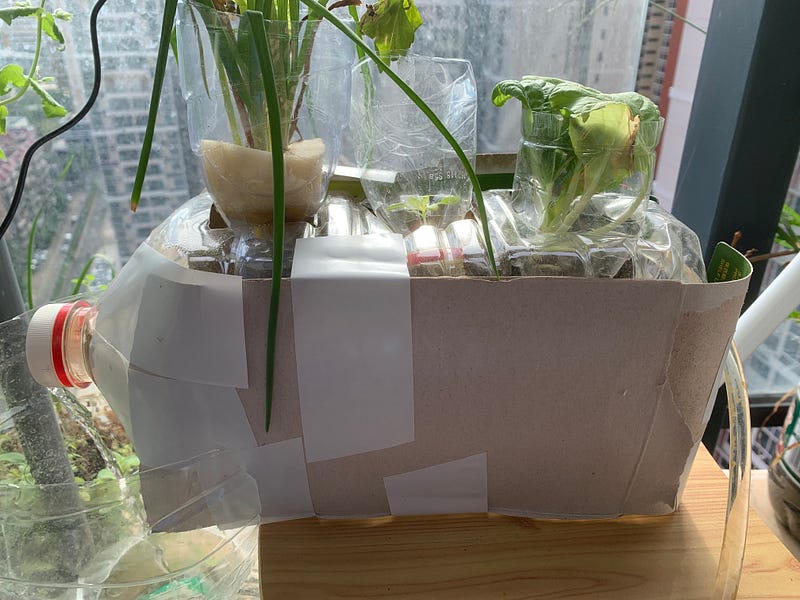
The grow bed is in fact a 5L square cylinder bottle. At its bottom, drill a hole just large enough for the tube from the pump. On the lid, drill a small opening for the water outflow. On the upper side, cut three large holes for the vegetable cups. In order to prevent algal growth, I wrapped the walls with cardboard paper to deprive the algae of sunlight (Figure 5). Alternatively, you can just paint the walls black.
2.4 Vegetable cups
Vegetable cups hold the seedlings on the grow bed (Figure 5). Just cut open three 380 ml bottles and keep the upper parts. In addition, I made some small windows on the lower sides to allow water exchange (Figure 6).
3. Assembly
The assembly is straightforward. First, assemble and test the pump. The tube should be just long enough to connect the aquarium and the grow bed. If it is too long, the resistance may reduce the water throughput. Optimize the angle and position of the solar panel and connect it to the pump.
Wash the gravel, all the bottles, and the pump. Cover both the aquarium bottom and the grow bed bottom with gravel. Use a shelf or a small chair to elevate the grow bed above the aquarium. Fill the aquarium with 10L of water, but let it sit for at least 24 hours to reduce the chlorine. Afterward, add the water plants and the fish to the aquarium. Install the pump and the funnel. To increase the oxygen infusion, the grow bed waterfall should hit the aquarium water surface uninterruptedly.
Finally, place the plant seedlings into the cups and stabilize them with sponges. Insert the cups into the grow bed. Adjust their heights so that the seedlings can receive enough light and water. And the final product should look like Figure 1, Figure 7 and Video 1.
4. Maintenance
The system may take some days to establish. One possible reason is that it takes time for the bacteria to settle down and the roots to adapt to the hydroponic environment. So some casualties are expected. I lost three zebrafish and one Siamese fighting fish in the first few days. But once the system is up, its maintenance is minimal. I just needed to feed the fish and replenish some water now and then.
The invisible bacteria play a vital role in the system, especially the nitrifying bacteria. They convert the ammonia into nitrite (NO2) and then into nitrate (NO3) for the plant. They should occur naturally in the system. You can give the system a head start by adding some nitrifying bacteria capsules.
Even though I have wrapped the grow bed with cardboard paper. Algae still appeared. Algae will siphon the nutrient and clog up the tube. It is therefore advisable to wash the components regularly to remove algae and other waste.
Conclusion
The system has been up and running for three weeks. After the initial casualties, the remaining fish are healthy and active. And the plants are growing. And I haven’t changed the water even once. I still need some experiments to determine the optimal fish-to-plant ratio. And I want to measure the growth rates of the plants.
It is possible to scale the system up. I can get a larger aquarium to raise more fish and add more grow beds for more plants. But that will require a more powerful pump. And my current solar panel may not meet the power requirement. I can install solar LEDs to boost plant growth. An automatic fish feeder is necessary in case I travel.
I was so happy and excited when my aquaponic system went online for the first time. And I enjoy its companion every day. In addition, I appreciate more and more the delicate balance in this small ecosystem. Finally, the experiment teaches me a great deal about agriculture and fishery. So, it is time for you to build one yourself.