
How to Build a Drag & Drop Form with FastAPI & JavaScript
Step by Step Tutorial to Create Uploading File Form
[Update: 2022–1–5 Bootstrap 5]
Table of Contents
· Introduction
· Set-Up
· Installing Python Packages Using requirements.txt
· Structure
· Creating the Upload Page
  ∘ ① How to add a router in app/main.py
  ∘ ② Adding a link to the templates/include/topnav.html
  ∘ ③ Creating a controller app/routers/upload.py
  ∘ ④ Creating a view page, templates/upload.html
· Creating Upload Area
  ∘ Updating upload.html
· Plan of Procedure
· Adding Drag & Drop Functions
· Python Codes
· Adding the upload/new Post Method
· Demo Using Drag and Drop
· Demo Using File Select
· Conclusion
· Updates
· References
Introduction
This article shows how to build a drag & drop form using Python and Javascript. Uploading files allows users to analyze their data or image on your app. We use FastAPI [1] for this tutorial but you can apply this to Flask or other Python frameworks. FastAPI is a modern, high-performance, web framework for building APIs with Python 3.6+ based on standard Python type hints. HTML Drag and Drop [2] interfaces enable applications to use drag-and-drop features in browsers.
Code along with the article or grab the final code.
(Options) These articles, “Creating a Virtual Environment” and “Creating a GitHub Repository with Gitstart” will help you to set up your Python environment. If you want to host your FastAPI app for free, please read “How to Deploy a FastAPI App on Heroku Free”.
Set-Up
We build the app on top of the FastAPI Web Starter. The FastAPI Web Starter is a static website built with FastAPI and Jinja.
$ git clone [email protected]:shinokada/fastapi-web-starter.git
$ cd fastapi-web-starter
Installing Python Packages Using requirements.txt
Create the requirements.txt file in the root directory.
We add Pillow to the FastAPI Web Starter’s requirements.txt. Pillow[3] is a Python imaging library.
Install Python packages using this rquirements.txt:
$ pip install -r requirements.txtRun the server:
$ uvicorn app.main:app --reload --port 8000Visit http://127.0.0.1:8000/
Structure
FastAPI Web Starter has most of the files. We will create missing files in this article.
Creating the Upload Page
Let’s create a new page. We need to add ① a router in app/main.py, ② a link in the top menu, ③ a controller app/routers/upload.py, and ④ a view page.
① How to add a router in app/main.py
We add a new route for upload in app/main.py:
...
from app.routers import upload, twoforms, unsplash, accordion
...
app.include_router(upload.router)
We import upload from app.routers, and include the router upload.router. This allows us to visit http://127.0.0.1:8000/upload.
② Adding a link to the templates/include/topnav.html
<li class="nav-item {{'active' if active_page == 'upload' }}">
    <a class="nav-link" href="/upload">Upload</a>
</li>
We use Jinja’s if-statement to check that the active_page is upload. If it is so, it will add the active class.
③ Creating a controller app/routers/upload.py
Line 1: We import FastAPI’s APIRouter. We can include this file in the app/main.py.
Line 5: We create a APIRouter object, router.
Line 9-12: We use the get method with a URL of /upload. We use the HTMLResponse to return an HTML file called upload.html. For now, we return a variable result to the HTML file.
④ Creating a view page, templates/upload.html
Line 1: We extend the base.html that is in the FastAPI Web Starter.
Line 2: We set active_page to upload. This ensures it will add active class in the topnav menu.
Line 12: Display result.
Let’s start the server:
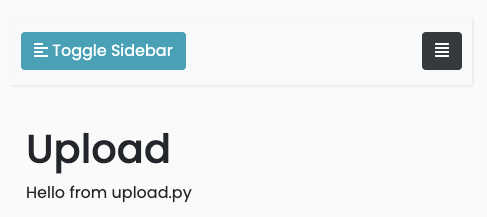
$ uvicorn app.main:app --reload --port 8000Visit http://127.0.0.1:8000/upload
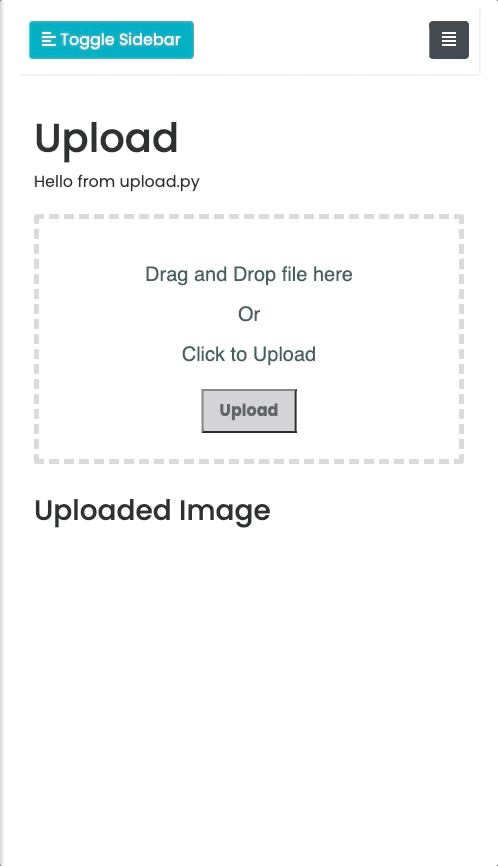
Creating Upload Area
Updating upload.html
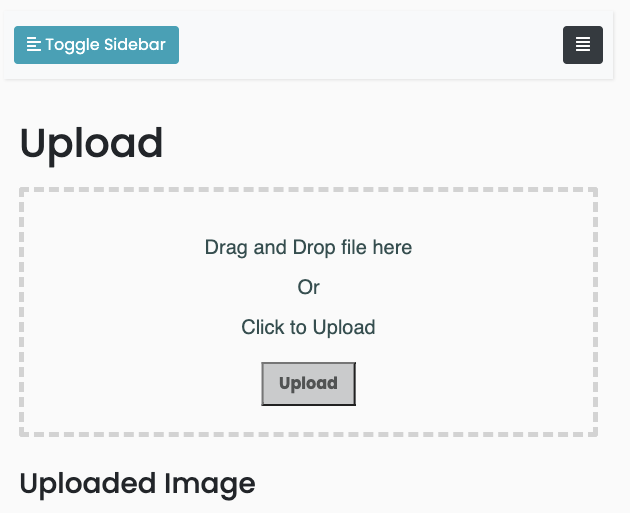
We are going to create a div upload-area in templates/upload.html.
Line 17: Since we will allow users to not only drag-and-drop but also select a file to upload, we add a submit button as well.
Line 37: Add the dragdrop.js. Please note type="module". This allows us to import another javascript file in the dragdrop.js.
Let’s add some styles for the upload page in the static/css/mystyle.css:
Now the page looks like this:
Plan of Procedure
The following flowchart is a summary process in sequential order for uploading a file. For this example, we are going to upload an image file and create a thumbnail.
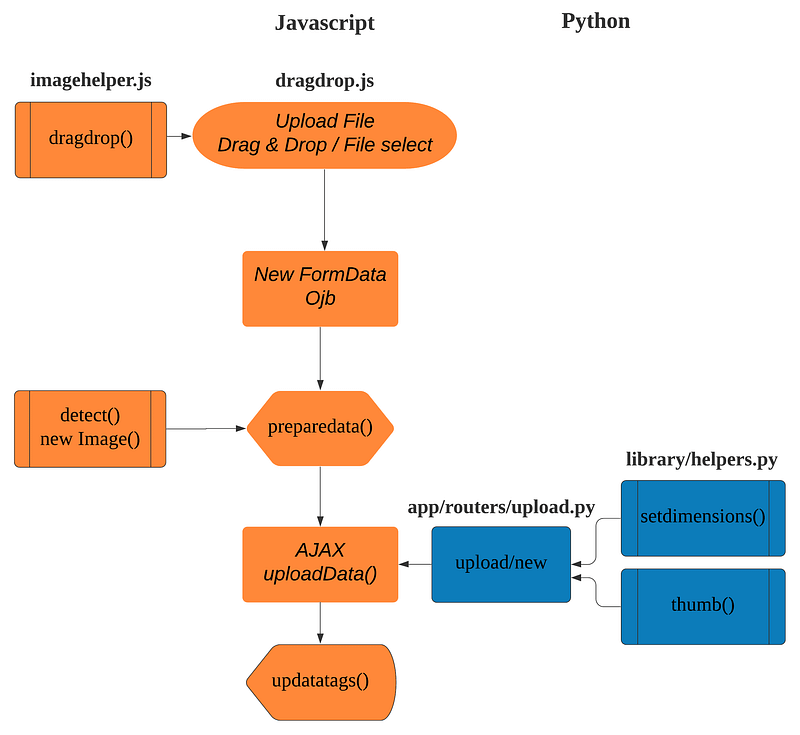
We handle most of the process with JavaScript and create a thumb image with Python. We go through the above process in the next section one by one.
Adding Drag & Drop Functions
There are two functions in static/js/imagehelpers.js.
The detect() function finds the image width and height. It takes an image URL and a callback. It creates a new Image object and assigns the Image src using the URL. We find the image width and height and use them in the callback. We are going to use the image width and height to determine the thumbnail width and height.
In the dragdrop() function, we use dragger, drop, and dragenter events to change the text when a user drags a file over the upload-area. We add preventDefault() and stopPropagation() to prevent the browser's default action.
In the last line, we export both functions so that we can import these in another javascript file.
In the static/js/dragdrop.js:
Line 1: Because we used type="module", we can import the detect() and dragdrop() functions from ./imghelper.js.
Line 4: Run the imported dragdrop() function.
Line 6–20: The preparedata() function creates an image URL blob using the file as the source. It uses the imported detect() function with the created image URL blob. The callback function uses the window.width(), imgWidth, and imgHeight - both are in the result returned from the detect() function. We store them in the data object and use the stringily() function to convert the JavaScript object to a JSON string. We append it and the dropped file. We then run the uploadData() function.
Line 23–36: This part controls actions when a user drops a file. First, it will change the text to “We are uploading your file”.
event.originalEvent.dataTransfer.files returns a list of files.

We use it to define the file variable, get the window width, winWidth and get the dropped file which is the first item on the list. If the dropped file matches the imageType, send it to the preparedata() function. Otherwise, change the text telling "Please use an image file. Try one more time.".
Line 39–41: This triggers the “select file” dialog box.
Line 44–54: This part is the same as line 28–36.
Line 57–69: This AJAX part posts data to the URL /upload/new. Once it is successful, it runs the updatatags() function.
Line 71–76: We set the HTML contents using an img tag, and change back the text to "Drag and Drop file here<br />Or<br />Click to Upload".
Python Codes
We add four more functions to the library/helpers.py.
setdimensions() calculates and returns dimensions for a thumbnail.
create_workspace() returns a directory path using uuid.uuid4() to create a unique directory name.
thumb() creates a thumbnail and saves it in a directory.
image_trannspose_exif() prevents a created image from rotation.
Adding the upload/new Post Method
Update app/routers/upload.py:
Line 1: Import File and UploadFile from fastapi.
Line 4: Import all functions from ../library/helpers.
Line 18: Add parameters, imgdata and file.
Line 19: The imgdata[0] contains winWidth, imgWidthand imgHeight. We convert the string to a Python dictionary using eval().
Line 22: Create the directory path and store it in the workspace variable.
Line 24: Store the dropped file name to file_name.
Line 26: Store the full path to img_full_path variable.
Line 27–29: Save the dropped file in the directory.
Line 31–35: Create a thumbnail and store the path to thumb_path variable.
Line 37–40: Return the img_full_path and thumb_path. These values will be used in dragdrop.js to insert the thumbnail on the page.
Demo Using Drag and Drop
Demo Using File Select

Conclusion
The uploaded image can be analyzed in your app. In a future article, we will cover how to find dominant colors in the image. Since we have the original and thumbnail in the directory we can use one of the images depending on the workload.
Get full access to every story on Medium by becoming a member.

Updates
[Update: 2022–1–5 Bootstrap 5] [Update: 2021–11–07 FastAPI & dependencies updates] [Update: 2021–08–15 Python and dependencies updated]
References
- [1] FastAPI
- [2] MDN Web Docs HTML Drag and Drop API
- [3] Pillow


