
How to Build a Docker Image and Push it to the GitLab Container Registry from a GitLab CI pipeline
While Dockerhub is a public registry that is essentially used by everyone, you don’t always need to use it. You can build your own Docker images and publish them in the GitLab Container Registry, which can act as a private registry.
Maybe you are wondering if there is a way to store Docker images at GitLab and use them in pipelines. There are many reasons why you may want to use the GitLab Container Registry. There are two typical use-cases:
- to store your dockerized applications
- to use your own Docker image inside the GitLab CI pipeline
Here is what this article will cover:
- How to build and push a Docker image to the GitLab Container Registry.
- How to figure out the size of the Docker images you are using.
- How to use a Docker image from the GitLab Container Registry in a GitLab CI pipeline.
The problem
Quite often, when creating a GitLab CI pipeline, you start with a base Docker image from Dockerhub and you add any missing dependencies. Here is a very simplified version where pytest is installed as a dependency:
some test job:
    image: python
    script:
        - python --version
        - pip --version
        - pip install pytest
        - pytest --version
        - echo "Doing complex stuff"
If you want to learn how to build pipelines in Gitlab CI, I have created an online course that starts with the basics of Gitlab CI and YAML and helps you understand the fundamentals of CI/CD. Learn more about the course.
At one point, you may end up with a lot of boilerplate scripts that you carry over from project to project. If there is no public Docker image that has everything you need, just build one!
The first step is to create a Dockerfile . For the example above, the file would look as follows:
FROM python:3.10
RUN pip install pytest
What is the size of the Docker images I am using?
Regardless if you are building a custom Docker image or if you are using an image from the public Dockerhub registry, knowing the size of your images is key in optimizing the performance of your pipeline.
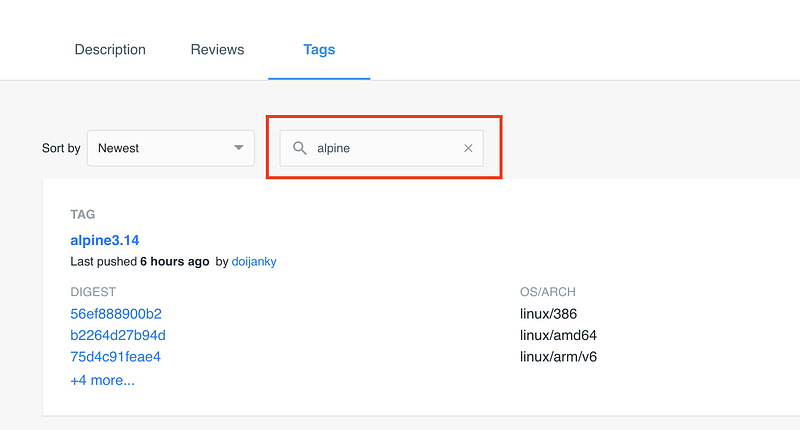
Let’s take a Docker image containing Python for example. From the official Python page on Dockerhub, click on Tags.
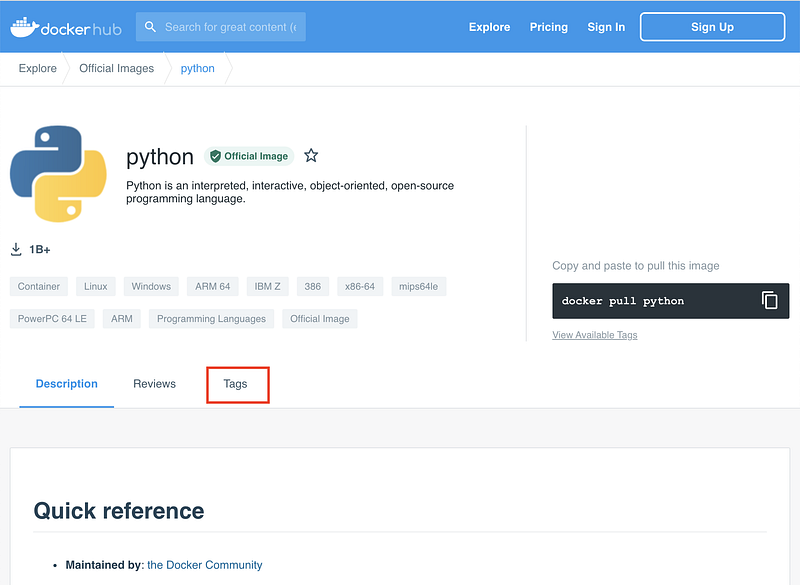
This will display all the different versions available. As you can notice, the latest version has over 300MB!
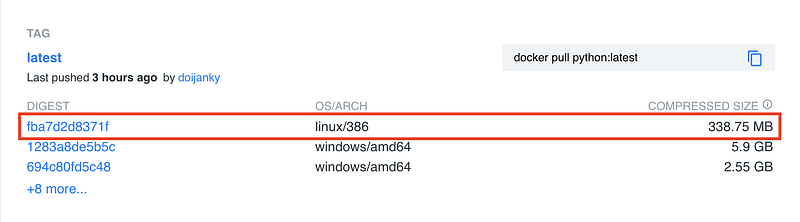
This is a full version of the Docker image with many Linux packages. But for every job that uses this image, you need to download 300MB before you can do anything.
But here is the thing: you may not need all the dependencies that this full image has. Quite often, Docker images are available for smaller Linux distributions, like Alpine Linux. In this case, the Apline Linux version only has 17MB.
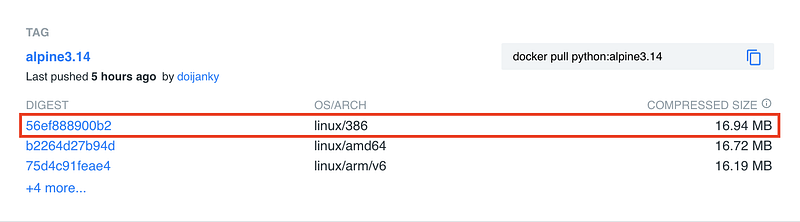
The difference comes from the fact that Alpine Linux is really lightweight and many packages are missing, including cURL.
There is also an alternative tag to Alpine Linux: slim This is a type of a Docker image that has been minimized with DockerSlim.
So I highly recommend giving smaller packages a try. Use the search field to locate the version of the image you wish to use.
Viewing the GitLab Container Registry
First of all, make sure that the GitLab Container Registry is enabled by going to your project and selecting Packages & Registries > Container Registry.
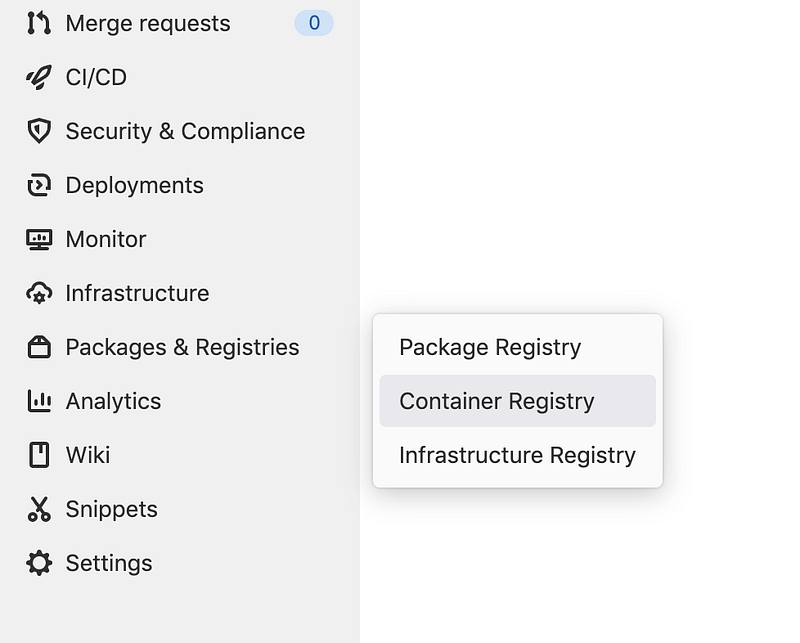
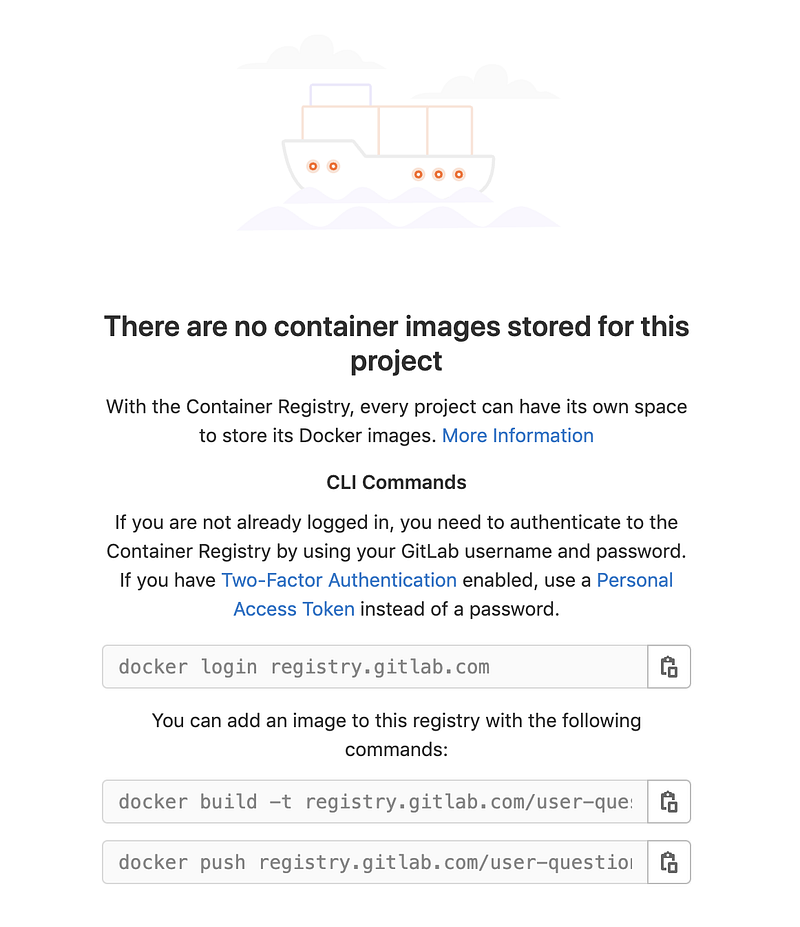
At this point, the registry will be empty as we have not pushed any images yet.
If you are using GitLab.com with a private account that is not part of an organization, this should be enabled by default. If this is not the case, you may need to ask your administrator for the necessary permissions.
Build and push a Docker image to the GitLab Container Registry
Building and pushing a Docker image requires Docker. So we need to use the Docker image but also to start the Docker daemon using Docker-in-Docker (done) as a service.
build image:
    image: docker
    services:
        - docker:dind
It is considered bad practice to use the latest version of a Docker image as this will always change and could break your pipeline. The version you are using changes all the time if you:
- don’t specify a version (e.g.
docker) - use the latest tag (e.g.
docker:latest) - use the stable tag (e.g.
docker:stable) - use a major version tag(e.g.
docker:20)
Consider the following:
- Use a specific version, like
docker:20.10.10&docker:20.10.10-dind(recommended). - Log the version with
--version(this can help you figure out which was the version that worked).
So look up a version of Docker that works for you and try using that. I will use the version 20.10.10 .
build image:
    image: docker:20.10.10
    services:
        - docker:20.10.10-dind
If you want to learn how to build pipelines in Gitlab CI, I have created an online course that starts with the basics of Gitlab CI and YAML and helps you understand the fundamentals of CI/CD. Learn more about the course.
So now that we know the size of the Docker images we are using, let’s go ahead and adapt the Dockerfile by specifying a smaller base image that uses Alpine Linux:
FROM python:3.10-alpine
RUN pip install pytest
We could build this image from out computer and push it to the GitLab Container Registry, but I prefer to use automation. So let’s define a new job in our pipeline. This can be part of the same pipeline that needs the image:
The first step is loggin in to the GitLab Container Registry using docker login. Since our plan is to use this command from a GitLab CI pipeline, we don’t need to know or generate any credentials. We can simply reference the CI_REGISTRY_USER , CI_REGISTRY_PASSWORD and CI_REGISTRY environment variables.
echo $CI_REGISTRY_PASSWORD | docker login -u $CI_REGISTRY_USER $CI_REGISTRY --password-stdindocker login prefers to get the password from the standard input, so this is why I am using the echo command to pipe it to docker login.
The next step is building and the image. I will only use the latest version, but feel free to also tag it if you wish. Again, we can keep our pipeline configuration-free by using the predefined GitLab CI variable CI_REGISTRY_IMAGE .
Heads-up! If you are unsure which value this variables have, simply use
echo $VARNAMEto inspect their value. It is better to know exactly what you are doing instead of assuming.
- docker build -t $CI_REGISTRY_IMAGE .Finally, let’s push the image:
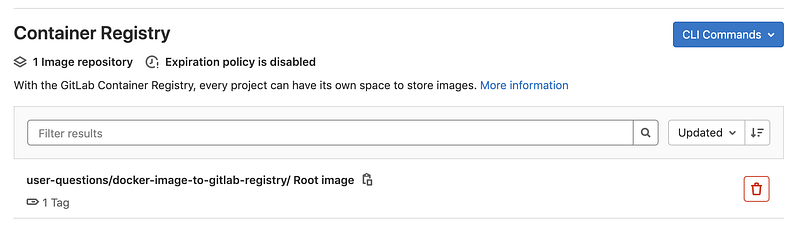
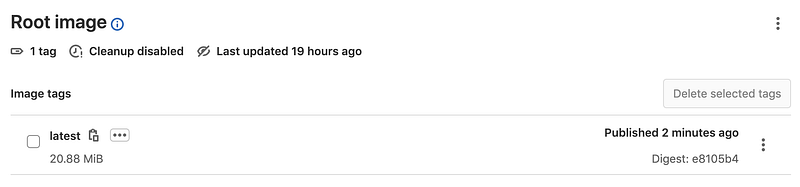
docker push $CI_REGISTRY_IMAGEIf all commands succeeded, you should shortly see the image in your GitLab Container Registry.
As I don’t wish to build this image with every commit, I will setup a pipeline schedule and define a rule that will ensure this job only runs according to the schedule I define.
build image:
    image: docker:20.10.10
    services:
        - docker:20.10.10-dind
    rules:
        - if: $CI_PIPELINE_SOURCE == "schedule"
    script:
        - echo $CI_REGISTRY_PASSWORD | docker login -u $CI_REGISTRY_USER $CI_REGISTRY --password-stdin
        - docker build -t $CI_REGISTRY_IMAGE .
        - docker push $CI_REGISTRY_IMAGE
Creating well-researched and to-the-point content requires a lot of time and energy. If this was helpful and you wish to support me, consider subscribing to Medium.
Using a Docker image from the GitLab Container Registry in a GitLab CI pipeline
This is actually easier than you think. All you need to know is the exact name of the image.
Go to your container registry and copy the full name.
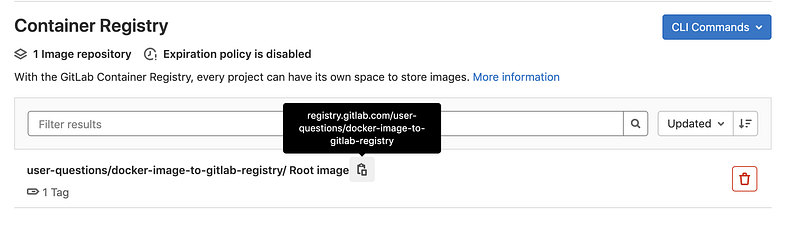
You can use the image in the same project or in other projects. A job requiring the Docker image would look like this:
run tests:
    image: registry.gitlab.com/somegroup/some-image-name
    rules:
        - if: $CI_PIPELINE_SOURCE != "schedule"
    script:
        - python --version
        - pip --version
        - pytest --version
Conclusion
I hope this tutorial helped you get started with building your own Docker images, publishing them in the GitLab Registry and using them in your pipelines. Leave a comment in the section below if you have any questions. I would love to hear from you!
Thank you for sticking with this article until the end. If you enjoyed it, please leave a comment, share, and press that 👏 a few times (up to 50 times). It will help others discover this information and maybe it will help someone else as well.
Follow me on Medium and YouTube if you’re interested in more tutorials like this one.


